
Propeller shaft - assembly (page 2 of 2)
- Make
- Land Rover
- Model
- Freelander Workshop Manual
- Year
- 1998–2000
- Section
- Repairs
Drive shaftsPropeller shaft - assembly · page 2 of 2
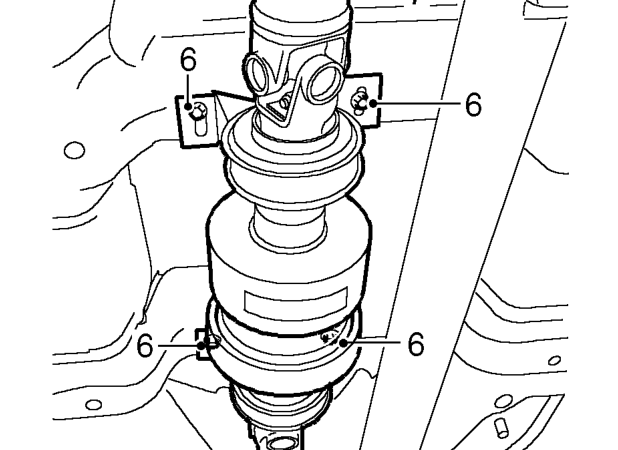
- Remove 4 bolts from viscous coupling support bearings.
- With assistance, remove complete propeller shaft assembly.
NOTE: Replace support bearings if worn or damaged.
Refit
- Clean propeller shaft flanges and mating faces.
- With assistance, fit propeller shaft in position, support front and rear propeller shafts at each end.
- Align viscous coupling support bearings, fit bolts but do not tighten at this stage.
- Position propeller shaft to rear axle and align reference marks.
- Fit and tighten nuts and bolts securing rear propeller shaft to rear axle to 65 Nm.
- Position propeller shaft to IRD flange, align flange reference marks.
- Fit and tighten nuts and bolts to 40 Nm.
CAUTION: It is important that when securing the support bearings to the body that each support bearing is positioned at a right angle to the centre shaft axis before and after tightening the retaining bolts.
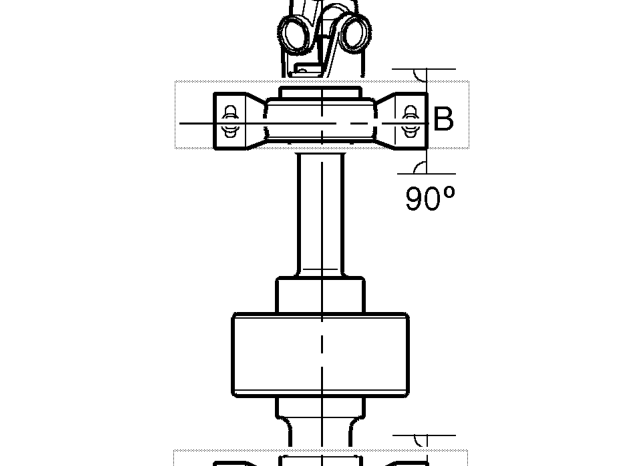
- Correctly position support bearings at 90° to the centre line as shown at points ’A’ and ’B’, tighten rear then front bolts to 28 Nm.
- Lower wheels.
- Lower vehicle.
Parts & tools for this job For 1998 Land Rover Freelander
- PARTWheel bearingSearch: Land Rover Freelander 1998 wheel bearing
- TOOLBearing puller kitSearch: wheel bearing puller kit
- PARTCV boot kitSearch: Land Rover Freelander 1998 cv boot kit
Links open Amazon search results in a new tab. As an Amazon Associate I earn from qualifying purchases.