
Deployment of pre-tensioner
- Make
- Land Rover
- Model
- Freelander Workshop Manual
- Year
- 1998–2000
- Section
- SRS precautions › Deployment of pre-tensioner
General informationDeployment of pre-tensioner · page 1 of 2
Deployment of pre-tensioner
These guidelines are written to aid authorised personnel carry out the safe disposal of the pretensioner.
WARNING:
- Only use the approved deployment equipment.
- Deploy pre-tensioner in a designated area.
- Ensure pre-tensioner is not damaged or ruptured before deploying.
- Notify relevant authorities.
- Carry out deployment tool self test.
- Slide seat fully rearwards to access pre-tensioner harness connector.
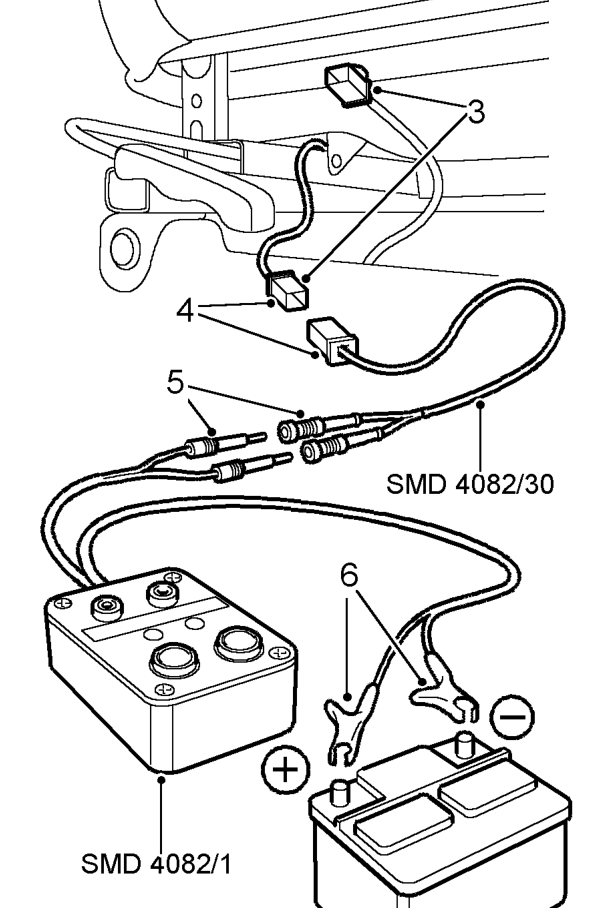
- Disconnect pre-tensioner harness connector.
WARNING: Ensure deployment tool SMD 4082/1 is not connected to battery.
- Connect flylead SMD 4082/30 to pre-tensioner connector.
- Connect flylead SMD 4082/30 to tool SMD 4082/1.
WARNING: Do not lean over pretensioner whilst connecting.
Parts & tools for this job For 1998 Land Rover Freelander
- TOOLOBD2 scanner with SRSSearch: OBD2 scanner ABS SRS
- TOOLTrim removal tool kitSearch: trim removal tool kit
Links open Amazon search results in a new tab. As an Amazon Associate I earn from qualifying purchases.