
Gearbox - ’l’ series (page 5 of 6)
- Make
- Land Rover
- Model
- Freelander Workshop Manual
- Year
- 1998–2000
- Section
- Repairs
Manual gearbox - PG1Gearbox - ’l’ series · page 5 of 6
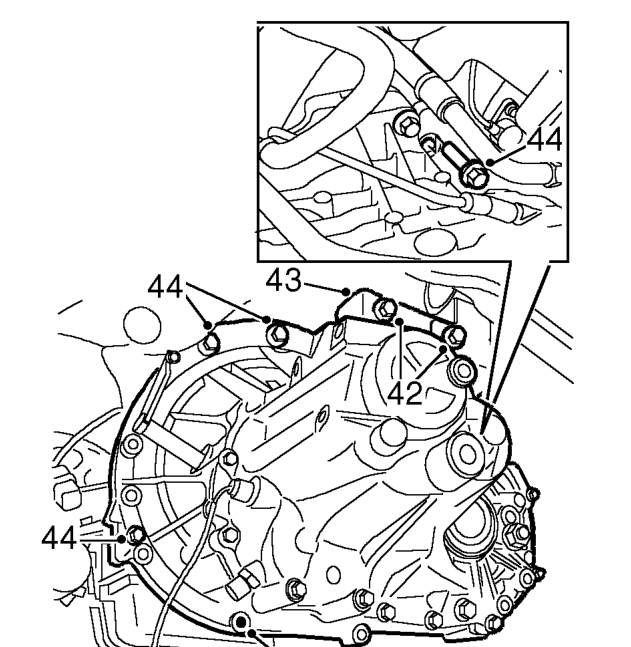
- Remove 2 bolts securing LH mounting bracket to gearbox.
- Remove gearbox mounting bracket.
- Remove 6 bolts securing gearbox to gearbox adaptor plate.
- With assistance, carefully release gearbox from engine.
- Lower gearbox to the floor and remove lifting equipment.
- Remove gearbox from under vehicle.
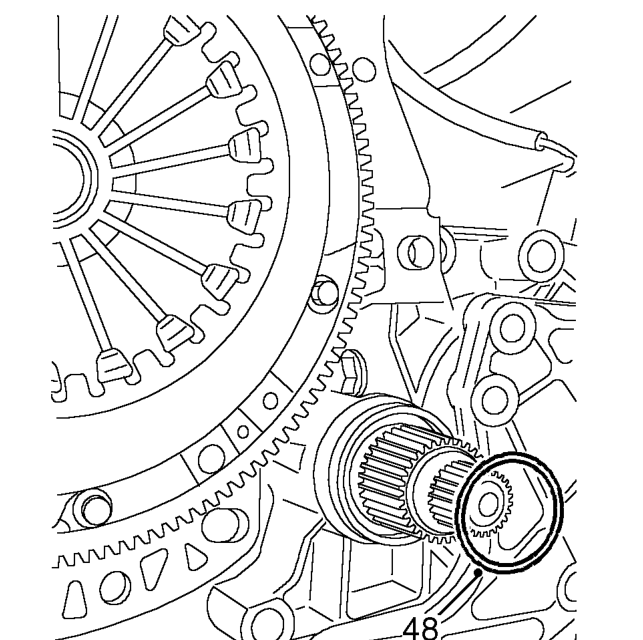
- Remove and discard IRD ’O’ ring.
Refit
- Clean mating faces of gearbox and adaptor plate..
- Clean mating faces of IRD unit and gearbox.
- Lubricate and fit NEW ’O’ ring to IRD unit.
- Inspect drive shaft seals for damage and renew if necessary.
- Lightly grease gearbox splines with molybdenum disulphide grease.
- Position gearbox under vehicle and connect lifting equipment.
- With assistance, raise gearbox, manoeuvre into position and locate on dowels.
- Fit 6 bolts securing gearbox to adaptor plate and tighten to 80 Nm.
- Align fuel and coolant pipe bracket and secure with bolt.
Parts & tools for this job For 1998 Land Rover Freelander
- PARTClutch kitSearch: Land Rover Freelander 1998 clutch kit
- TOOLClutch alignment toolSearch: clutch alignment tool
- FLUIDGear oilSearch: Land Rover Freelander manual gearbox oil
Links open Amazon search results in a new tab. As an Amazon Associate I earn from qualifying purchases.