
Slave cylinder (page 2 of 2)
- Make
- Mini
- Model
- Mini Workshop Manual
- Year
- 1996–2000
- Section
- Repairs
ClutchSlave cylinder · page 2 of 2
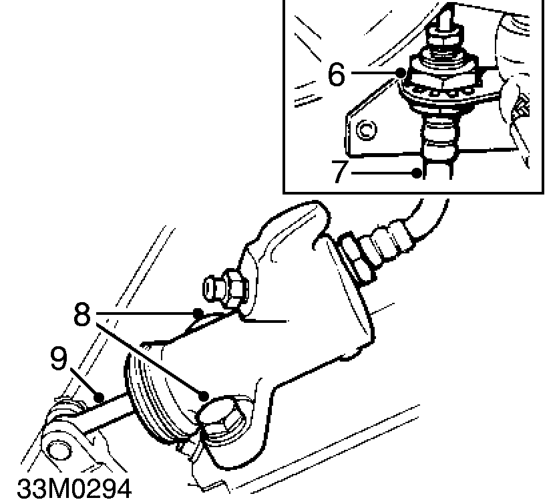
- Remove nut securing hose to bracket and remove washer.
- Release hose from bracket.
- Remove 2 bolts securing slave cylinder to mounting bracket.
- Withdraw slave cylinder from push rod and remove.
Do not carry out further dismantling if component is removed for access only.
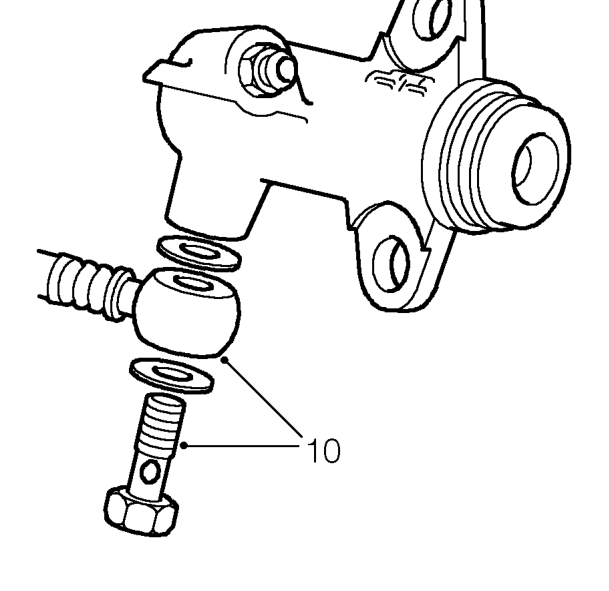
- Holding slave cylinder in a soft jawed vice, loosen union and remove hose and sealing washers from slave cylinder.
- Remove old slave cylinder from vice and replace with new.
- Ensure mating faces of cylinder and hose union are clean.
- Using new sealing washers, fit hose and tighten union.
- Remove cylinder from vice.
Refit
- Position slave cylinder to mounting bracket on flywheel housing, fit bolts and tighten to 37 Nm.
- Fit hose to bracket and secure with washer and nut.
- Clean unions on clutch pipe, master cylinder and slave cylinder.
- Fit pipe to master cylinder and slave cylinder and tighten unions to 14 Nm.
- Fit engine breather/oil separator. See EMISSION CONTROL, Repairs.
- Bleed clutch. See Adjustments.
Parts & tools for this job For 1996 Mini Mini
- PARTClutch kitSearch: Mini Mini 1996 clutch kit
- TOOLClutch alignment toolSearch: clutch alignment tool
- FLUIDGear oilSearch: Mini Mini manual gearbox oil
Links open Amazon search results in a new tab. As an Amazon Associate I earn from qualifying purchases.