
Heater valve
- Make
- Mini
- Model
- Mini Workshop Manual
- Year
- 1996–2000
- Section
- Repairs › Heater valve
Heating & ventilationHeater valve · page 1 of 2
Refit
- Fit heater control cable to switch panel and secure with nut.
- Feed the cable over the top of the heater.
- Ensure cable is routed correctly and heater valve is in the OFF position.
- Connect control cable to lever on heater valve and secure with clip.
- Check that heater valve control lever operates through its full range of travel, adjust position of outer cable if necessary.
- Fit switch panel to fascia rail and secure with nuts.
- Align heater to fascia rail and secure with screws.
- Fit heater valve to fascia support rail, fit earth lead to heater valve stud and tighten nut.
- Connect battery earth lead.
HEATER VALVE
Service repair no - 80.10.16
Remove
- Drain cooling system. See COOLING SYSTEM, Adjustments.
- Position container beneath heater to collect coolant spillage.
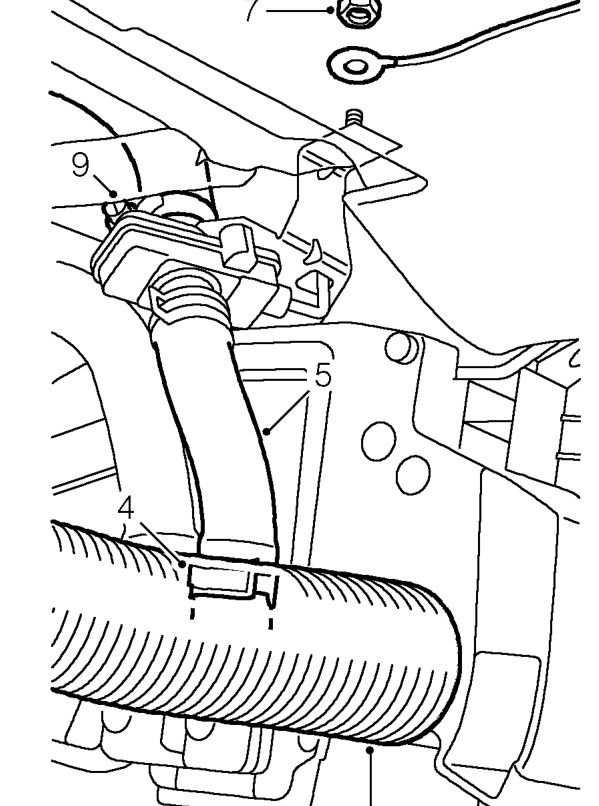
- Disconnect demister duct from heater.
- Release clip securing feed hose to heater.
- Disconnect hose from heater.
- Ensure heater valve is in the open position and allow coolant to drain.
- Remove nut securing heater valve to fascia rail.
NOTE: An earth lead is located on the heater valve stud.
Parts & tools for this job For 1996 Mini Mini
- PARTEngine gasket setSearch: Mini Mini 1996 engine gasket set
- TOOLTorque wrenchSearch: 3/8 inch torque wrench
- TOOLFeeler gauge setSearch: feeler gauge set
Links open Amazon search results in a new tab. As an Amazon Associate I earn from qualifying purchases.