
Wiper motor - windscreen (page 2 of 2)
- Make
- Rover
- Model
- 400 Workshop Manual
- Year
- 1995–2000
- Section
- Repairs
Wipers & washersWiper motor - windscreen · page 2 of 2
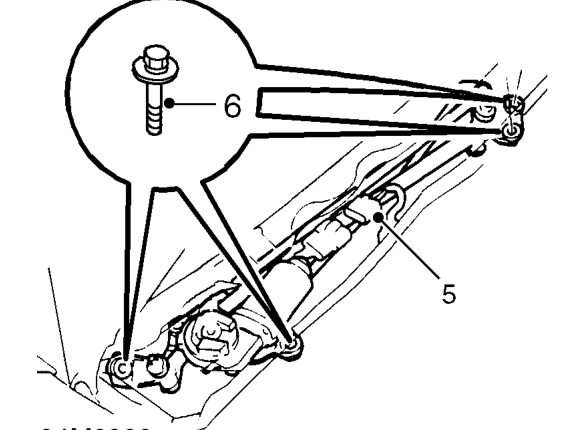
- Disconnect harness multiplug from wiper motor.
- Remove 4 bolts securing wiper motor and linkage. Remove motor and linkage.
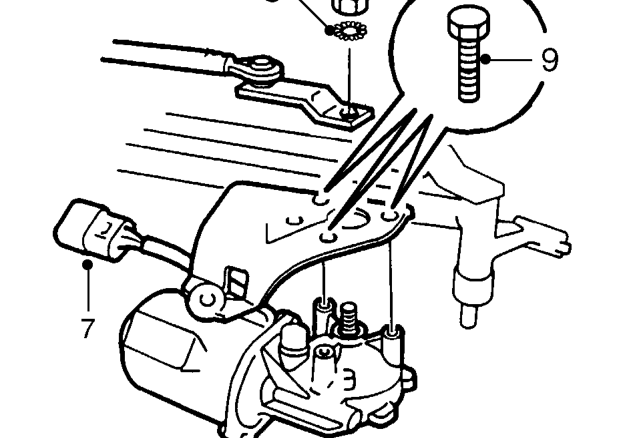
- Release multiplug from linkage.
- Remove nut and washer and release linkage from motor.
- Remove 3 bolts and remove motor from linkage.
Refit
- Fit motor to linkage. Tighten bolts to 8 Nm.
- Fit and align link to motor and fit nut.
- Secure multiplug to linkage.
- Fit motor and linkage assembly. Tighten bolts to 9 Nm.
- Connect harness multiplug to wiper motor.
- Fit plenum air intake and secure with 9 studs to lower edge and 7 studs to upper edge.
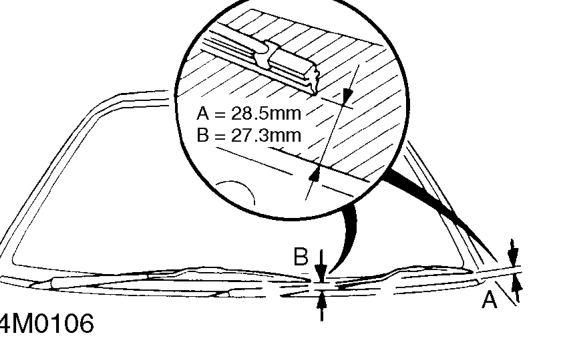
- Fit wiper arms. Set blades to, dimension ’A’ 28.5 mm and dimension ’B’ to 27.3 mm, then tighten nuts to 18 Nm.
Parts & tools for this job For 1995 Rover 400
- PARTWiper bladesSearch: Rover 400 1995 wiper blades
- PARTWasher pumpSearch: Rover 400 1995 washer pump
Links open Amazon search results in a new tab. As an Amazon Associate I earn from qualifying purchases.