
Three valve gauge
- Make
- Rover
- Model
- 600 Rover 600 Repair Manual - Volumes 1 and 2 - 2nd Edition
- Section
- Information › Three valve gauge
Heating and ventilationThree valve gauge
Note:
- Only use a gauge set for refrigerant R134a.
- use a vacuum pump adapter which is equipped with a check valve to prevent the backflow of the vacuum pump oil.
WARNING: When handling refrigerant (R134a) observe all safety precautions, see R134a general precautions.
- Close the evacuation valve (two valve gauge; evacuation stop valve)
- Open the cans
- Open the high pressure valve to charge the system to about 100kPa (1.0kg/cm², 14 psi), then close it.
Note: close the low pressure valve.
- Check the system for leaks using a leak detector suitable for refrigerant R134a.
Note: Check for leaks, particularly around the compressor, condenser and the receiver/drier
- If any leaks are found, tighten the joint nuts and bolts to the specified torque.
- Recheck the system for leaks using a leak detector.
- If leaks are found that require the system to be opened (to repair or replace hoses, fittings, etc.), release and charge in the system.
- After checking and repairing leaks, the system must be evacuated, see System Evacuation.
THREE VALVE GAUGE
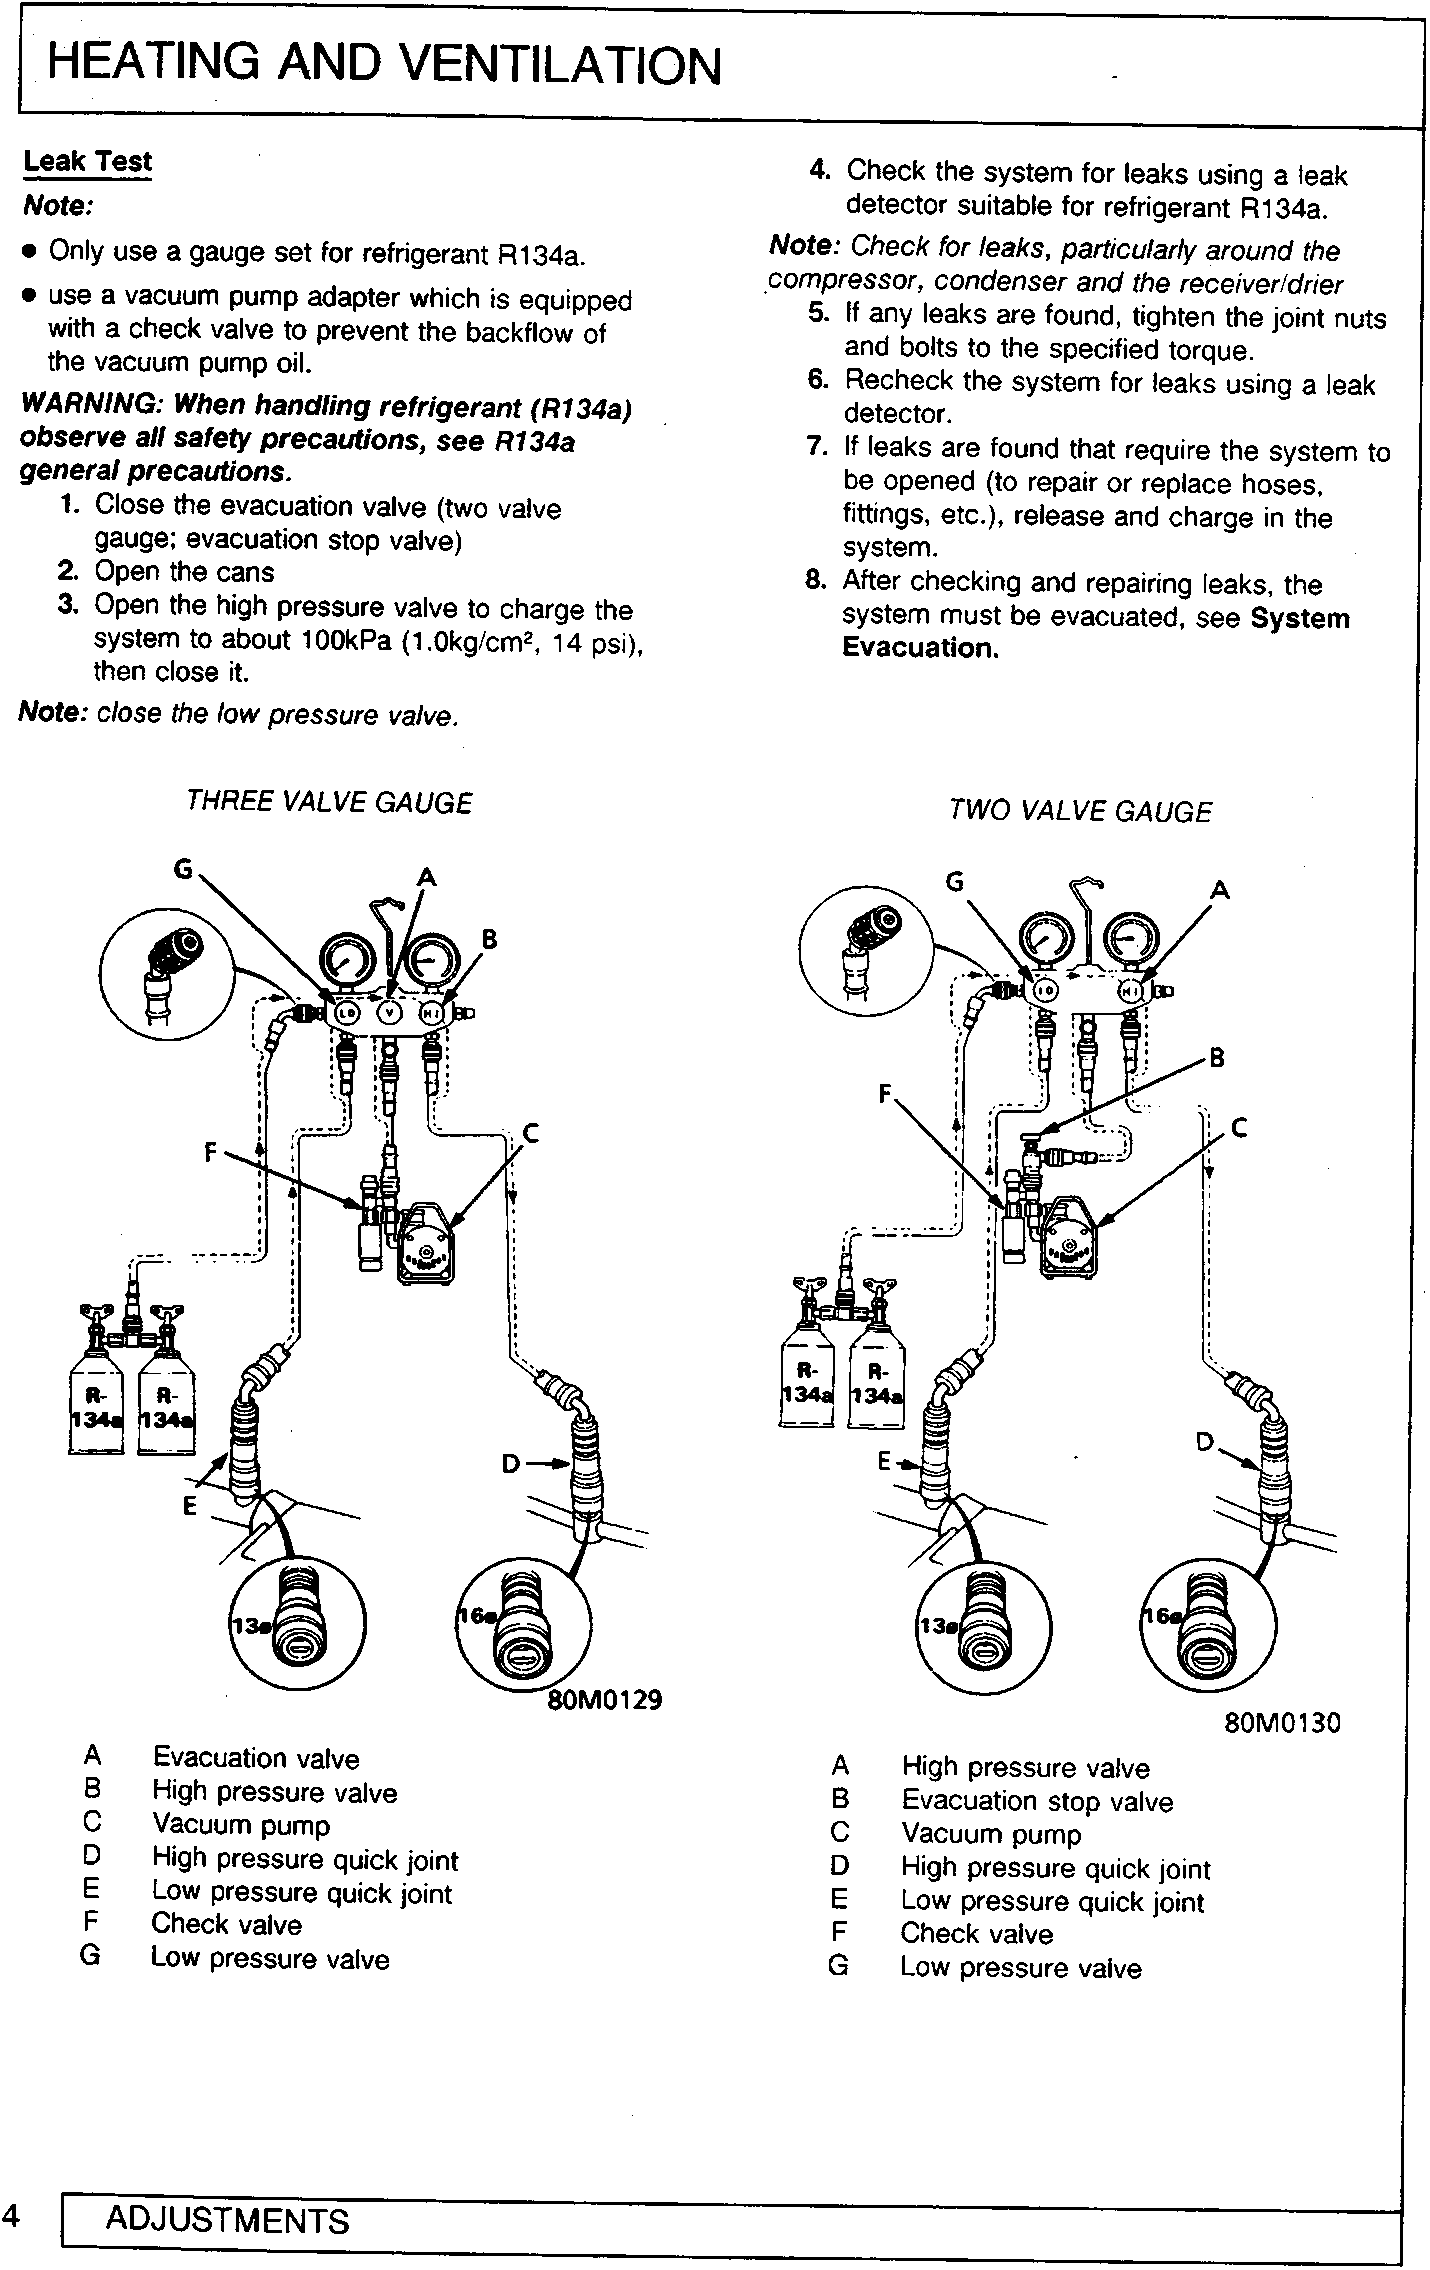
- A Evacuation valve
- B High pressure valve
- C Vacuum pump
- D High pressure quick joint
- E Low pressure quick joint
- F Check valve
- G Low pressure valve
TWO VALVE GAUGE
- A High pressure valve
- B Evacuation stop valve
- C Vacuum pump
- D High pressure quick joint
- E Low pressure quick joint
- F Check valve
- G Low pressure valve
Parts & tools for this job For Rover 600
- PARTEngine gasket setSearch: Rover 600 engine gasket set
- TOOLTorque wrenchSearch: 3/8 inch torque wrench
- TOOLFeeler gauge setSearch: feeler gauge set
Links open Amazon search results in a new tab. As an Amazon Associate I earn from qualifying purchases.