
Preparation of the removed rearscreen (page 2 of 2)
- Make
- Alfa Romeo
- Model
- GTV / Spider GTV and Spider (916) Factory Service Manual
- Year
- 1995–2000
- Section
- Hard top
70 BodyworkPreparation of the removed rearscreen · page 2 of 2
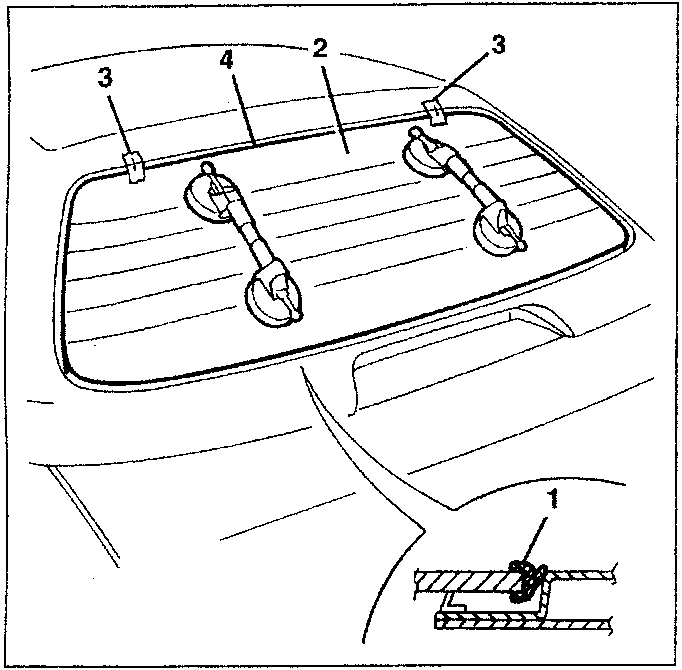
- Place the perimeter seal in position in the housing along the perimeter of the rearscreen.
- Test fit the rearscreen.
- When the rearscreen has been centered, mark the reciprocal position of the rearscreen and the housing using strips of adhesive tape.
- Cut the strips of adhesive tape and remove the rearscreen.
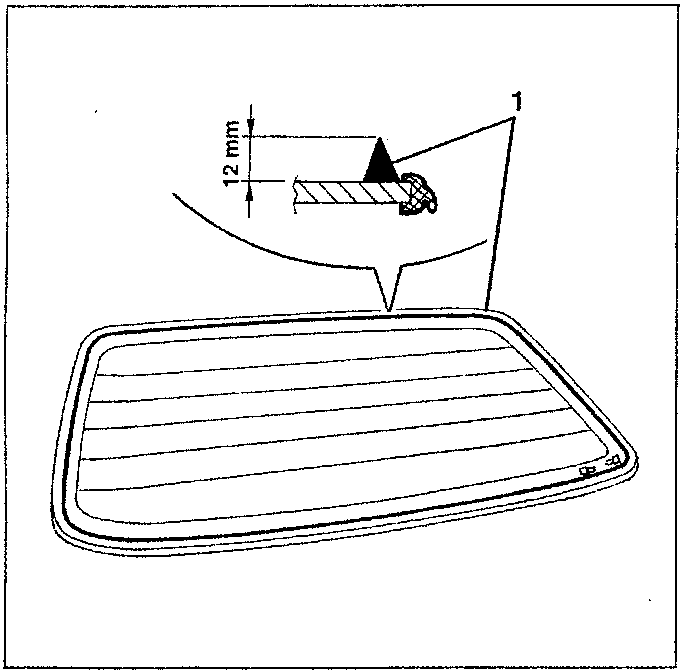
- Using a pneumatic spray gun, apply window fixing sealant, product no. 71711976, along the perimeter of the rearscreen, as evenly as possible.
NOTE: Start the operation from the centre on the lower side and proceed without interruption for the entire perimeter of the glass.
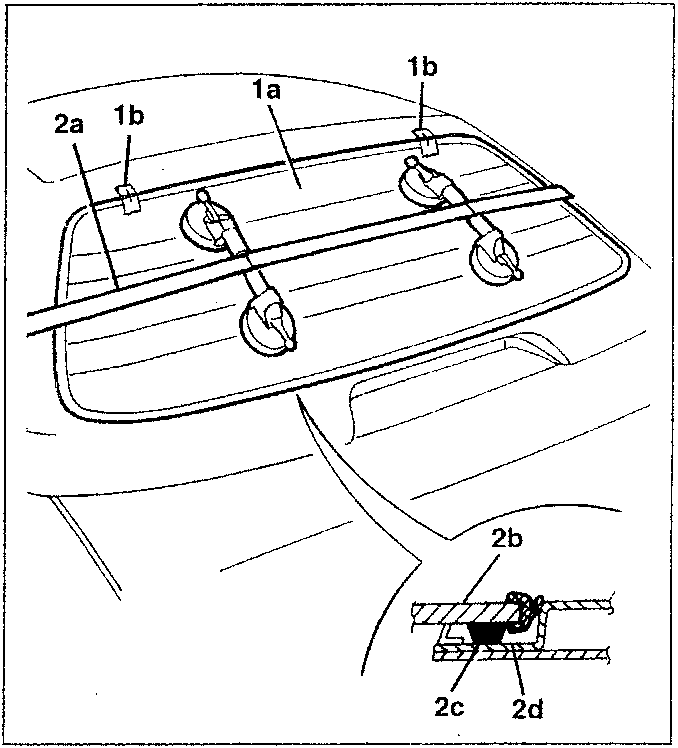
- With the assistance of a second operator, place the rearscreen (1a) in position straight after applying the sealant and correct its position using the strips of adhesive tape (1b) fitted previously as a reference.
- Position the belt (2a) as illustrated in the diagram and tension it to exert even pressure along the entire rearscreen in order to ensure the correct matching between the glass (2b), sealant (2c) and rearscreen housing (2d).
– Check that there are no penetration points by applying soapy water with a sponge along the outer perimeter and blow through from the inside using an air jet to identify any areas of penetration.
– Connect the electrical connections to the rear-screen.
WARNING: Do not move the vehicle before the time recommended by the supplier of the sealant has elapsed.
Parts & tools for this job For 1995 Alfa Romeo GTV / Spider
- TOOLTorque wrenchSearch: 3/8 inch torque wrench
- TOOLSocket setSearch: socket set metric
- BOOKHaynes manualSearch: Haynes manual Alfa Romeo GTV / Spider
Links open Amazon search results in a new tab. As an Amazon Associate I earn from qualifying purchases.