
Removal
- Make
- Aston Martin
- Model
- DB9 Factory Workshop Manual
- Year
- Issue 2, 2005
- Section
- Interior Trim › Removal
01 Body systemRemoval
Removal
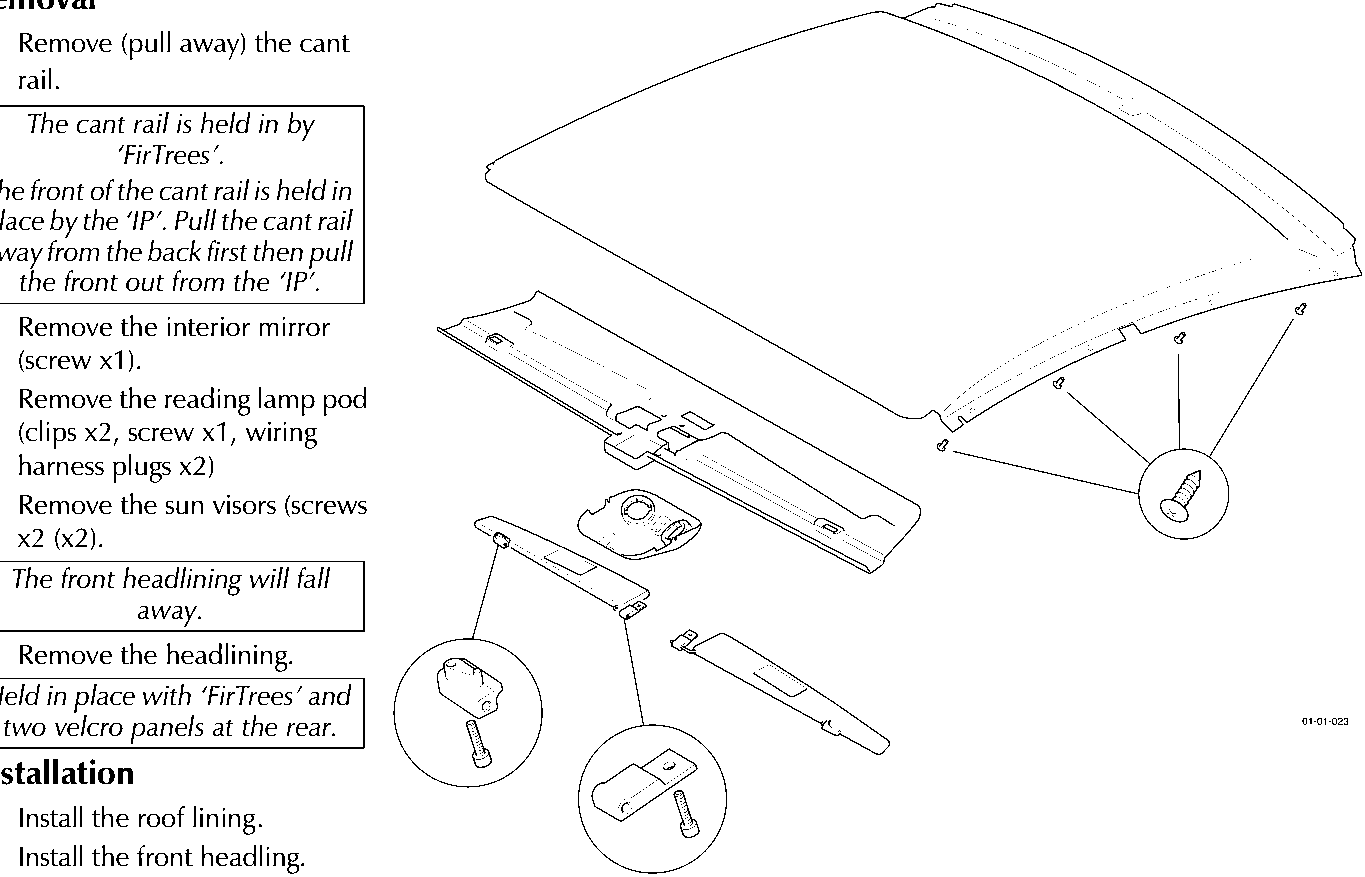
- Remove (pull away) the cant rail.
The cant rail is held in by ‘FirTrees’.
The front of the cant rail is held in place by the ‘IP’. Pull the cant rail away from the back first then pull the front out from the ‘IP’.
- Remove the interior mirror (screw x1).
- Remove the reading lamp pod (clips x2, screw x1, wiring harness plugs x2)
- Remove the sun visors (screws x2 (x2).
The front headlining will fall away.
- Remove the headlining.
Held in place with ‘FirTrees’ and two velcro panels at the rear.
Installation
- Install the roof lining.
- Install the front headling.
While holding the front headling in place install the sun visors.
- Install the interior mirror.
- Install the cant rails.
Place the front of the cant rail into location at the IP, and work towards the rear, locating the ‘FirTrees’.
Parts & tools for this job For 2005 Aston Martin DB9
- TOOLTrim removal tool kitSearch: trim removal tool kit
- PARTTouch-up paintSearch: Aston Martin touch up paint
- PARTPanel clip assortmentSearch: Aston Martin panel clips assortment
Links open Amazon search results in a new tab. As an Amazon Associate I earn from qualifying purchases.