
Rear Subframe
- Make
- Aston Martin
- Model
- DB9 Factory Workshop Manual
- Year
- Issue 2, 2005
- Section
- Subframes › Rear Subframe
- Install the steering rack bolts (x3). Torque bolts to 115 Nm.
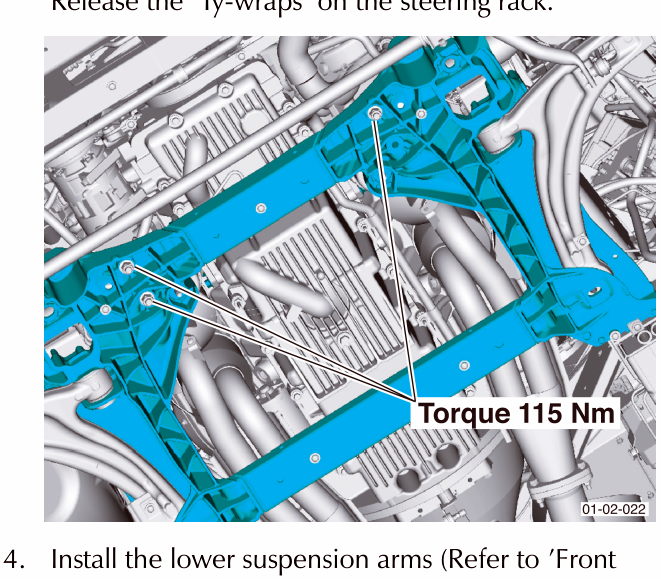
Release the ‘Ty wraps’ on the steering rack.
- Install the lower suspension arms (Refer to ‘Front Suspension (04.01)’, page 4-2-1).
The bolts that secure the lower suspension arm must be torqued only when the vehicle is at normal ride height (Refer to ‘Road Wheel Alignment (04.00)’, page 4-1-2).
- Remove the engine support service tool.
- Install the undertray.
- Install the road wheel arch liners and road wheels. (Refer to ‘Road Wheel Nut Torque Tightening’, page 4-5-7).
- Connect the vehicle battery.
- Check / Adjust the camber, Toe and Castor settings (Refer to ‘Road Wheel Alignment (04.00)’, page 4-1-2).
Rear Subframe
| Repair Operation Time (ROT) | |
|---|---|
| Item | Code |
| Rear Subframe | 02.01.CA |
Removal
Warning
If rasing vehicle on a ‘two post’ ramp (vehicle supported by underbody), ensure that the rear end of the vehicle is securely strapped to the ramp. Failure to strap the rear of vehicle down may lead to the vehicle falling off the ramp.
Caution
If using a two post vehicle lift, remove the screws that secure the rear section of the road wheel arch liner. Hold back the rear section of the road wheel arch liner to allow the foot of the vehicle lift to be positioned correctly (Refer to ‘Jacking Points’, page I-I-IX).
Disconnect the vehicle battery.
- Raise the vehicle and make safe.
- Remove the rear road wheels and road wheel arch liners.
The fuel filler drain off pipe is attached to the arch liner. Ensure that the fuel filler drain off pipe does not disconnect from it’s stub pipe.
- Front and rear undertrays
Lower the undertray to reveal the air intake for the alternator. Release the spring clip and part the flex pipe from the undertray.
- Shear plate
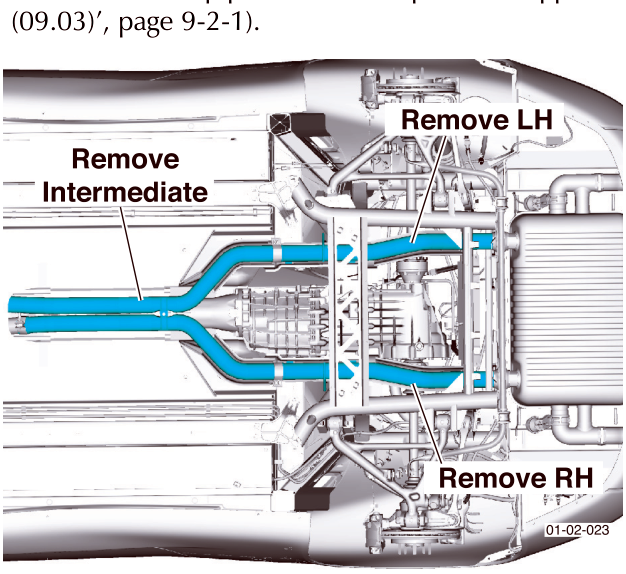
- Remove the intermediate exhaust pipe and the rear LH and RH exhaust pipes (Refer to ‘Pipes and Supports (09.03)’, page 9-2-1).
Parts & tools for this job For 2005 Aston Martin DB9
- TOOLTorque wrenchSearch: 3/8 inch torque wrench
- TOOLSocket setSearch: socket set metric
- BOOKHaynes manualSearch: Haynes manual Aston Martin DB9
Links open Amazon search results in a new tab. As an Amazon Associate I earn from qualifying purchases.