
Removal
- Make
- Aston Martin
- Model
- DB9 Factory Workshop Manual
- Year
- Issue 2, 2005
- Section
- Power Conversion › Removal
| Repair Operation Time (ROT) | |
|---|---|
| Item | Code |
| Flywheel Renew | TBA |
Removal
Warning
If rasing vehicle on a ‘two post’ ramp (vehicle supported by underbody), Ensure that the rear end of the vehicle is securely strapped to the ramp. Failure to strap the rear of vehicle down may lead to the vehicle falling off the ramp.
If using a two post vehicle lift, remove the screws that secure the rear section of the road wheel arch liner. Hold back the rear section of the road wheel arch liner to allow the foot of the vehicle lift to be positioned correctly (Refer to ‘Jacking Points’, page I-1-IX).
- Disconnect the vehicle battery.
- Raise the vehicle and make safe.
- Remove the rear road wheel(s) and road wheel arch liners.
- Remove the front and rear undertrays and the shear plate.
Lower the front undertray to reveal the air intake for the alternator. Release the spring clip and part the flex pipe from the undertray.
- Remove the rear subframe and torque tube.
- (Refer to ‘Rear Subframe’, page 2-1-4)
- (Refer to ‘Torque Tube’, page 5-1-2)
- Manual Gearbox Only.
Remove the clutch assembly (Refer to ‘Clutch (08.00)’, page 8-1-1). - Automatic Gearbox Only.
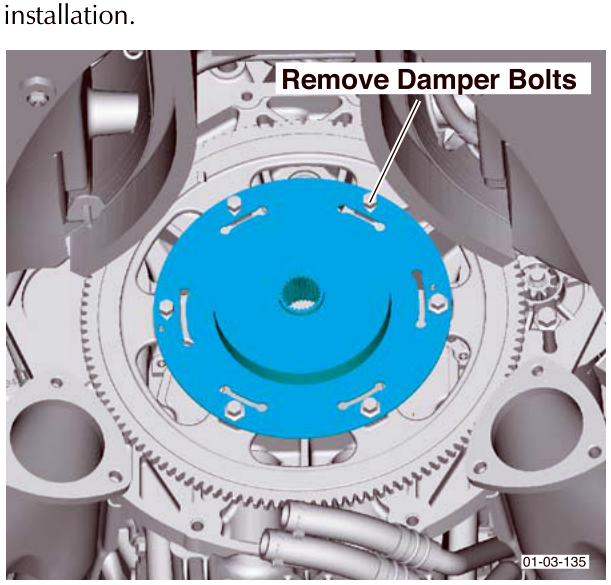
Remove the drive damper plate (bolts x8).Retain for installation.
Caution
The flywheel assembly, including the mounting bolts, is a balanced assembly. Use the same bolts when reassembling to retain balance.
- Place a support surface under the flywheel. Insert flywheel bolts (x2) into the threaded ‘jacking’ holes in the flywheel.
Warning
The flywheel is heavy. Take care to provide adequate support when removing or replacing it.
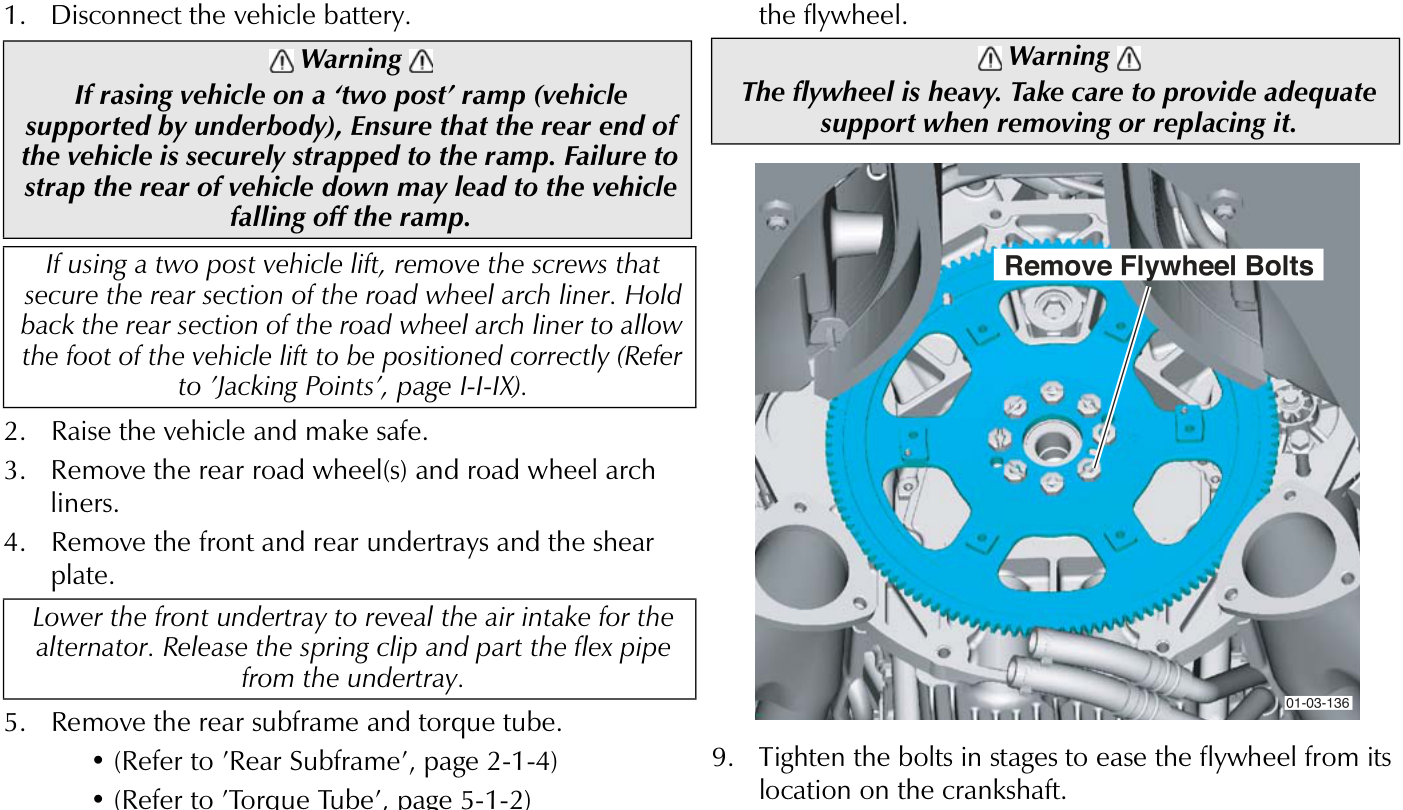
- Tighten the bolts in stages to ease the flywheel from its location on the crankshaft.
Parts & tools for this job For 2005 Aston Martin DB9
- PARTEngine gasket setSearch: Aston Martin DB9 2005 engine gasket set
- TOOLTorque wrenchSearch: 3/8 inch torque wrench
- TOOLFeeler gauge setSearch: feeler gauge set
Links open Amazon search results in a new tab. As an Amazon Associate I earn from qualifying purchases.