
Component Checks
- Make
- Aston Martin
- Model
- DB9 Factory Workshop Manual
- Year
- Issue 2, 2005
- Section
- Power Conversion › Component Checks
03 EngineComponent Checks · page 1 of 3
To withdraw the bearing caps, spread the engine block side walls using the engine block spreading tool (Refer to '303-664 (Crankshaft Rear Oil Seal Install)', page 20-1-5), tensioned to 25 Nm.
To avoid overstriking engine block walls, do not exceed 25 Nm. on engine block spreader bolt.
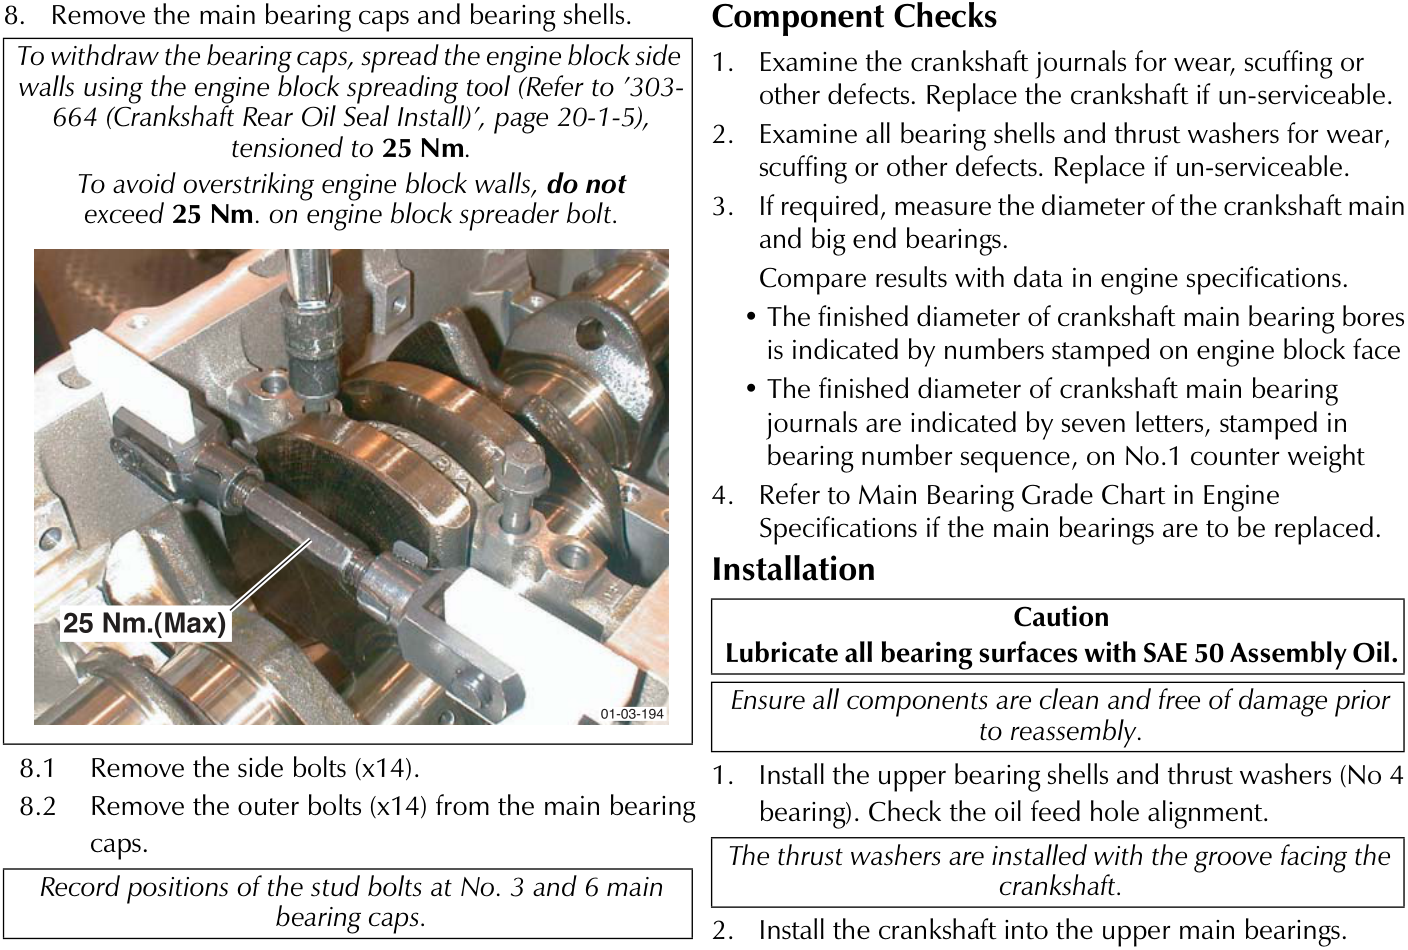
- Remove the side bolts (x14).
- Remove the outer bolts (x14) from the main bearing caps.
Record positions of the stud bolts at No. 3 and 6 main bearing caps.
- Remove the inner bolts (x14) from the main bearing caps.
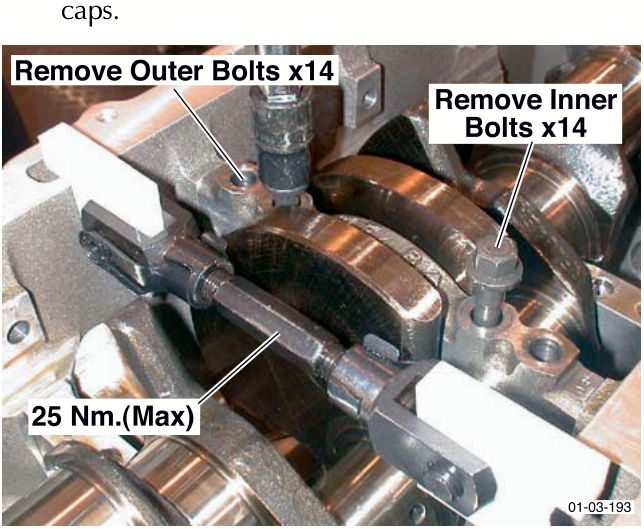
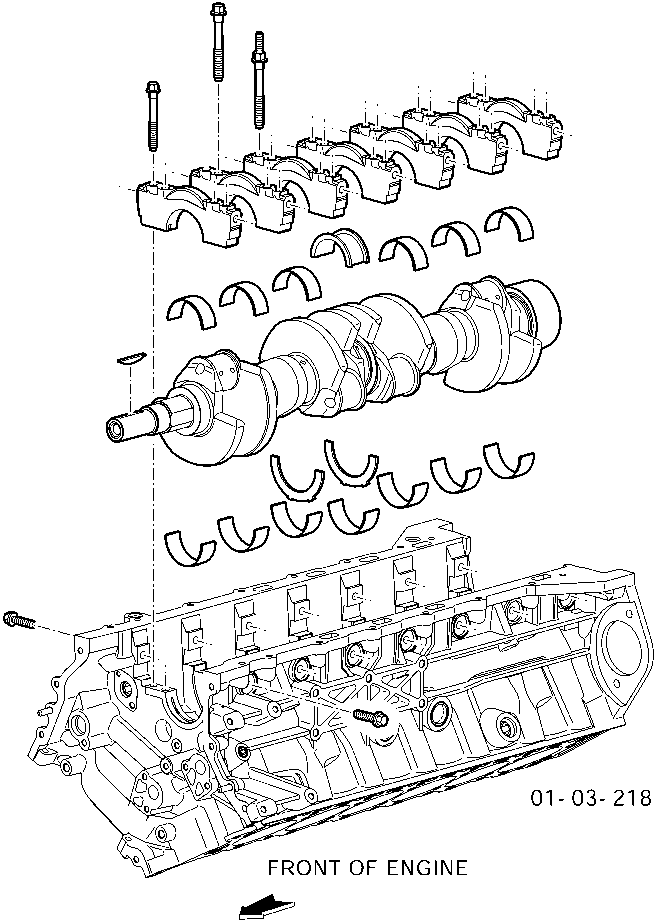
Retain all components in order for installation to their original locations, if serviceable.
- Remove the crankshaft from the engine.
- Remove the thrust washers from No. 4 main bearing.
- Remove the upper bearing shells from all the main bearings.
If serviceable, retain all bearings, in order, for refitting to their original locations.
Component Checks
- Examine the crankshaft journals for wear, scuffing or other defects. Replace the crankshaft if un-serviceable.
- Examine all bearing shells and thrust washers for wear, scuffing or other defects. Replace if un-serviceable.
- If required, measure the diameter of the crankshaft main and big end bearings.
Compare results with data in engine specifications.- The finished diameter of crankshaft main bearing bores is indicated by numbers stamped on engine block face
- The finished diameter of crankshaft main bearing journals are indicated by seven letters, stamped in bearing number sequence, on No.1 counter weight
- Refer to Main Bearing Grade Chart in Engine Specifications if the main bearings are to be replaced.
Installation
| Caution |
|---|
| Lubricate all bearing surfaces with SAE 50 Assembly Oil. |
| Ensure all components are clean and free of damage prior to reassembly. |
- Install the upper bearing shells and thrust washers (No 4 bearing). Check the oil feed hole alignment.
The thrust washers are installed with the groove facing the crankshaft.
- Install the crankshaft into the upper main bearings.
Parts & tools for this job For 2005 Aston Martin DB9
- PARTEngine gasket setSearch: Aston Martin DB9 2005 engine gasket set
- TOOLTorque wrenchSearch: 3/8 inch torque wrench
- TOOLFeeler gauge setSearch: feeler gauge set
Links open Amazon search results in a new tab. As an Amazon Associate I earn from qualifying purchases.