
Removal
- Make
- Aston Martin
- Model
- V8 Vantage Factory Workshop Manual
- Year
- 2005–2010
- Section
- Manual Transmission › Removal
07 TransmissionRemoval
| Repair Operation Time (ROT) | |
|---|---|
| Item | Code |
| Dry Break Connector-Renew | 07.03.AJ |
Removal
- Disconnect vehicle battery.
- Raise vehicle on ramp and secure with straps.
- Remove road wheel(s).
- Remove rear exhaust silencer assembly (see Workshop Manual procedure 09.00.KA Muffler & Bypass Valve Assembly - Remove for Access & Refit).
- Remove centre undertray (see Workshop Manual procedure 01.02.MB Undertray - Centre - Renew).
- Remove bolts (x4), subframe cross brace.
- Remove centre exhaust mounting bolts (x4) (see Figure 1).
ALWAYS DISCONNECT THE BATTERY EARTH (- VE) TERMINAL FIRST.
WHEN YOU LIFT THE VEHICLE ON A 'TWO POST' LIFT MAKE SURE THAT YOU USE A STRAP TO HOLD THE REAR END OF THE VEHICLE TO THE RAMP. IF YOU DO NOT, THE VEHICLE CAN FALL OFF THE RAMP AND CAUSE PERSONAL INJURY OR DEATH.
- Loosen clamp nuts (x2), release centre pipe from both catalysts.
- Remove centre pipe and rear exhaust pipes as an assembly.
- Remove bolts/washers (x4), tunnel heatshield to body, remove heatshield.
- Remove bolts (x8), shear plate to body, remove shear plate.
- Remove bolt securing earth lead to transaxle.
- Mark drive shaft to differential flanges for assembly purposes.
- Remove and discard Allen bolts (x12), collect plates (x6), drive shaft flanges to transaxle.
- Position drain container to collect oil spillage.
- Loosen unions and disconnect oil cooler pipes (x2) from transaxle interconnecting pipes and plug pipe connections (x4).
OBSERVE ALL OIL/FLUID MANUFACTURERS SAFETY INSTRUCTIONS WHEN HANDLING COMPONENTS THAT HAVE BEEN IN CONTACT WITH TRANSAXLE OIL.
Plug oil cooler connections to prevent ingress of dirt or moisture into the system.
- Remove drain container.
- Disconnect transaxle breather pipe.
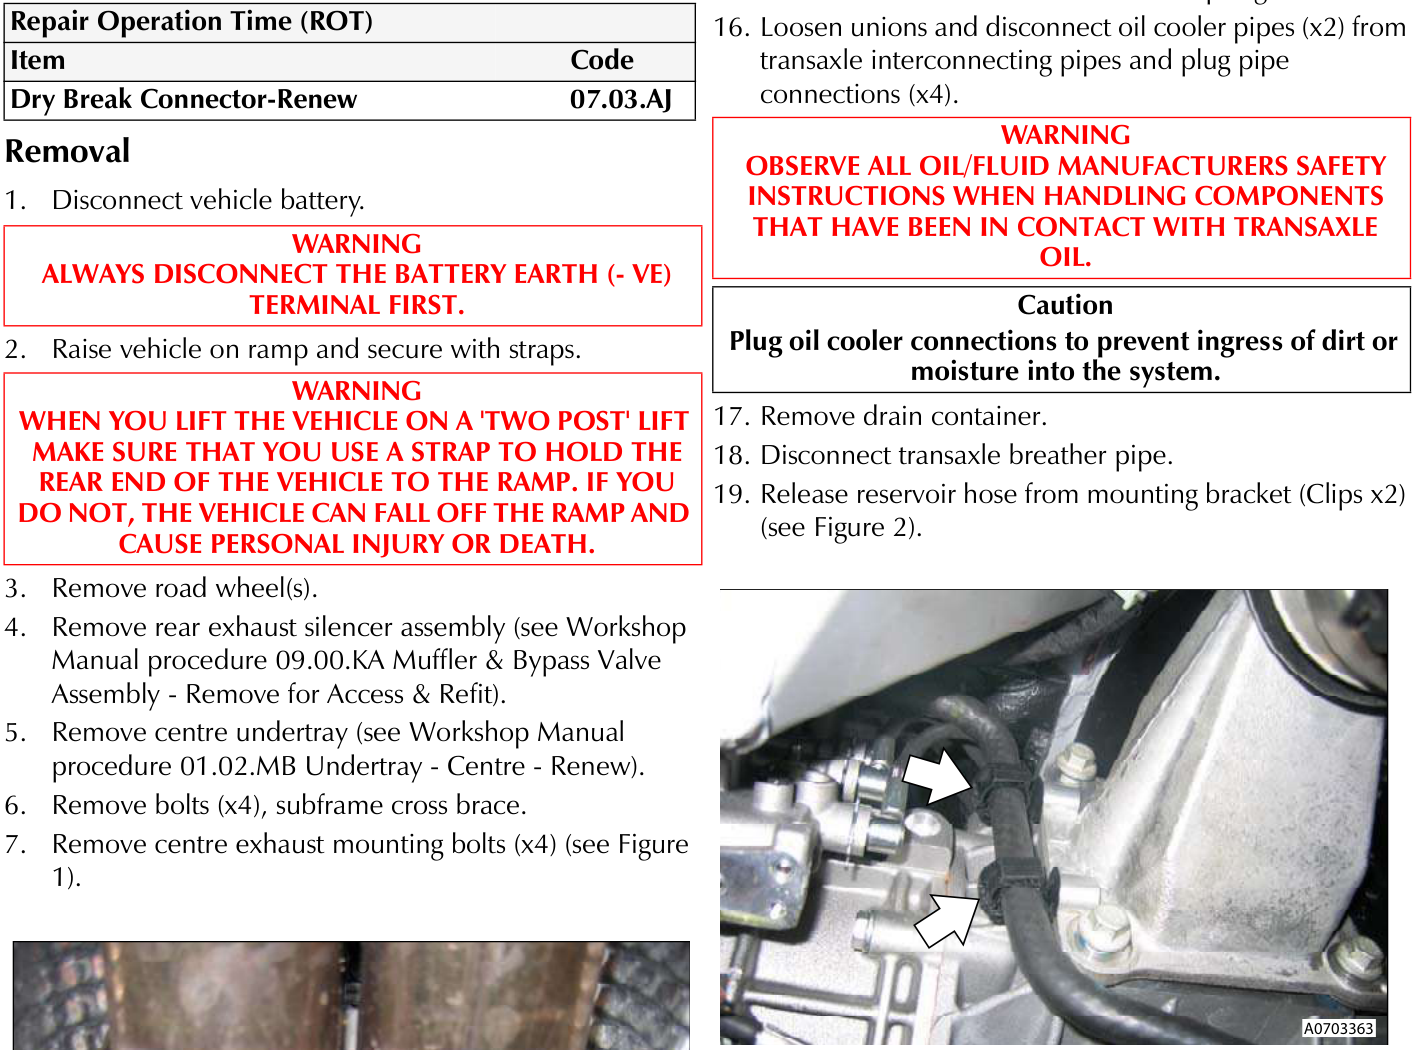
- Release reservoir hose from mounting bracket (Clips x2) (see Figure 2).
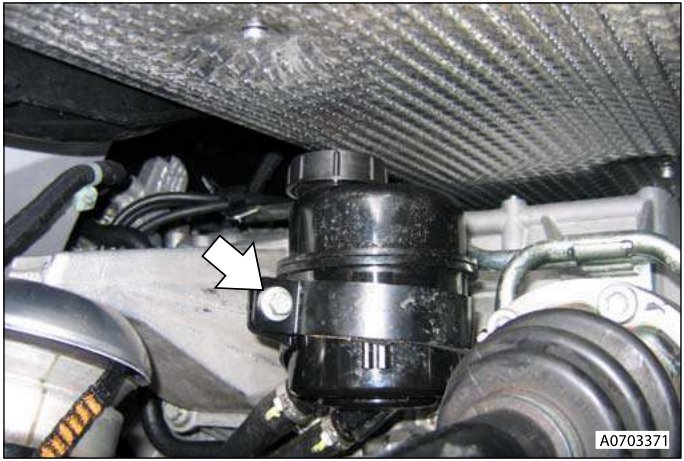
- Remove bolt from reservoir bracket, release and remove clamp, tie reservoir aside (see Figure 3).
- Remove nuts (x2), hydramounts to subframe mountings.
- Position hydraulic lifter to support transaxle.
Parts & tools for this job For 2005 Aston Martin V8 Vantage
- PARTClutch kitSearch: Aston Martin V8 Vantage 2005 clutch kit
- TOOLClutch alignment toolSearch: clutch alignment tool
- FLUIDGear oilSearch: Aston Martin V8 Vantage manual gearbox oil
Links open Amazon search results in a new tab. As an Amazon Associate I earn from qualifying purchases.