
Setting timing to "0" (page 4 of 4)
- Make
- Fiat
- Model
- Bravo /Brava (182) Factory Service Manual
- Year
- 1995–2001
- Section
- Replacing timing belt (1581 16v)
10 EngineSetting timing to "0" · page 4 of 4
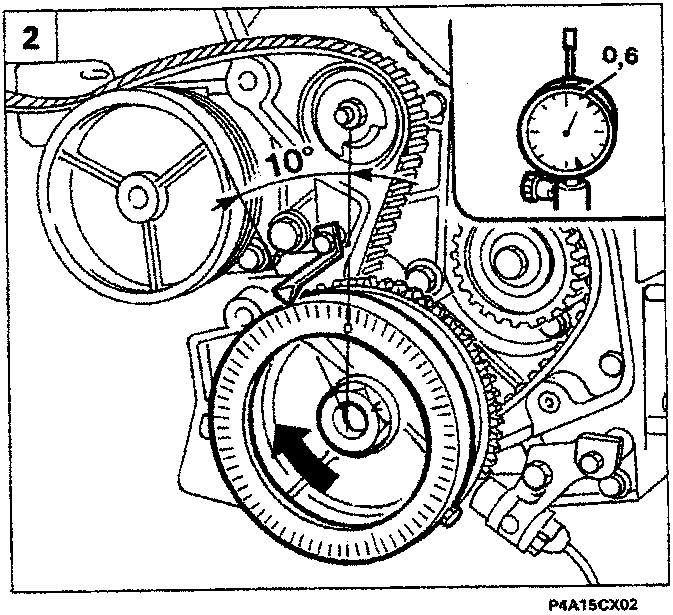
- Fit support base of graduated disc 1860896000 onto auxiliary component drive pulley and secure to pulley using a screw. Then fit graduated disc onto its support base so that "0" on disc is aligned with the fixed pointer positioned previously.
- Turn the crankshaft through about 10° in its normal direction of rotation by applying a wrench to the auxiliary component drive pulley retaining nut. Measure piston axial displacement off gauge (e.g. 0.6 mm).
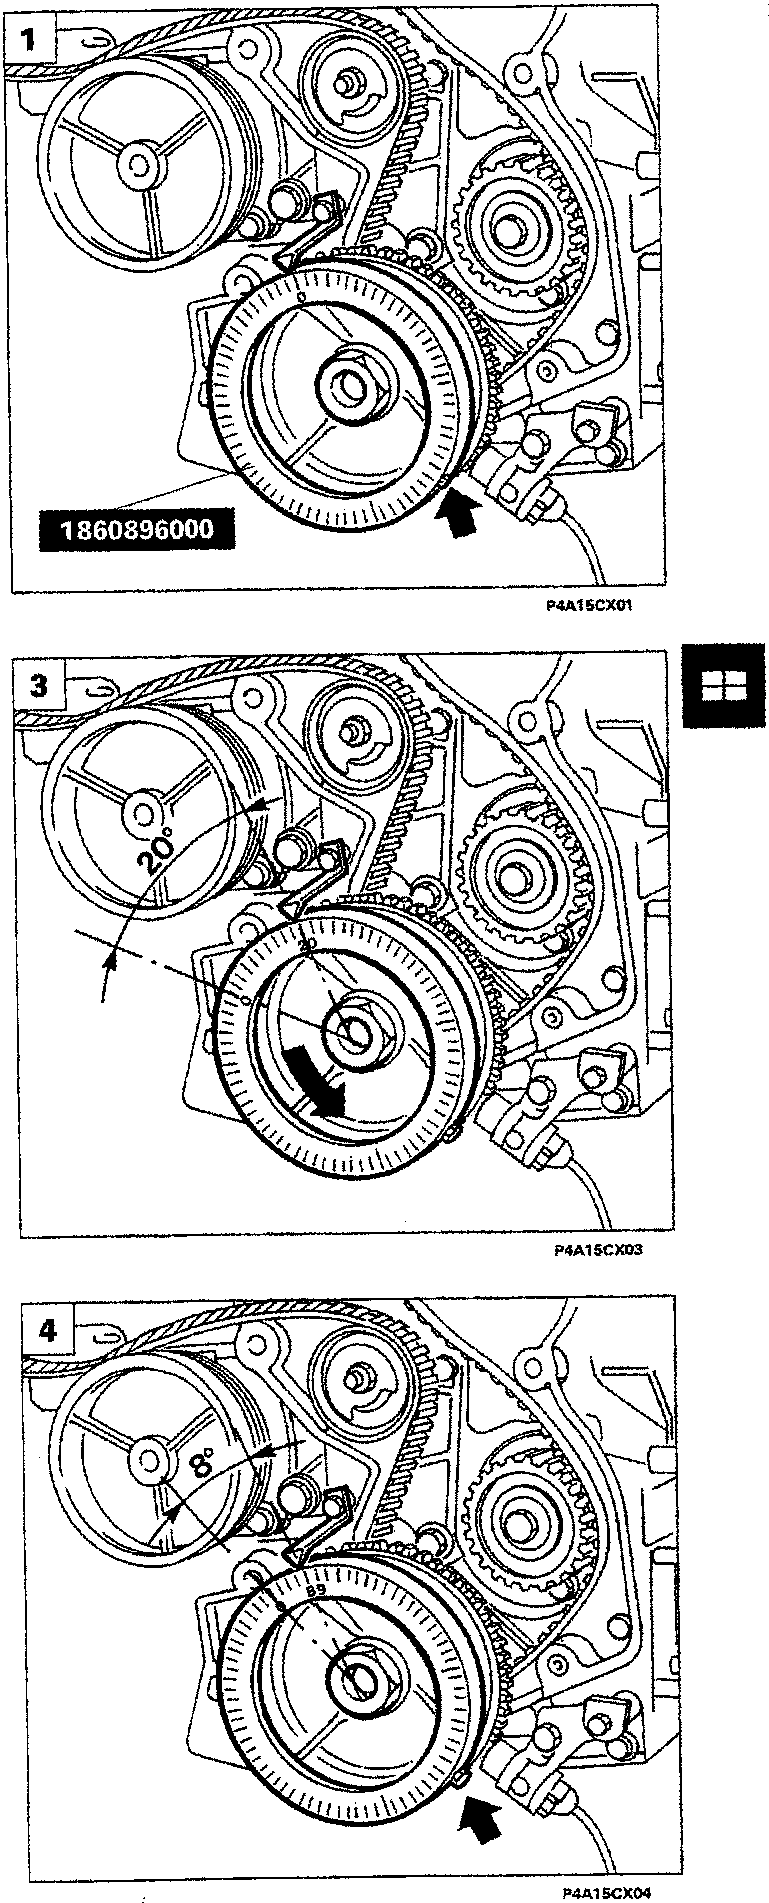
- Turn the crankshaft against its direction of normal rotation by about 20° in relation to the fixed pointer. Turn crankshaft back through its normal direction of rotation until gauge shows the same axial displacement measured previously (e.g. 0.6 mm).
- Read angular value corresponding to previous axial displacement (e.g. 8°) off the graduated disc. Take the arithmetic mean of the crankshaft angle set at the beginning of the procedure (10°) and the current value (8°). Then release the graduated disc from its base, locate at setting obtained by taking the arithmetic mean (e.g. 9° = mean of 10° and 8°) in relation to the fixed pointer without turning the crankshaft. Then tighten graduated disc again.
Parts & tools for this job For 1995 Fiat Bravo
- PARTTiming belt kitSearch: Fiat Bravo 1995 timing belt kit
- TOOLEngine timing tool setSearch: Fiat engine timing tool set
- TOOLTorque wrenchSearch: 3/8 inch torque wrench
Links open Amazon search results in a new tab. As an Amazon Associate I earn from qualifying purchases.