
Detail showning compressor on vehicle
- Make
- Fiat
- Model
- Bravo /Brava (182) Factory Service Manual
- Year
- 1995–2001
- Section
- Compressor › Detail showning compressor on vehicle
50 Auxiliary unitsDetail showning compressor on vehicle
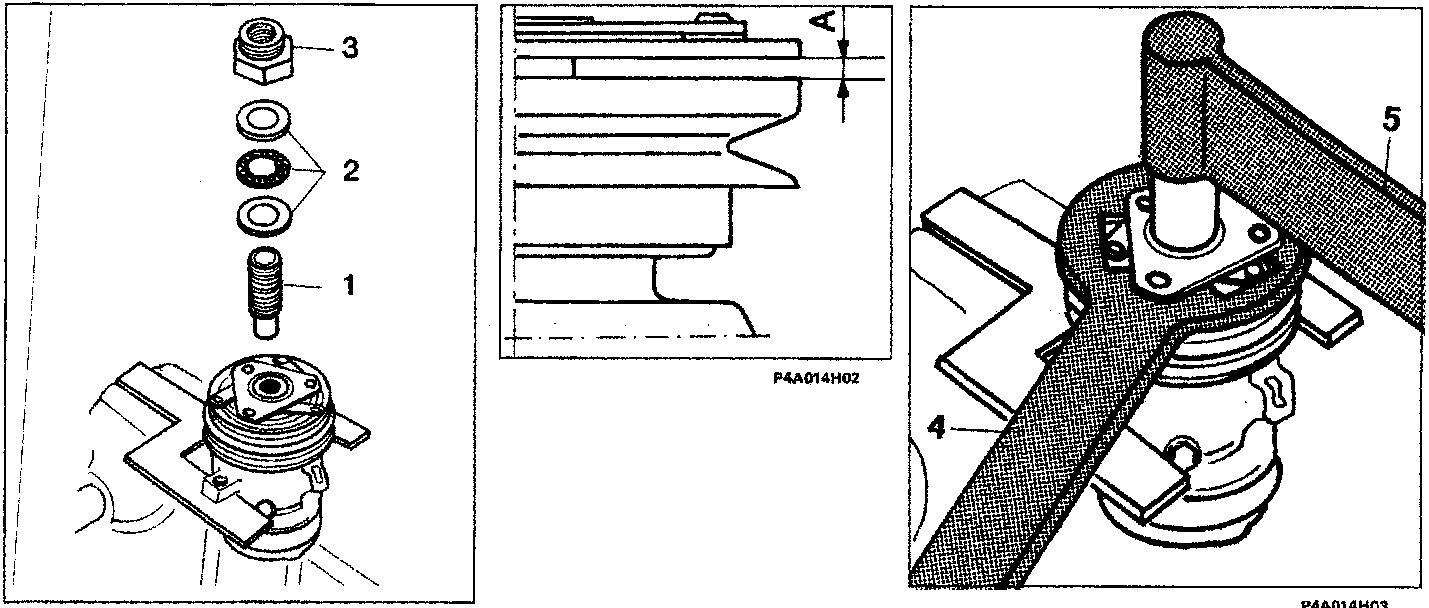
NOTE Before carrying out the operations described on these two pages, ensure that clutch plate and pulley assembly friction surfaces are perfectly clean.
After carrying out the last operations described above on this page, turn compressor pulley by hand to ensure that it does not rub against the clutch plate.
- Apply parts (1-2-3) making up tool 1877508000 to compressor shaft and clutch plate as shown in figure (5) on the previous page. Tighten part (1) into compressor shaft and fit to this the three rings (2) (which form a ball bearing). Lastly, tighten nut (3) in place, noting that outer thread should face upward. Tighten nut until lower clutch plate surface and upper pulley assembly surface are separated by a gap (A) of 0.38 - 0.64 mm, which may be measured by means of feeler gauge 1895113000.
- Lastly, use tool 1877507000 (4) to hold clutch plate steady while clutch plate hub retaining nut is tightened to a torque of 11 - 12 Nm using torque wrench (5).
Detail showning compressor on vehicle
- Compressor control valve
- High pressure vent valve
- Sealing rings on inlet and outlet ports
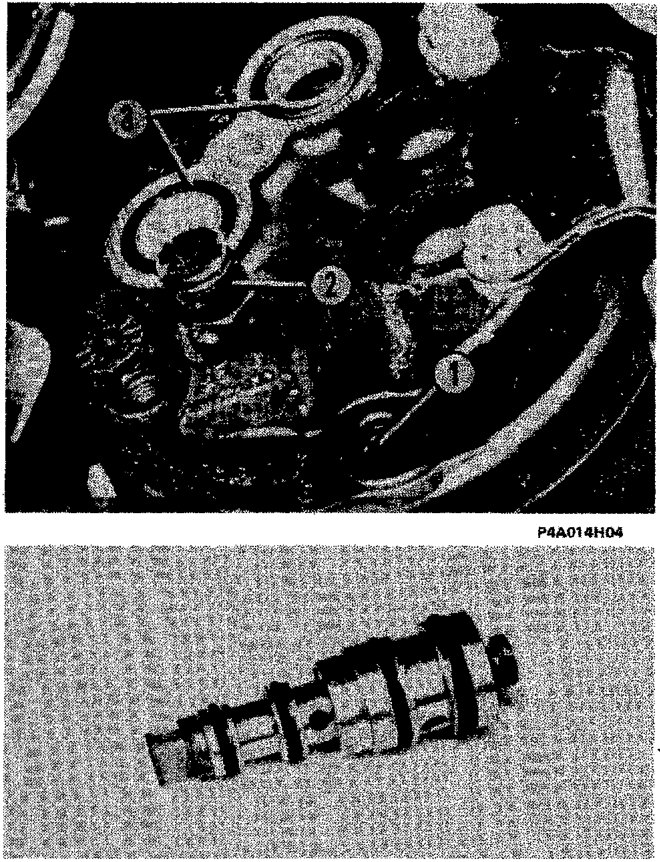
The compressor control valve is the only part which may be replaced without removing the compressor from the vehicle. Simply drain the system, remove the valve retaining ring using round-nosed pliers and remove from compressor.
Before fitting a new valve (shown in the figure alongside) lubricate the sealing rings using antifreeze.
Parts & tools for this job For 1995 Fiat Bravo
- TOOLTorque wrenchSearch: 3/8 inch torque wrench
- TOOLSocket setSearch: socket set metric
- BOOKHaynes manualSearch: Haynes manual Fiat Bravo
Links open Amazon search results in a new tab. As an Amazon Associate I earn from qualifying purchases.