
Reassembly
- Make
- Fiat
- Model
- Seicento Factory Service Manual
- Year
- 1998–2010
- Section
- Interior trim and upholstery › Reassembly
70 BodyworkReassembly
(Op. 7040A10 continued)
- Remove instrument panel trimming from car fixing points, extract it and rest it on a suitable bearing plane.
To replace trimming of instrument panel it is necessary to disconnect it from the cables and to position it, as suitable, so as to make the operation easier.
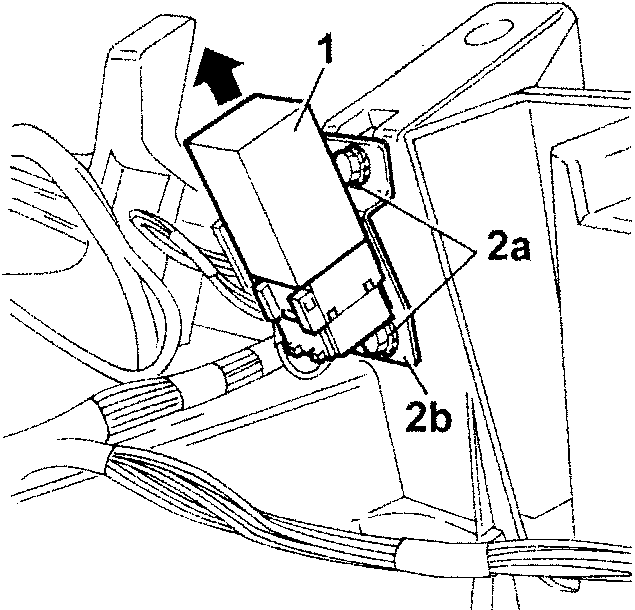
- Take off door locking control unit.
- Loosen fixing screws(2a) of supporting bracket (2b).
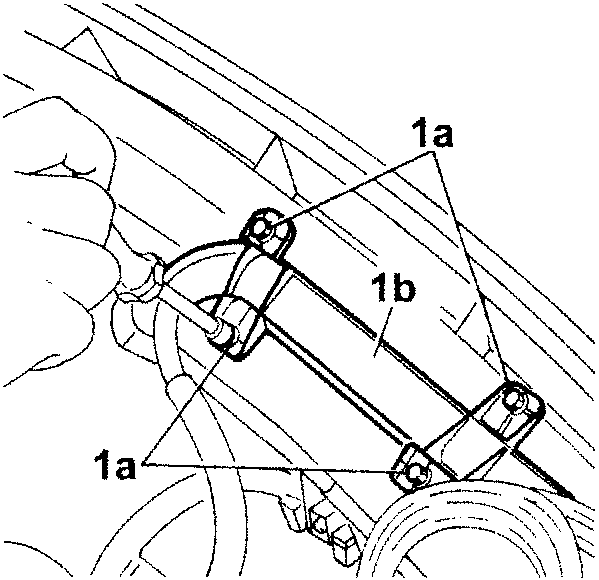
- Unscrew the four screws (1a) of the bracket (1b)fixing the electric wiring to instrument panel trimming .
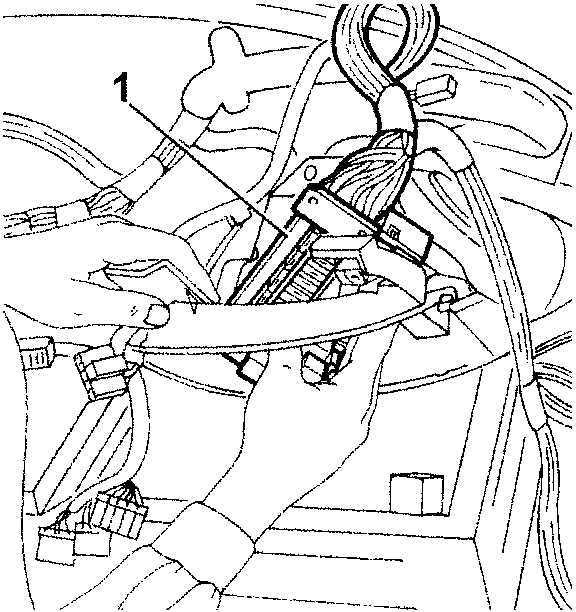
- Release wiring from different retainers and from clamps located on intrument panel trimming.
- To separate completely the instrument panel trimming from electrical wiring, extract fuse carrier from rear part of the relevant seat.
Reassembly
- Rest instrument panel trimming on a suitable support plane near left door.
- Position electrical wiring on instrument panel trimming and fasten it with relevant clamps and plastic fasteners.
- Reassemble fuse carrier, screw the three screws fixing it to instrument panel trimming.
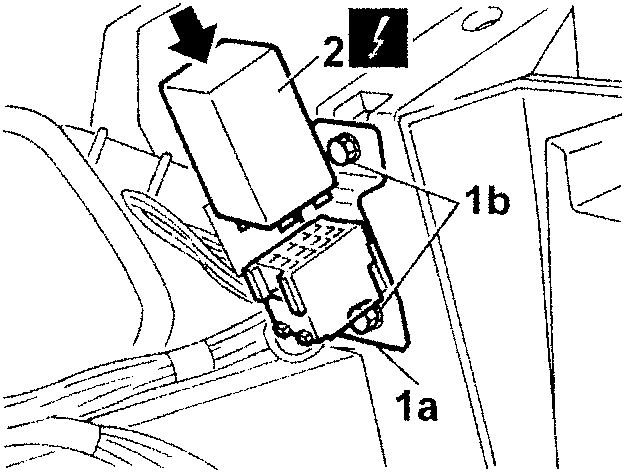
- Position supporting bracket(1a) of door locking control unit and screw fixing screws (1b).
- Install door locking control unit.
| Description | Connector | |
|---|---|---|
| 2 | Door locking control unit | M80 |
(Cont..)
Parts & tools for this job For 1998 Fiat Seicento
- TOOLTrim removal tool kitSearch: trim removal tool kit
- PARTTouch-up paintSearch: Fiat touch up paint
- PARTPanel clip assortmentSearch: Fiat panel clips assortment
Links open Amazon search results in a new tab. As an Amazon Associate I earn from qualifying purchases.