
Reassembly
- Make
- Fiat
- Model
- Seicento Factory Service Manual
- Year
- 1998–2010
- Section
- Interior trim and upholstery › Reassembly
70 BodyworkReassembly
(Op.7040A26 continued)
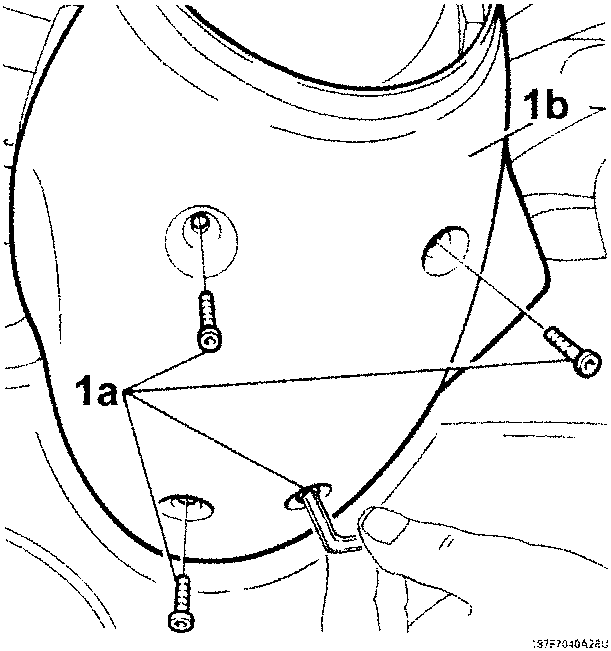
- Unscrew four fixing screws (1a) of lower trim (1b)and remove it.
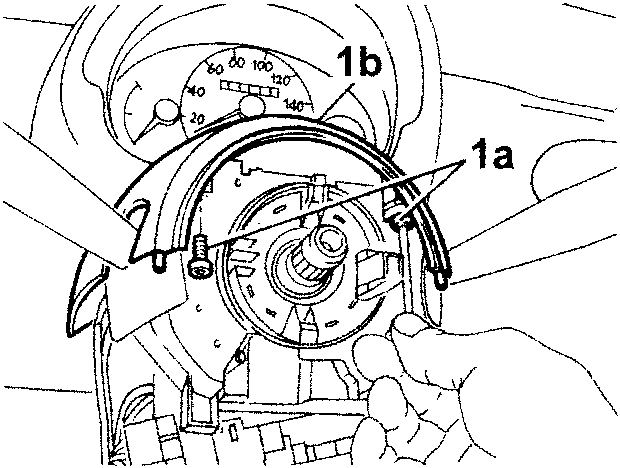
- Unscrew two fixing screws (1a) of upper trim (1b) and remove it.
Reassembly
- Assemble steering column upper trim and screw the two fixing screws.
- Assemble steering column lower trim and screw the four fixing screws.
- Reconnect the electrical connection of warning horn.
- Complete with Op. 5580C12 - SPRING CABLE FOR AIR BAG SYSTEM- R.R.
- Complete with Op. 4110A11 - MODULE FOR AIR BAG - R.R.
- Complete with Op. 5580C18 - STEERING COLUMN TRIM - R.R.
7040A37 -FUSE COVER ON INSTRUMENT PANEL - R.R.
Removal
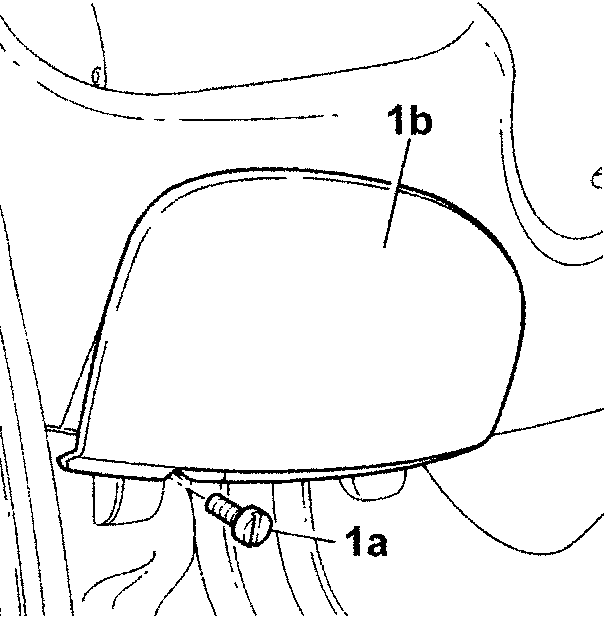
- Loosen fixing screw (1a) of fuse cover (1b) and remove it.
Reassembly
- Position cover in respective seats of instrument panel trimming and screw fixing screw.
7040A39 -LOUDSPEAKER GRILLE (ONE), LH OR RH, ON INSTRUMENT PANEL - R.R.
Refer to Op. 5570T90 - FRONT LOUDSPEAKER (ONE), LH OR RH - R.R.
Parts & tools for this job For 1998 Fiat Seicento
- TOOLTrim removal tool kitSearch: trim removal tool kit
- PARTTouch-up paintSearch: Fiat touch up paint
- PARTPanel clip assortmentSearch: Fiat panel clips assortment
Links open Amazon search results in a new tab. As an Amazon Associate I earn from qualifying purchases.