
Expansion tank viscous coupling (page 2 of 2)
- Make
- Land Rover
- Model
- Defender 90 Workshop Manual (NAS)
- Section
- Repair
Cooling systemExpansion tank viscous coupling · page 2 of 2
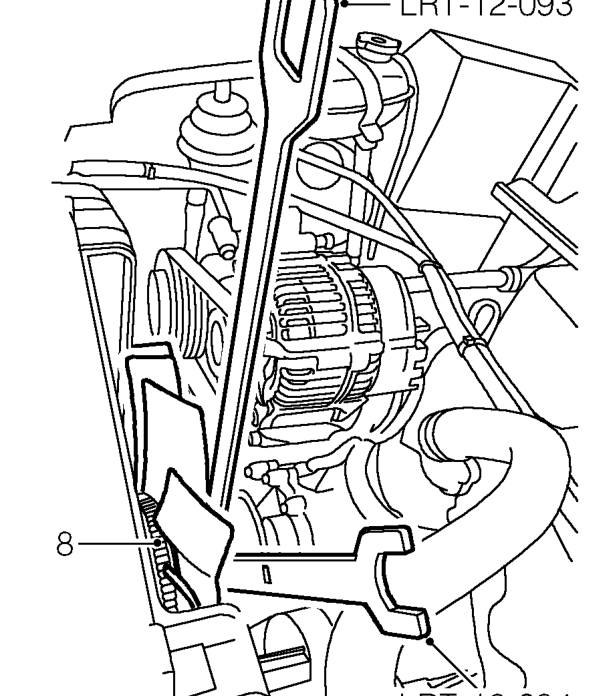
- Position tool LRT-12-093 to hold coolant pump pulley.
- Loosen viscous coupling nut using tool LRT-12-094. 10. Remove fan blades from coupling.
- Remove tool LRT-12-093.
- Remove viscous coupling assembly. Refit
Do not carry out further dismantling if component 11. Clean mating faces of fan blades and coupling. is removed for access only. 12. Fit fan blades to coupling and secure with Allen
- Position coupling assembly and start tightening
- Position tool
- Tighten viscous coupling assembly nut using
- Remove tools.
- Fit fan upper cowl and secure with clips.
- Align fan cowl fixings to upper mounting brackets
- Reconnect battery negative lead.
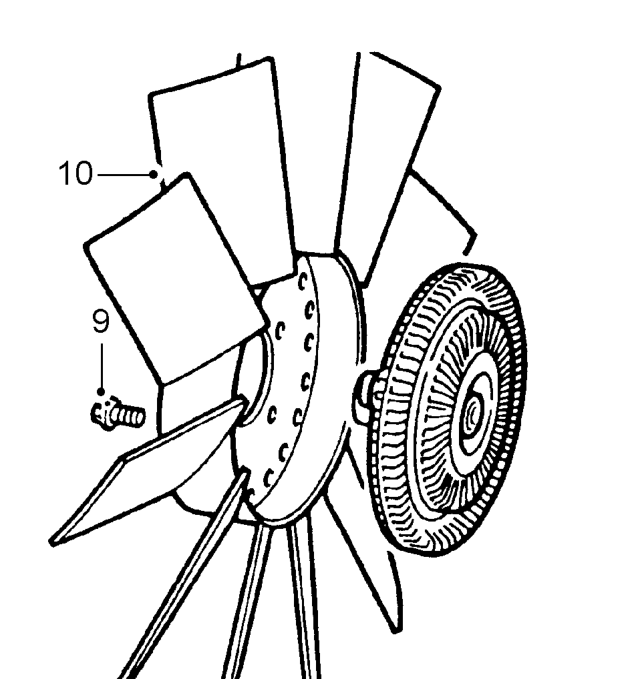
- Remove 4 Allen screws securing fan blades to coupling.
screws.
nut. LRT-12-093 to hold pulley.
tool LRT-12-094.
and secure with screws.
Parts & tools for this job For Land Rover Defender
- FLUIDCoolantSearch: Land Rover coolant antifreeze
- PARTThermostatSearch: Land Rover Defender thermostat
- TOOLCooling system pressure testerSearch: cooling system pressure tester
Links open Amazon search results in a new tab. As an Amazon Associate I earn from qualifying purchases.