
NOTE: Position ground lead to mounting bolt.
- Make
- Land Rover
- Model
- Defender 90 Workshop Manual (NAS)
- Section
- Repair › NOTE: Position ground lead to mounting bolt.
- Remove 2 clips securing harness to transfer box.
- Position a jack to support main gearbox.
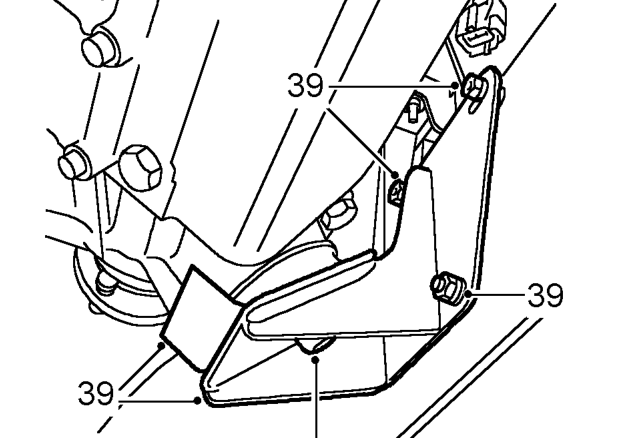
- Remove nut and 4 bolts securing transfer box to
- Fit 3 guide studs, LRT-41-009, through transfer
- Lower hoist and withdraw transfer box from main
- Remove transfer box.
Refit
- Ensure joint faces of transfer box and main
- Remove nut securing transfer gearbox RH mounting to mounting rubber.
- Lubricate oil seal in joint face of transfer box.
- Remove 3 nuts and bolts securing transfer
- Secure transfer box to adaptor plate on lifting
gearbox mounting bracket to chassis. Remove transfer box RH mounting bracket and collect rubber mounting heat shield.
- Remove guide studs, and secure transfer box to
- Lower transmission sufficiently to gain access to harness connectors and transfer box breather pipe connection.
- Connect muliplugs/connectors to transfer box.
- Position breather pipe to transfer box, fit new
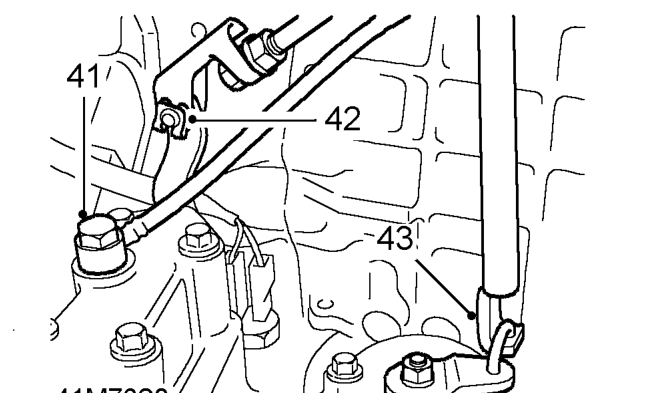
- Fit link to differential lock lever and pivot arm and
- Connect high/low lever to operating rod and
- Raise hoist and remove jack supporting main
- Position RH mounting rubber heat shield and
- Align RH mounting bracket to chassis and
- Tighten nut securing RH mounting.
- Remove banjo bolt from transfer box breather 63. Align LH mounting bracket to chassis and pipe and collect 2 sealing washers. Discard sealing washers.
- Remove retaining clip and disconnect high/low lever from operating rod.
- Remove 2 clips at lower end of pivot arm and disconnect differential lock lever link.
- Disconnect the following multiplugs/connectors from transfer box: Speed transducer Parking solenoid Neutral detection switch Differential lock Temperature sensor switch
CAUTION: Use a block of wood or hard rubber pad to protect gearbox.
main gearbox extension case.
box bolt holes to support it during removal.
gearbox.
gearbox are clean and guide studs, LRT-41-009, are fitted to extension case.
hoist and raise hoist until transfer box can be located over guide studs.
main gearbox extension case. Tighten fixings to 45 Nm, 33 lbf/ft.
sealing washers and tighten banjo bolt to 15 Nm, 11 lbf ft.
secure with retaining clips.
secure with retaining clip.
gearbox.
mounting bracket and secure loosely with retaining nut.
secure with nuts and bolts.
secure with nuts and bolts.
NOTE: Position ground lead to mounting bolt.
Parts & tools for this job For Land Rover Defender
- TOOLTorque wrenchSearch: 3/8 inch torque wrench
- TOOLSocket setSearch: socket set metric
- BOOKHaynes manualSearch: Haynes manual Land Rover Defender
Links open Amazon search results in a new tab. As an Amazon Associate I earn from qualifying purchases.