
Compressor - ’k’ series
- Make
- Land Rover
- Model
- Freelander Workshop Manual
- Year
- 1998–2000
- Section
- Repairs › Compressor - ’k’ series
Air conditioningCompressor - ’k’ series
COMPRESSOR - ’K’ SERIES
Service repair no - 82.10.20
Remove
- Disconnect battery earth lead.
- Recover refrigerant from A/C system. See Adjustments.
- Remove alternator. See ELECTRICAL, Repairs.
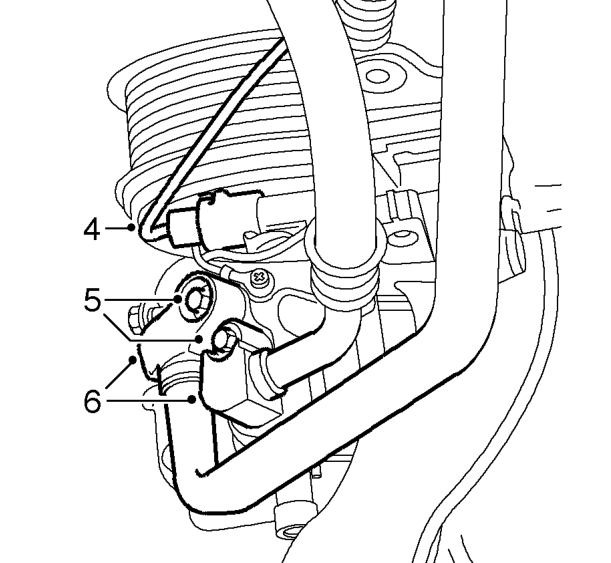
- Disconnect multiplug from A/C compressor.
- Remove 2 bolts securing A/C pipe unions to compressor.
- Release A/C pipe unions from compressor.
- Remove and discard 2 ’O’ rings from compressor.
CAUTION: Immediately cap all air conditioning pipes to prevent ingress of dirt and moisture into the system.
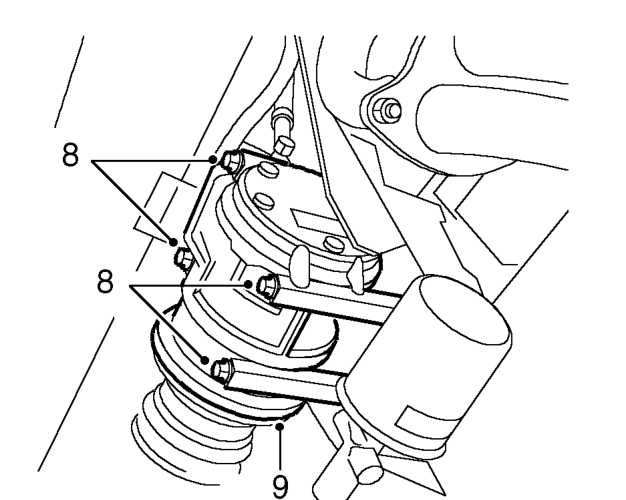
- Remove 4 through bolts securing compressor to engine.
- Manoeuvre compressor from mounting bracket, remove compressor from beneath vehicle.
Fitting a new compressor
A new compressor is sealed and pressurised with Nitrogen gas, slowly release the sealing cap, gas pressure should be heard to release as the seal is broken.
NOTE: A new compressor should always have it’s sealing cap in place and must not be removed until immediately prior to fitting.
A new compressor is supplied with an oil fill quantity33 (Xcm ) of 150 ± 20 cm . A calculated quantity of oil must be drained from a new compressor before fitting.
To calculate the quantity to be drained:
- Remove the drain plug from the old compressor.
- Invert compressor and gravity drain the oil into a calibrated measuring cylinder. Rotating the compressor clutch plate will assist complete draining.3
- Note the quantity of oil drained (Ycm )
Parts & tools for this job For 1998 Land Rover Freelander
- TOOLA/C manifold gauge setSearch: AC manifold gauge set
- TOOLUV leak detection kitSearch: AC UV leak detection kit
- PARTCabin filterSearch: Land Rover Freelander 1998 cabin filter
Links open Amazon search results in a new tab. As an Amazon Associate I earn from qualifying purchases.