
Distributor cap and rotor arm
- Make
- Land Rover
- Model
- Freelander Workshop Manual
- Year
- 1998–2000
- Section
- Repairs › Distributor cap and rotor arm
Engine management system - MEMSDistributor cap and rotor arm
DISTRIBUTOR CAP AND ROTOR ARM
Service repair no - 18.20.23
Remove
- Remove air cleaner assembly. See this section.
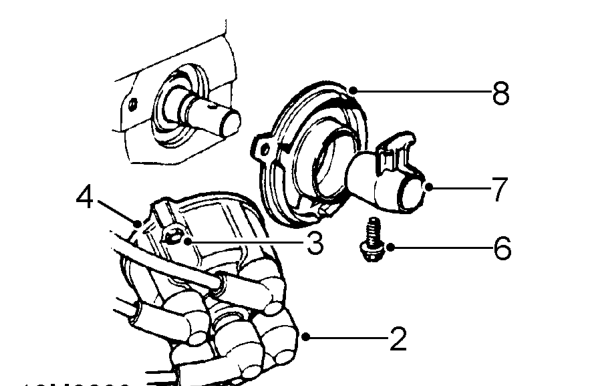
- Noting their fitted positions, disconnect 5 h.t. leads from distributor cap.
- Loosen 2 screws securing distributor cap to engine.
- Remove distributor cap.
- Rotate engine to gain access to rotor arm screw.
- Remove screw securing rotor arm to camshaft.
- Remove rotor arm.
- Remove distributor flash shield.
Refit
- Clean distributor cap, rotor arm and flash shield.
- Examine distributor cap and rotor arm for signs of damage or tracking; renew if necessary.
- Fit flash shield.
- Clean rotor arm screw thread in camshaft with thread tap.
- Position rotor arm on camshaft.
- Fit NEW patchlock screw to secure rotor arm to camshaft and tighten to 8 Nm.
- Fit distributor cap and align holes in cap and flash shield with those in engine.
- Fit 2 screws securing distributor cap to engine.
- Connect h.t. leads to distributor cap.
- Fit air cleaner assembly. See this section.
COIL - IGNITION
Service repair no - 18.20.44
Remove
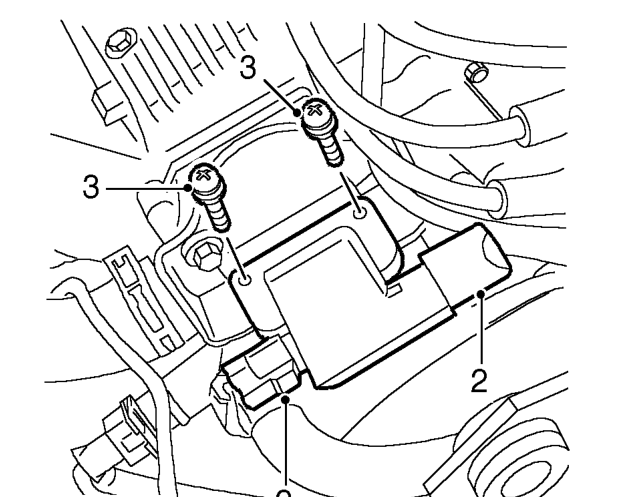
- Disconnect battery earth lead.
- Disconnect multiplug and h.t. lead from coil.
- Remove 2 screws and remove coil from mounting bracket.
Refit
- Position coil to mounting bracket and tighten screws to 9 Nm.
- Connect multiplug and h.t. lead.
- Connect battery earth lead.
Parts & tools for this job For 1998 Land Rover Freelander
- PARTBrake padsSearch: Land Rover Freelander 1998 brake pads
- TOOLCaliper piston rewind toolSearch: brake caliper piston rewind tool
- FLUIDBrake fluidSearch: brake fluid
Links open Amazon search results in a new tab. As an Amazon Associate I earn from qualifying purchases.