
All models
- Make
- Land Rover
- Model
- Freelander Body Repair Manual
- Year
- 1998 on
- Section
- Repairs › All models
Restraint systemsAll models
All models
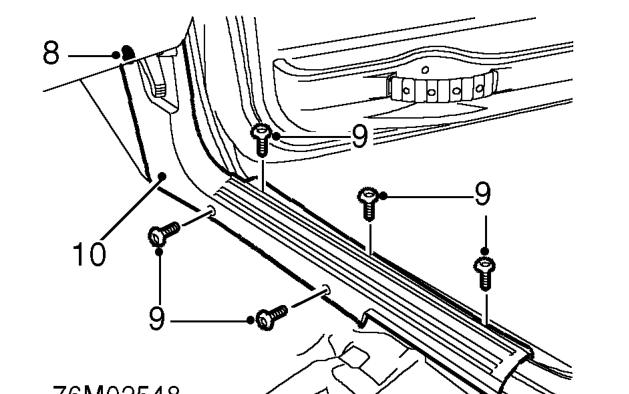
- Remove scrivet from front of passenger side carpet retainer.
- Remove 5 Torx screws from carpet retainer.
- Remove carpet retainer.
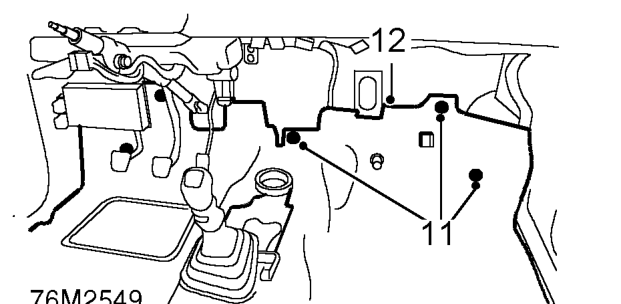
- Remove 3 retainers securing carpet to bulkhead.
- Pull carpet back for access to DCU.
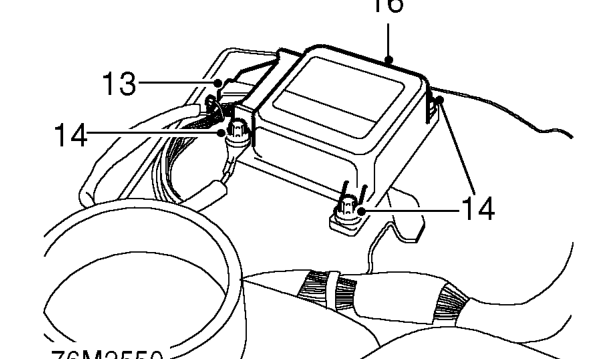
- Disconnect multiplug from DCU.
- Remove 3 bolts securing DCU.
- Release earth lead.
- Remove DCU.
Refit
- Fit DCU.
- Fit earth lead and tighten bolts to 9 Nm.
WARNING: The vehicle crash sensor is incorporated inside the DCU, it is imperative that bolts securing the DCU are tightened to their correct torque.
- Connect multiplug to DCU.
- Fit carpet and secure to bulkhead.
- Fit carpet retainer, fit and tighten Torx screws.
- Fit scrivet to front of carpet retainer.
Models with air conditioning fitted
- Fit air duct and pipe seal.
- Fit evaporator assembly to drain hose and air intake.
- Fit evaporator to studs and secure with nuts.
- Connect multiplugs to air conditioning switches.
- Fit NEW receiver drier. See AIR CONDITIONING, Repairs.
All models
- Fit heater assembly. See HEATING & VENTILATION, Repairs.
- Connect battery leads, earth lead last.
Parts & tools for this job For 1998 Land Rover Freelander
- TOOLOBD2 scanner with SRSSearch: OBD2 scanner ABS SRS
- TOOLTrim removal tool kitSearch: trim removal tool kit
Links open Amazon search results in a new tab. As an Amazon Associate I earn from qualifying purchases.