
Kickdown cable
- Make
- Rover
- Model
- 200 Workshop Manual
- Year
- 1995–1999
- Section
- Repairs › Kickdown cable
Automatic gearboxKickdown cable
KICKDOWN CABLE
Service repair no - 44.15.01
Remove
- Raise front of vehicle.
WARNING: Support on safety stands.
- Remove starter motor. See ELECTRICAL, Repairs.
- Remove fluid pan as detailed in Fluid pan gasket. See AUTOMATIC GEARBOX - ’CVT’, Repairs.
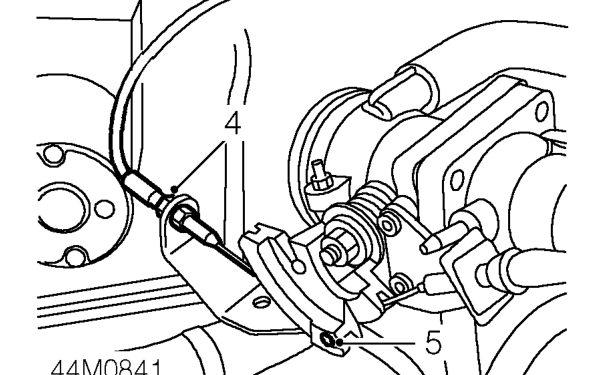
- Loosen nuts securing kickdown cable to abutment bracket.
- Release kickdown inner cable from throttle cam.
- Release kickdown cable from abutment bracket.
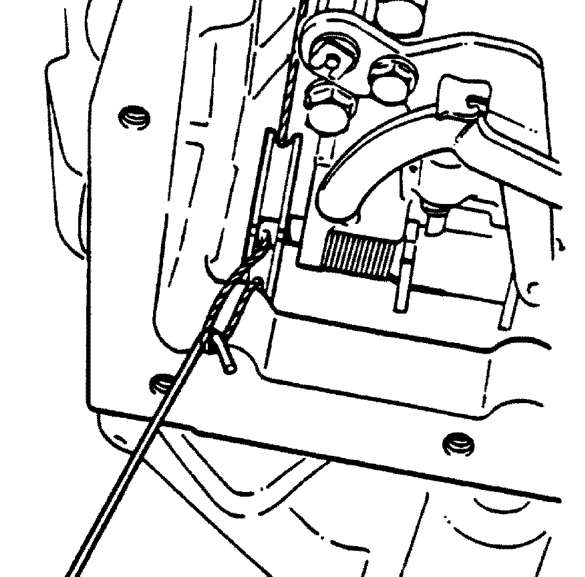
- Using a piece of stiff wire with a hook on the end, release kickdown inner cable from valve cam inside gearbox.
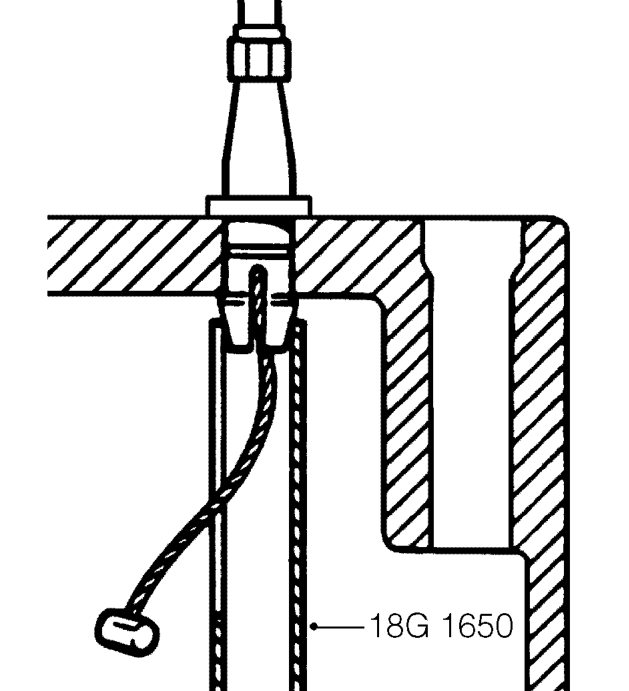
- Using tool 18G 1650 release kickdown outer cable from gearbox housing.
- Remove kickdown cable from vehicle.
Parts & tools for this job For 1995 Rover 200
- PARTTransmission filter kitSearch: Rover 200 1995 transmission filter kit
- FLUIDAutomatic transmission fluidSearch: Rover automatic transmission fluid
- TOOLFluid transfer pumpSearch: fluid transfer pump
Links open Amazon search results in a new tab. As an Amazon Associate I earn from qualifying purchases.