
Selector cable (page 2 of 2)
- Make
- Rover
- Model
- 200 Workshop Manual
- Year
- 1995–1999
- Section
- Repairs
Automatic gearboxSelector cable · page 2 of 2
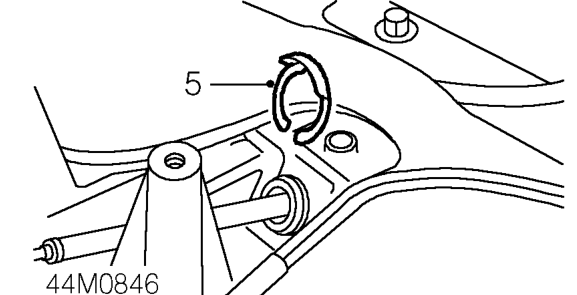
- Remove ’C’ clip securing selector cable to body.
- Raise front of vehicle.
WARNING: Support on safety stands.
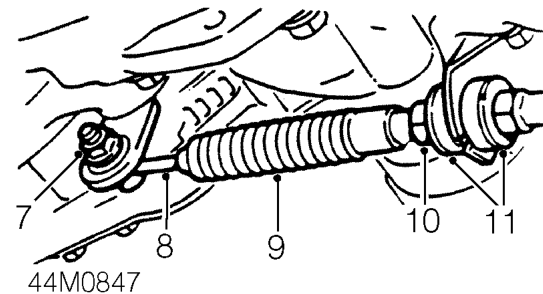
- Remove nut securing selector cable rod to lever.
- Release selector cable rod from selector lever.
- Slide rubber sleeving back from lock nut on selector cable rod.
- Loosen lock nut securing selector cable to abutment bracket.
- Seperate anti-vibration rubbers and release cable from abutment bracket.
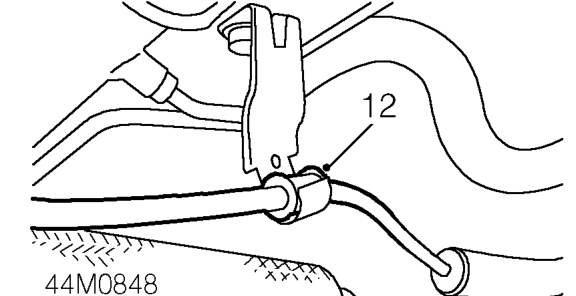
- Release selector cable from bracket on rear beam.
- Remove selector cable from vehicle.
Refit
- Position selector cable in vehicle and secure to bracket on rear beam.
- Fit selector cable to abutment bracket and push anti-vibration dampers into position.
- Tighten selector cable lock nut to abutment bracket.
- Slide selector cable rod rubber sleeving into position.
- Connect selector cable rod to selector lever but DO NOT tighten nut.
- Fit ’C’ clip securing selector cable to body.
- Connect selector cable ball joint to selector lever.
- Position selector lever nacelle, fit and tighten Allen screws with washers fitted.
CAUTION: Do not over tighten screws.
- Fit front console. See BODY, Interior trim components.
- Adjust selector cable. See AUTOMATIC GEARBOX - ’CVT’, Adjustments.
Parts & tools for this job For 1995 Rover 200
- PARTTransmission filter kitSearch: Rover 200 1995 transmission filter kit
- FLUIDAutomatic transmission fluidSearch: Rover automatic transmission fluid
- TOOLFluid transfer pumpSearch: fluid transfer pump
Links open Amazon search results in a new tab. As an Amazon Associate I earn from qualifying purchases.