
Front console trim pad - brm
- Make
- Rover
- Model
- 200 Workshop Manual
- Year
- 1995–1999
- Section
- Interior trim components › Front console trim pad - brm
BodyFront console trim pad - brm
FRONT CONSOLE TRIM PAD - BRM
Service repair no - 76.25.25
Remove
- Remove front console. See this section.
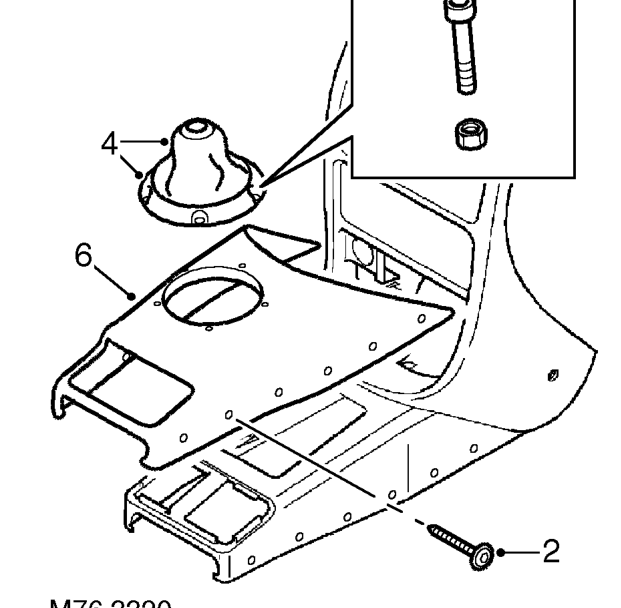
- Remove 5 screws and cup washers securing trim pad to each side of console.
- Remove 5 screws and self-locking nuts securing gaiter finisher, discard nuts.
- Remove finisher and gaiter.
- Make suitable reference marks to enable replacement trim pad to be positioned correctly on console.
- Carefully release trim pad from adhesive, remove trim pad.
Refit
- Remove all traces of adhesive from console using suitable solvent.
CAUTION: Ensure that solvent used does not react adversely with console material.
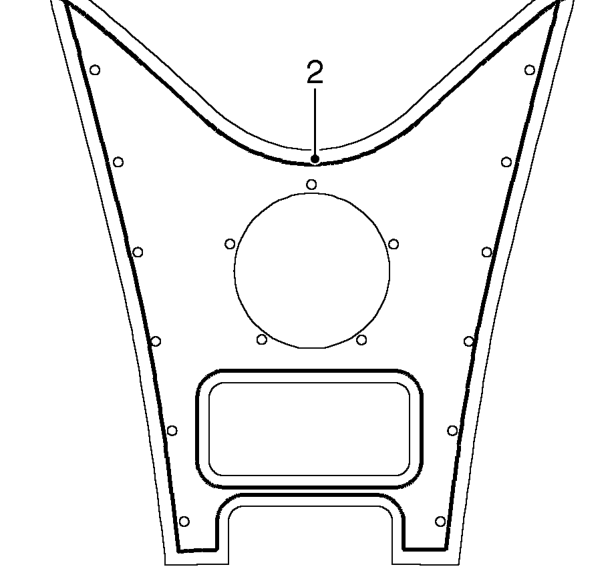
- Apply continuous bead of suitable adhesive to replacement trim pad as shown.
- Position trim pad to console ensuring that reference marks are aligned.
- Fit gaiter and finisher to console, fit 5 screws and new self-locking nuts.
- Tighten nuts to 3 Nm.
- Fit 5 screws and cup washers to secure each side of trim pad to console.
NOTE: Do not fit console securing screws at this stage.
- Fit front console. See this section.
Parts & tools for this job For 1995 Rover 200
- TOOLTrim removal tool kitSearch: trim removal tool kit
- PARTTouch-up paintSearch: Rover touch up paint
- PARTPanel clip assortmentSearch: Rover panel clips assortment
Links open Amazon search results in a new tab. As an Amazon Associate I earn from qualifying purchases.