
Blower assembly
- Make
- Rover
- Model
- 200 Workshop Manual
- Year
- 1995–1999
- Section
- Repairs › Blower assembly
Heating & ventilationBlower assembly
BLOWER ASSEMBLY
Service repair no - 80.20.12
Remove
- Disconnect battery earth lead.
- Remove fascia. See BODY, Interior trim components.
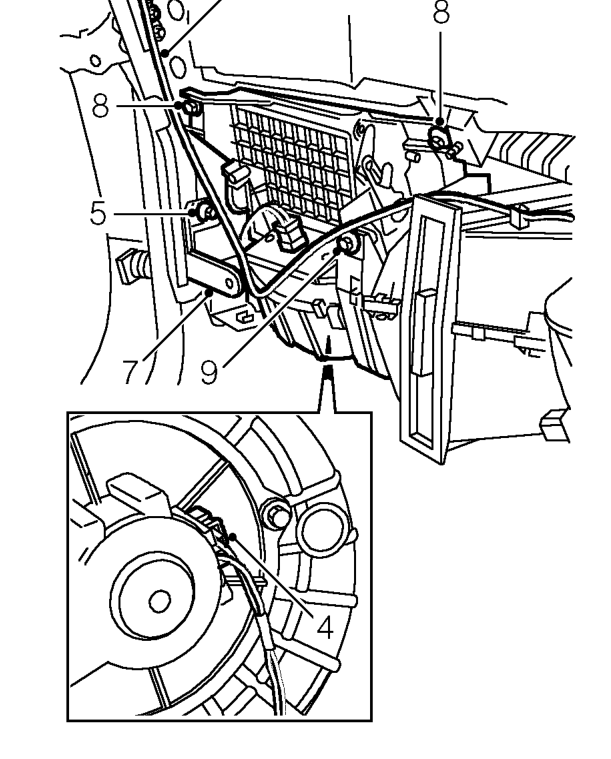
- Release coaxial cable from heater/blower assembly.
- Disconnect 2 multiplugs from blower assembly.
- Remove 3 bolts securing fascia end support panel to body.
- Remove bolt securing blower assembly to support panel.
- Remove support panel.
- Remove 2 nuts securing blower assembly to body.
- Remove screw securing blower assembly to heater duct.
- Release blower assembly from heater duct and remove.
Refit
- Fit blower assembly to heater duct and position to body.
- Fit and tighten screw securing blower assembly to heater duct.
- Fit and tighten nuts securing blower assembly to body.
- Fit fascia support panel and tighten bolts to body to 20 Nm.
- Fit and tighten bolt securing blower assembly to support panel.
- Connect multiplugs to blower assembly.
- Secure coaxial cable to clips on heater/blower assembly.
- Fit fascia. See BODY, Interior trim components.
- Connect battery earth lead.
Parts & tools for this job For 1995 Rover 200
- TOOLA/C manifold gauge setSearch: AC manifold gauge set
- TOOLUV leak detection kitSearch: AC UV leak detection kit
- PARTCabin filterSearch: Rover 200 1995 cabin filter
Links open Amazon search results in a new tab. As an Amazon Associate I earn from qualifying purchases.