
Oil pressure switch (page 2 of 3)
- Make
- Rover
- Model
- 400 Workshop Manual Supplement
- Year
- 1999
- Section
- Repairs
Engine - K SeriesOil pressure switch · page 2 of 3
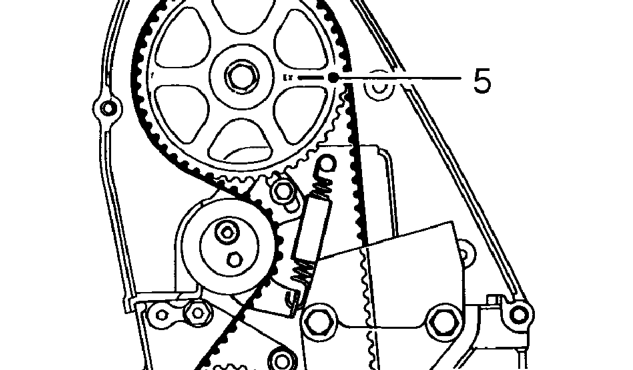
- Rotate crankshaft to align camshaft gear timing marks with top face of cylinder head - 90° BTDC.
- Remove starter motor. See WORKSHOP MANUAL - ELECTRICAL, Repairs.
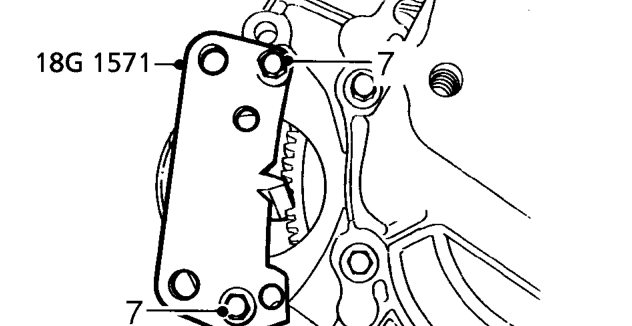
- Position flywheel locking tool 18G 1571 to flywheel and secure with 2 starter motor bolts.
- Remove alternator drive belt. See WORKSHOP MANUAL - ELECTRICAL, Repairs.
- Remove engine RH mounting. See this section.
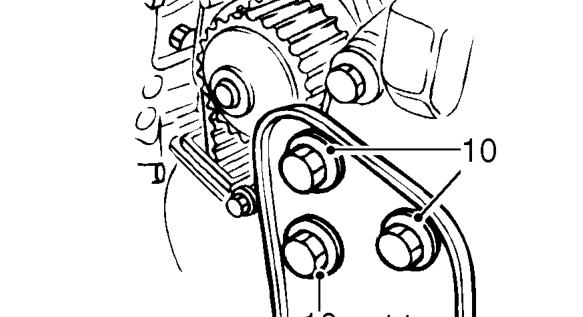
- Remove 3 bolts securing RH torque mounting bracket to engine.
- Remove RH torque mounting bracket.
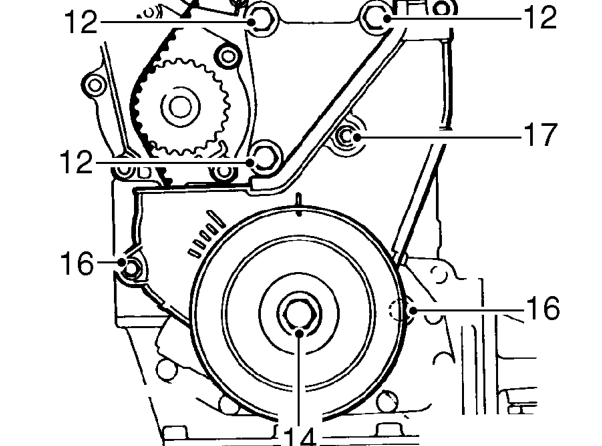
- Remove 3 bolts securing engine RH mounting bracket to engine.
- Carefully raise engine sufficiently to remove engine mounting bracket.
- Remove crankshaft pulley bolt and washer.
- Remove crankshaft pulley.
- Remove 3 bolts securing timing belt lower cover.
- Remove lower cover and rubber seal.
Parts & tools for this job For 1999 Rover 400
- TOOLOBD2 scannerSearch: OBD2 scanner
- TOOLDigital multimeterSearch: automotive digital multimeter
- TOOLBack-probe test leadsSearch: back probe test leads
Links open Amazon search results in a new tab. As an Amazon Associate I earn from qualifying purchases.