
Windscreen (page 2 of 5)
- Make
- Rover
- Model
- 400 Workshop Manual
- Year
- 1995–2000
- Section
- Screens
BodyWindscreen · page 2 of 5
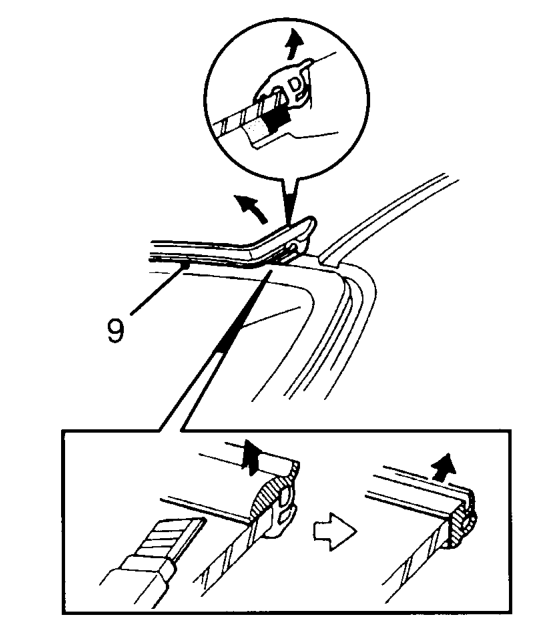
- Remove windscreen upper moulding.
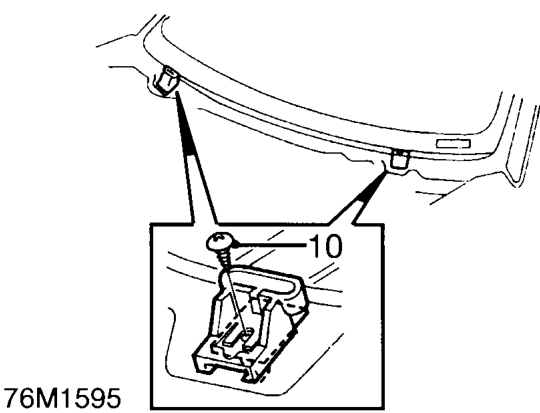
- Remove 2 screws, remove glass support brackets.
- Remove ’A’ post upper finishers. See Interior trim components.
- Remove roof lamp. See ELECTRICAL, Repairs.
- Remove interior mirror.
- Remove 4 screws and remove sun visors.
- Remove plug and screw, remove 2 sun visor retaining clips to allow front edge of headlining to be lowered.
- Apply protection to fascia panel.
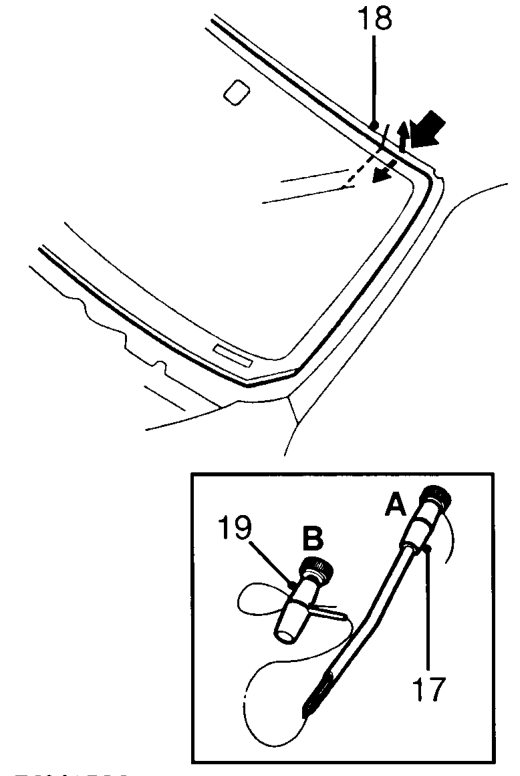
- Prepare cutting wire in handle ’A’. Bend end of wire to handle and tape over end.
- Force cutting wire through sealer from inside and 100 mm from a top corner.
- Attach handle ’B’. Allow 200 mm of wire between handles, bend end of wire to tube and tape over end.
- With an assistant, wedge the tube of handle ’A’ and carefully cut through the sealer around the entire windscreen.
- Attach suction cups to glass and lift from body flange.
WARNING: If glass has splintered: Protect eyes and operate demister blower to remove glass from heater ducts. Use a vacuum cleaner to remove glass from fascia, carpet and seats.
Parts & tools for this job For 1995 Rover 400
- TOOLTrim removal tool kitSearch: trim removal tool kit
- PARTTouch-up paintSearch: Rover touch up paint
- PARTPanel clip assortmentSearch: Rover panel clips assortment
Links open Amazon search results in a new tab. As an Amazon Associate I earn from qualifying purchases.