
Roof lamp
- Make
- Rover
- Model
- 400 Workshop Manual
- Year
- 1995–2000
- Section
- Repairs › Roof lamp
ElectricalRoof lamp
ROOF LAMP
Service repair no - 86.45.02
Remove
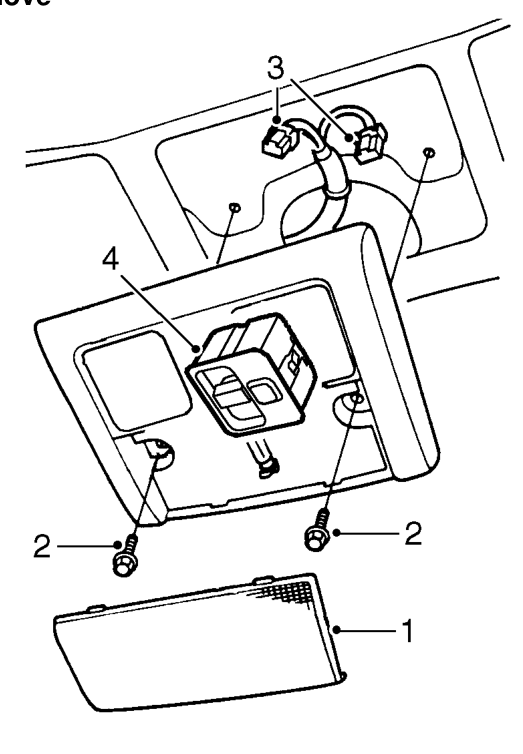
- Remove lamp lens.
- Remove 2 Torx T30 bolts securing lamp to roof.
- Disconnect multiplugs and remove lamp. Do not carry out further dismantling if component is removed for access only.
- Release sun roof switch and remove from roof lamp.
Refit
- Fit sun roof switch to lamp.
- Position lamp and connect multiplugs. Fit and tighten bolts.
- Fit lamp lens.
GLOVE BOX LAMP
Service repair no - 86.45.08
Remove
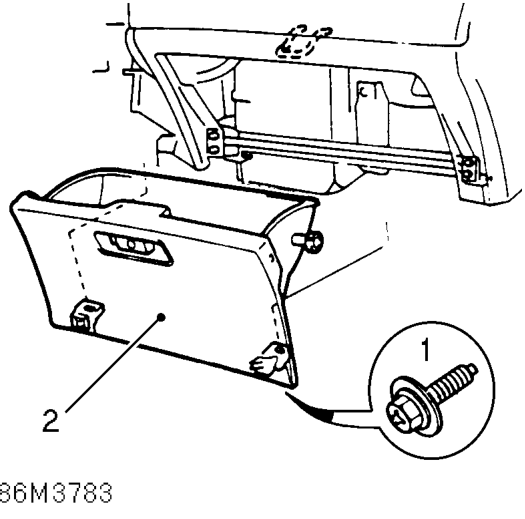
- Remove 2 bolts securing glove box to support rail.
- Release catch and remove glove box.
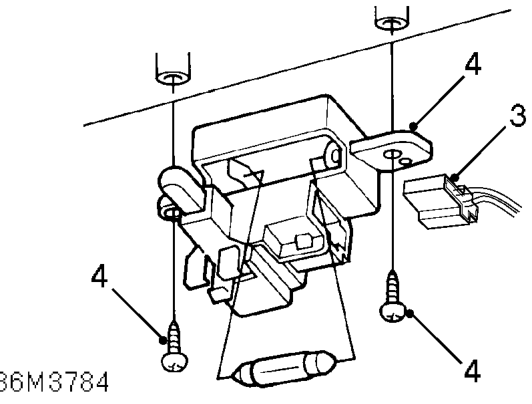
- Disconnect glove box lamp multiplug.
- Remove 2 screws securing lamp and remove lamp.
Refit
- Fit lamp and secure with screws.
- Connect multiplug to lamp.
- Fit glove box and fit but do not tighten screws.
- Align and close glove box. Tighten screws.
Parts & tools for this job For 1995 Rover 400
- PARTReplacement bulbsSearch: Rover 400 1995 bulbs
- TOOLDigital multimeterSearch: automotive digital multimeter
Links open Amazon search results in a new tab. As an Amazon Associate I earn from qualifying purchases.