
Headlamp assembly
- Make
- Rover
- Model
- 400 Workshop Manual
- Year
- 1995–2000
- Section
- Repairs › Headlamp assembly
ElectricalHeadlamp assembly
HEADLAMP ASSEMBLY
Service repair no - 86.40.49
Remove
- Remove front bumper, See BODY, Repairs.
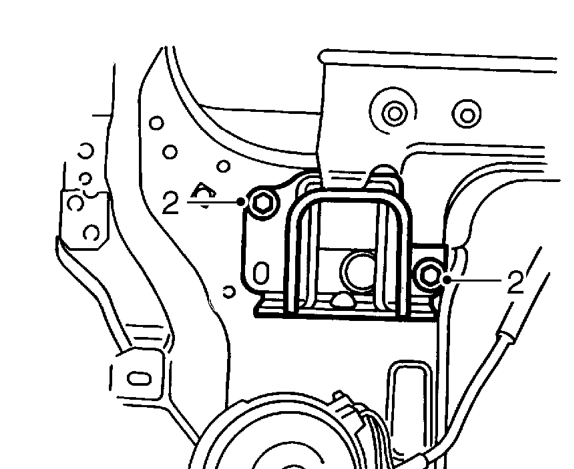
- Slacken 2 bolts securing impact can to front panel.
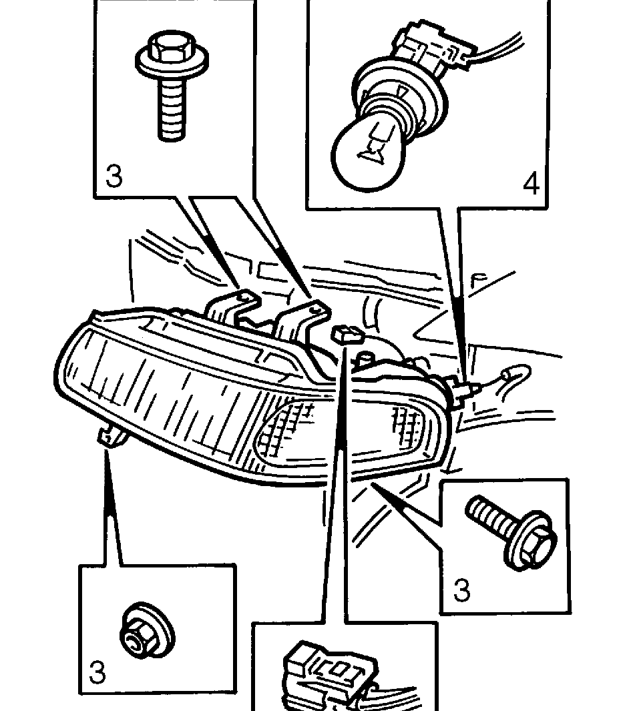
- Remove 3 screws and 1 nut securing head lamp.
- Release indicator bulb holder.
- Disconnect multiplug and remove headlamp. 97.5 MY on: Disconnect multiplug from headlamp levelling motor.
Refit
- Position headlamp, connect multiplug and indicator bulb holder. 97.5 MY on: Connect multiplug to headlamp levelling motor.
- Fit and tighten screws and nut.
- Tighten bolts securing impact can to 22 Nm.
- Refit front bumper, See BODY, Repairs.
Parts & tools for this job For 1995 Rover 400
- PARTReplacement bulbsSearch: Rover 400 1995 bulbs
- TOOLDigital multimeterSearch: automotive digital multimeter
Links open Amazon search results in a new tab. As an Amazon Associate I earn from qualifying purchases.