
Battery - ’t’ series
- Make
- Rover
- Model
- 400 Workshop Manual
- Year
- 1995–2000
- Section
- Repairs › Battery - ’t’ series
ElectricalBattery - ’t’ series
BATTERY - ’T’ SERIES
Service repair no - 86.15.01
Remove
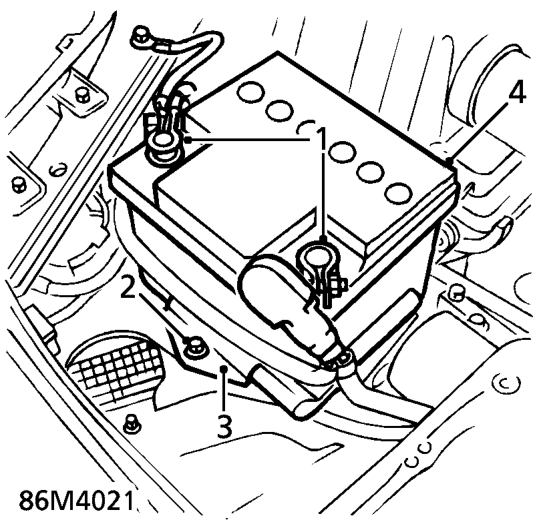
- Disconnect both battery leads, earth lead first.
- Remove bolt securing battery clamp to battery tray.
- Remove battery clamp.
- Release and remove battery from vehicle.
Refit
- Clean battery terminals and coat with petroleum jelly.
- Position battery to battery tray.
- Fit battery clamp and secure with bolt.
- Position and connect battery leads, earth lead last
DIM DIP RESISTOR - ’T’ SERIES
Service repair no - 86.55.92
Remove
- Remove air cleaner. See ENGINE MANAGEMENT SYSTEM - MEMS, Repairs.
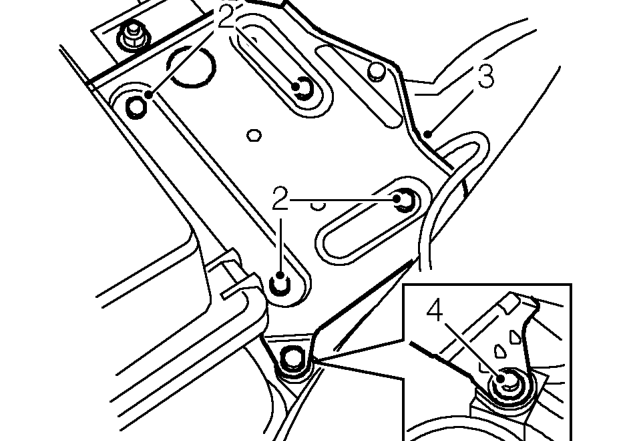
- Remove 4 bolts and nut securing battery tray to mounting bracket and engine LH mounting.
- Remove battery tray.
- Remove bolt securing air intake hose to battery tray mounting bracket.
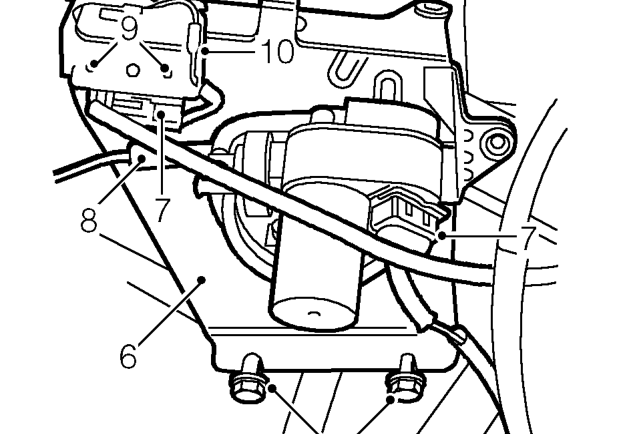
- Loosen 2 bolts securing battery tray mounting bracket to body.
- Release battery tray mounting bracket from fixings.
- Disconnect multiplugs from dim dip resistor and cruise control vacuum control unit.
Parts & tools for this job For 1995 Rover 400
- TOOLBattery testerSearch: car battery tester
- TOOLDigital multimeterSearch: automotive digital multimeter
- TOOLBattery terminal cleanerSearch: battery terminal cleaner
Links open Amazon search results in a new tab. As an Amazon Associate I earn from qualifying purchases.