
Brake light switch - adjust - ’d’ series (Brakes)
- Make
- Rover
- Model
- 400 Workshop Manual
- Year
- 1995–2000
- Section
- Adjustments › Brake light switch - adjust - ’d’ series
BrakesBrake light switch - adjust - ’d’ series
- Renew disc if run-out exceeds limit even after repeated re-positioning of disc on hub.
NOTE: Brake discs can be refaced using an on car disc lathe providing the disc thickness is sufficiently great to be 1 mm over service limit after machining.
- Remove dial test indicator. Tighten disc retaining screws to 10 Nm.
- Fit caliper carrier, fit bolts and tighten to 38 Nm.
- Fit pad retainers to carrier, clean pads and shims and apply Molykote M 77 to both sides of shims.
- Fit shims to pads and fit pads to carrier.
- Fit caliper over pads.
CAUTION: Ensure that lug on brake pad locates in cruciform slot in piston.
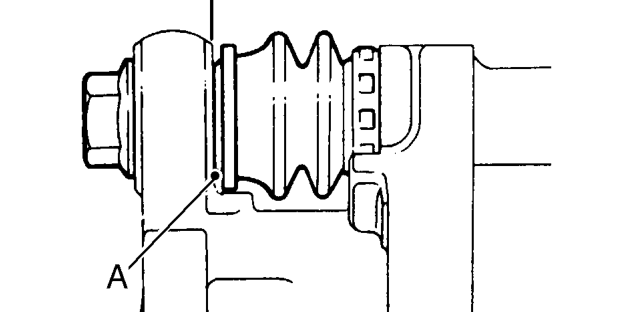
- Ensure flats ’A’ on guide pins locate with lugs on caliper. Fit guide pin bolts and tighten to 27 Nm.
- Fit caliper shield, fit bolts and tighten to 10 Nm.
- Fit road wheel(s) and tighten nuts to correct torque. See INFORMATION, Torque wrench settings.
- Remove stand(s) and lower vehicle.
- Depress brake several times to set pad to disc clearance.
- Check and top-up brake fluid. See INFORMATION, Capacities, fluids and lubricants.
BRAKE LIGHT SWITCH - ADJUST - ’D’ SERIES
Service repair no - 70.35.41
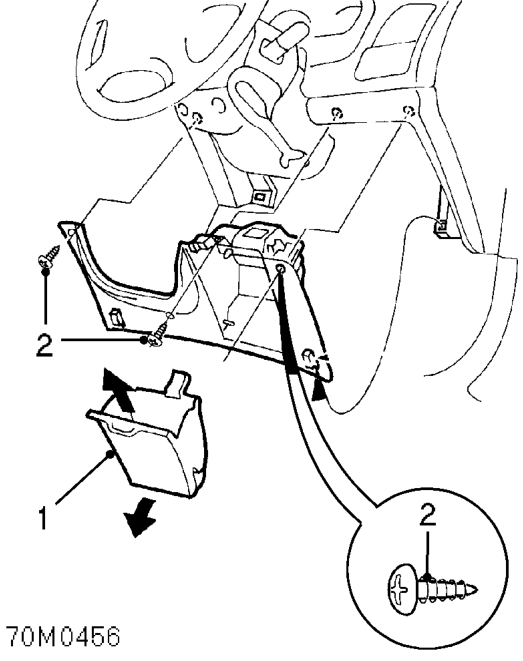
- Remove driver’s pocket from fascia lower cover.
- Remove 3 screws and remove lower cover.
Parts & tools for this job For 1995 Rover 400
- TOOLOBD2 scannerSearch: OBD2 scanner
- TOOLDigital multimeterSearch: automotive digital multimeter
- TOOLBack-probe test leadsSearch: back probe test leads
Links open Amazon search results in a new tab. As an Amazon Associate I earn from qualifying purchases.