
Making the repair (Wiring diagrams)
- Make
- Rover
- Model
- 600 620 Diesel Repair Manual Supplement
- Year
- 1995–1999
- Section
- General information › Making the repair
Making the repair
Crimp the two wire ends into a "Duraseal" connector. Apply hot air to the joint, using a hot air blower, and slowly rotate the joint to ensure the shrinking of the insulation is uniform and connector ends are sealed to the wires.
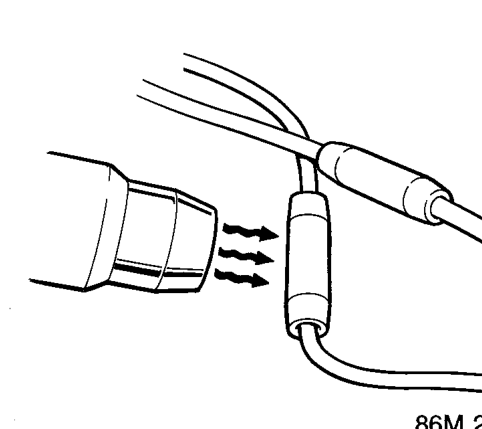
CAUTION: Extreme care must be taken when using a hot air blower. Deflect heat away from interior trim, carpets, etc. Do not touch the nozzle of the hot air blower or heatshrink connector until sufficiently cooled.
After allowing time for the repair to cool refit the wire into the harness. Re-tape the wiring harness ensuring the repair does not interfere with the fit of the harness or any components nearby.
Completing the repair
Reconnect the battery, check repaired circuit for correct operation ,and all related circuits. Always confirm that your diagnosis and repair is complete by verifying the complaint and symptom.
Typical wiring harness faults
Pinched
Symptom
Wiring damaged or shorted to ground causing: Fuse(s) to blow, circuit(s) not to operate or not to operate correctly.
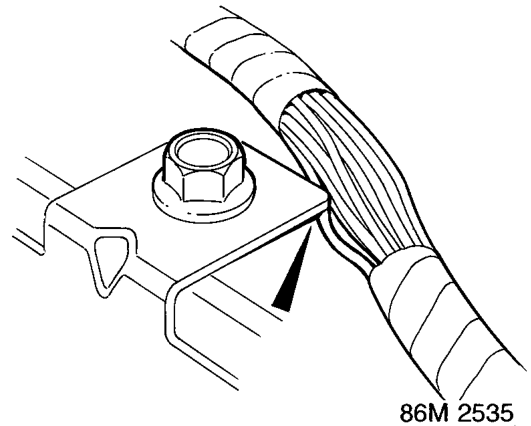
Wire trapped
Cause
The wire(s) is pinched or trapped by another component, e.g. a bracket, trim or finisher.
Action
Locate damaged section of wiring/harness, carefully cut back the tape or insulation from the harness with a suitable tool. If the harness has a black plastic conduit simply pull out the desired wire(s). See Repair Techniques.
Parts & tools for this job For 1995 Rover 600
- TOOLDigital multimeterSearch: automotive digital multimeter
- PARTAssorted fuse kitSearch: car fuse assortment kit
- TOOLWire crimper and connector kitSearch: wire crimper connector kit
Links open Amazon search results in a new tab. As an Amazon Associate I earn from qualifying purchases.