
Inspecting the welding areas
- Make
- Alfa Romeo
- Model
- GTV / Spider GTV and Spider (916) Factory Service Manual
- Year
- 1995–2000
- Section
- Body › Inspecting the welding areas
e. Welding on angled surfaces.
- Do not weld on angled surfaces as a concentration of tension can cause breakage.
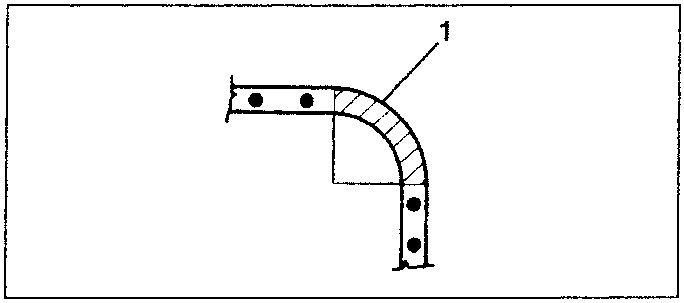
- Angled surface without welding spots
Examples:
- Front pillar upper corner.
- Front part of rear wing.
Inspecting the welding areas
The spot welding areas can be inspected in two ways: visually or by a destructive method. The latter should be applied before and after welding. Spot welds should be equally spaced and positioned at the centre of the flange to be welded.
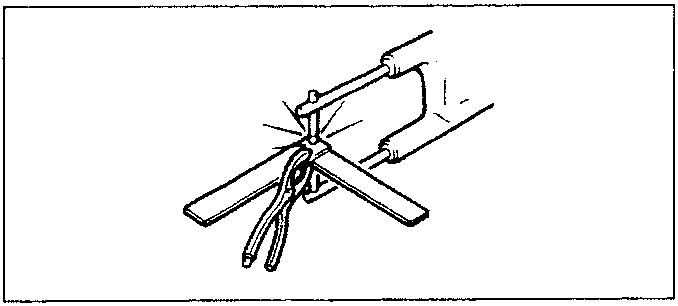
a. Sample test to be carried out before welding:
- Prepare the samples using sheet metal of the same thickness as the parts to be welded and secure them so that they do not move during welding. Carry out welding.
b. Test to be carried out after welding using a chisel and hammer.
- Insert the tip of the chisel between the welded metals and beat lightly on the chisel until a 3 ÷ 4 mm gap forms between the sheets; if warping does not occur in the weld, the result of the test is positive.
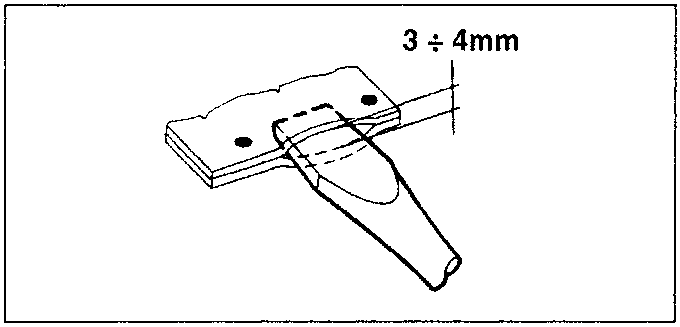
Rotate the samples around the spot weld until they detach and then inspect the break areas.
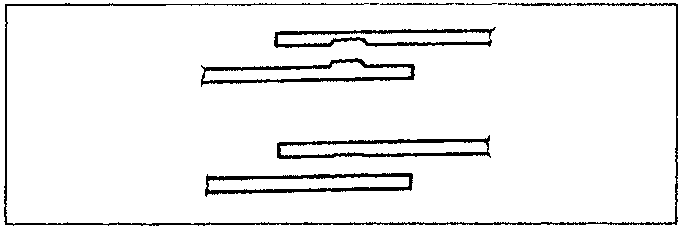
- The entire spot weld should remain on one of the two samples, while a circular hole should be on the other.
Otherwise the welding conditions are incorrect. Adjust the pressure, current, flow time and the other welding conditions, then repeat the test until satisfactory results are obtained.
Correct Welding Conditions

Incorrect Welding Conditions
Parts & tools for this job For 1995 Alfa Romeo GTV / Spider
- TOOLTrim removal tool kitSearch: trim removal tool kit
- PARTTouch-up paintSearch: Alfa Romeo touch up paint
- PARTPanel clip assortmentSearch: Alfa Romeo panel clips assortment
Links open Amazon search results in a new tab. As an Amazon Associate I earn from qualifying purchases.