
Mig welding
- Make
- Alfa Romeo
- Model
- GTV / Spider GTV and Spider (916) Factory Service Manual
- Year
- 1995–2000
- Section
- Body › Mig welding
If the sheets differ in thickness, the gap should be limited to 1.5 ÷ 2 mm.
Bear in mind that the above-mentioned value is only for reference.
This gap varies according to the position of the spot welds, the length of the flange. thickness of the sheet, angle of the weld and other factors. Do not exceed these limits to avoid detaching any spot welds.
Make sure that, after the test, the warped part is repaired.
MIG WELDING
Use the MIG welding method for parts for which spot welding is not possible.
Conditions of the panel to be welded
Remove all traces of foreign matter by sanding or brushing. Paint, rust or oil on the surface of the sheet may reduce the welding strength and cause blistering.
Welding instructions
- Filler weld (of prepared holes).
- Drill a hole 5 ÷ 6 mm in diameter on one of the two sheets to be welded and clamp the sheets together.
- Position the blow pipe, fitted with an appropriate nozzle, at right angles to the sheet and fill the hole. At each interruption of the welding process a film of oxide is formed on the surface which causes blistering. If this occurs, remove the oxide with a brush.
- Ensure that the welding of the upper and lower sheets is perfect.
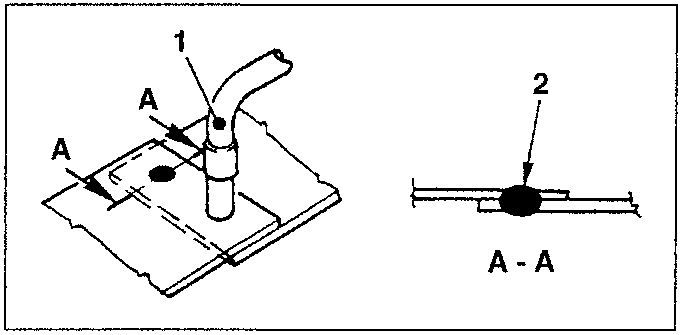
- Blowpipe
- Welding point
b. Butt welding.
Tack the two mating surfaces by intermittent weld to prevent buckling and align them perfectly, then fill the empty spaces with small welding seams.
NOTE: The correct gap is appr. 1 mm.
NOTE: If the welding is intermittent distortion is lower, if welding is continuous distrosion is higher.
Do not weld a continuous seam as buckling may result. Proceed as illustrated to reduce buckling.
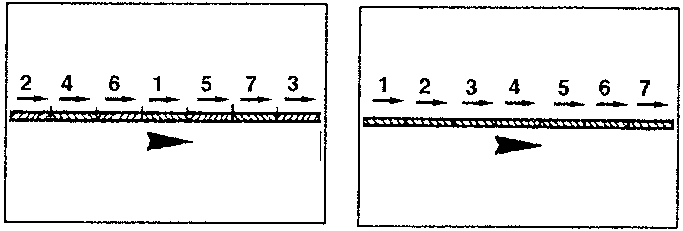
After welding, sand the weld following the profile of the part, if empty spaces remain, fill and sand.
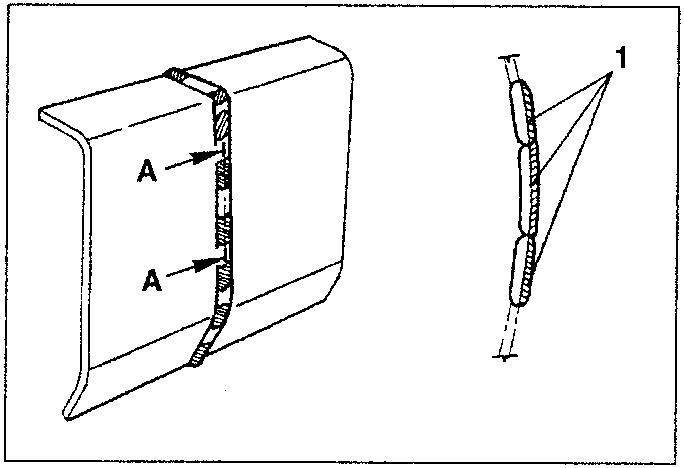
- Part of the seam to be flattened
Checking the fill weld
The welding test is substantially the same as described for spot welding.
Parts & tools for this job For 1995 Alfa Romeo GTV / Spider
- TOOLTrim removal tool kitSearch: trim removal tool kit
- PARTTouch-up paintSearch: Alfa Romeo touch up paint
- PARTPanel clip assortmentSearch: Alfa Romeo panel clips assortment
Links open Amazon search results in a new tab. As an Amazon Associate I earn from qualifying purchases.