
Rear Quarter Glass (Coupe) (page 3 of 3)
- Make
- Aston Martin
- Model
- DB9 Factory Workshop Manual
- Year
- Issue 2, 2005
- Section
- Glass, Frame and Mechanism
01 Body systemRear Quarter Glass (Coupe) · page 3 of 3
- Install the glass regulator. Install the nut to the top of the glass regulator. Do not torque.
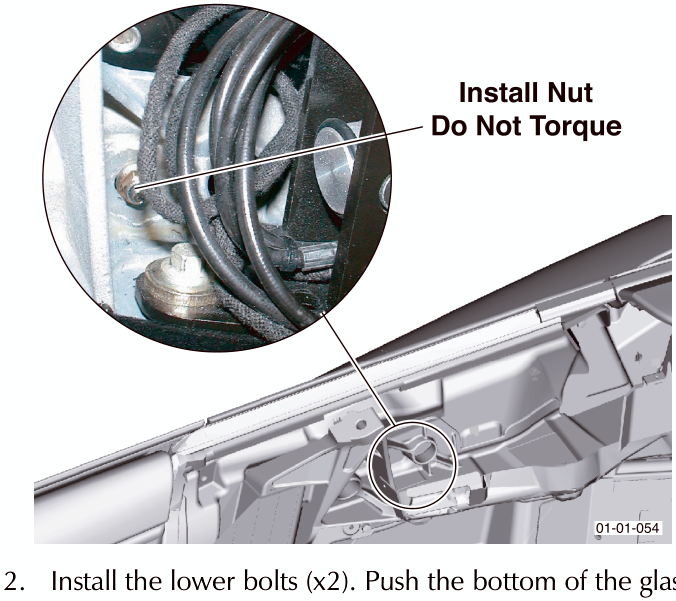
- Install the lower bolts (x2). Push the bottom of the glass regulator into place and install nuts (x2).
- Power up the glass regulator to line up the two glass securing screw holes through the two holes in the top bracket.
- Install the glass. Secure with screws (x2). Do not torque
- Remove the outer chrome trim.
- Torque the upper nut (1) of the glass regulator to 9 Nm.
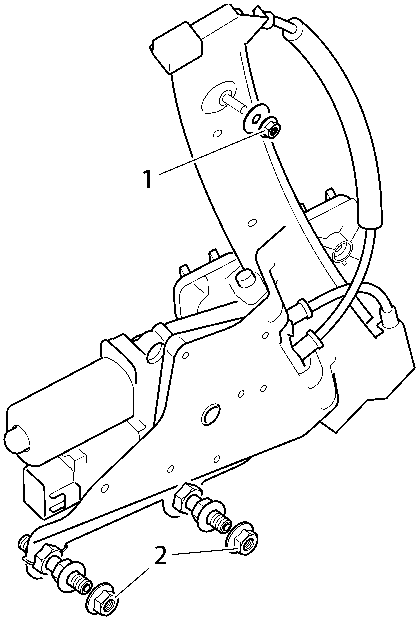
- Adjust the lower mountings (2) to achieve the 5 mm gap between the glass and the edge of the vehicle body.
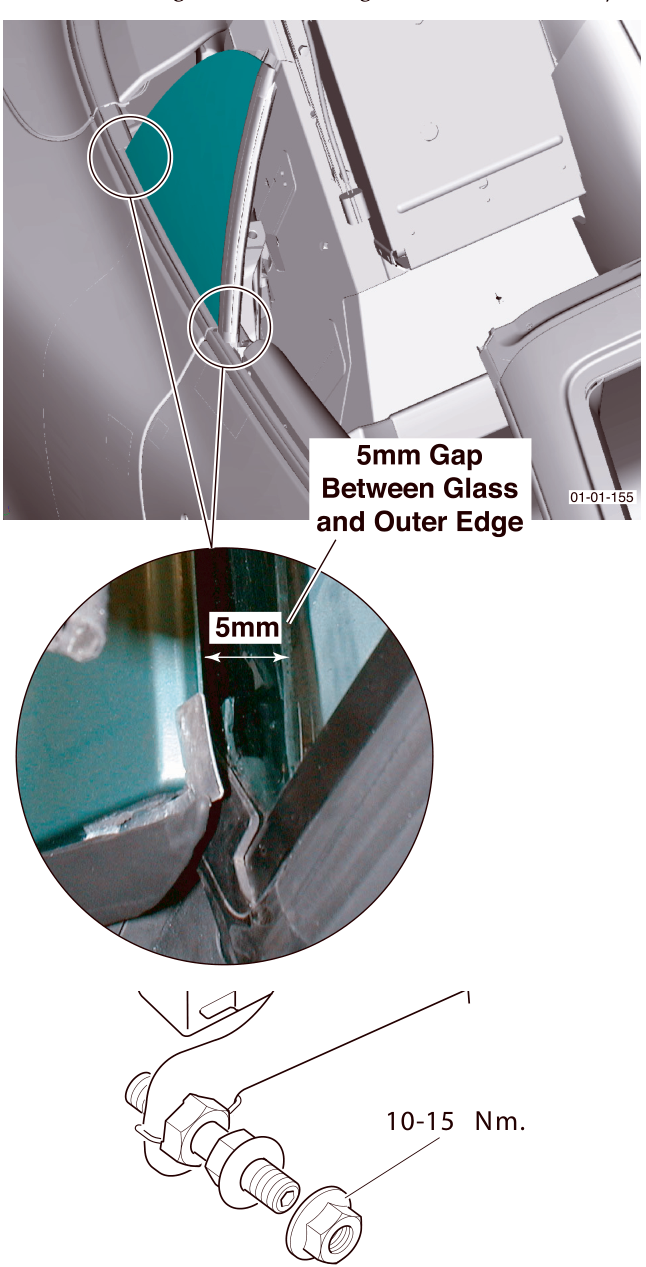
When adjusted, torque the outer nuts to 10-15 Nm.
- Secure the qurater glass. Torque the screws to 5-6 Nm.
- Connect the glass regulator wiring harness plug.
- Check glass alignment.
- Raise the convertible roof.
Check the alignment of the glass to the door glass.
Check the alignment of the glass with the convertible roof seals.
- Install the seat belt and speaker plate. Torque bolts to 8-10 Nm.
- Connect the wiring harness plugs (x2).
- Install the rear 1/4 panel.
- Install the seat belt top mount. Torque bolt to 35 Nm.
- Install the rear seat back and seat base.
- Power the front seat forward.
Parts & tools for this job For 2005 Aston Martin DB9
- TOOLTrim removal tool kitSearch: trim removal tool kit
- PARTTouch-up paintSearch: Aston Martin touch up paint
- PARTPanel clip assortmentSearch: Aston Martin panel clips assortment
Links open Amazon search results in a new tab. As an Amazon Associate I earn from qualifying purchases.