
Evaporator (page 2 of 3)
- Make
- Land Rover
- Model
- Freelander Workshop Manual
- Year
- 1998–2000
- Section
- Repairs
Air conditioningEvaporator · page 2 of 3
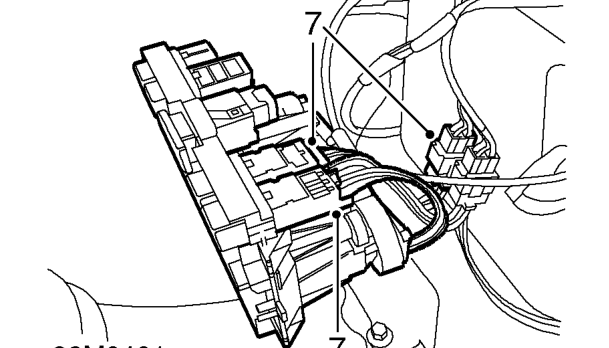
- Disconnect 3 multiplugs from air conditioning switches and heater harness.
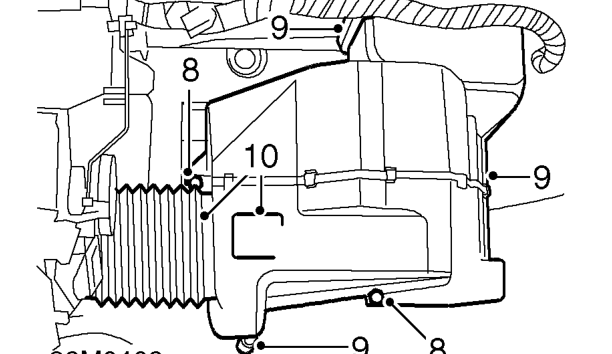
- Remove 2 nuts securing evaporator to body.
- Release evaporator from drain hose and air intake, remove evaporator assembly.
- Collect air duct and pipe seal.
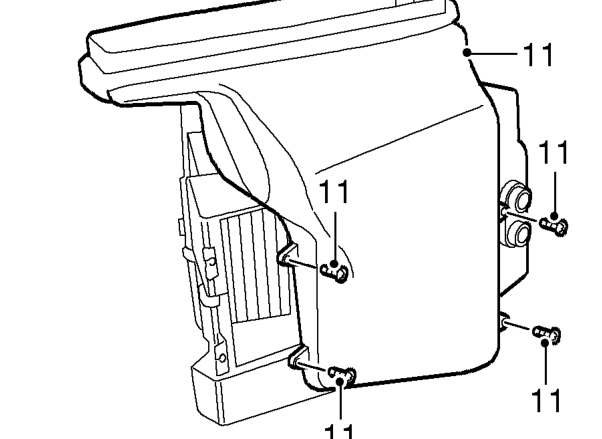
- Remove 4 screws from air ducting and remove ducting.
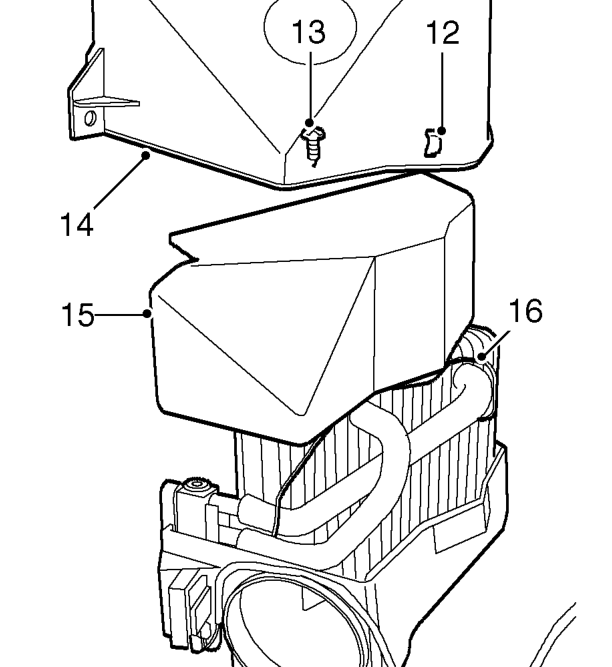
- Remove 5 clips from evaporator casing.
- Remove 3 screws from evaporator casing.
- Remove top half of evaporator casing.
- Remove insulation from evaporator matrix.
- Release thermostat pipe and ease to one side.
Parts & tools for this job For 1998 Land Rover Freelander
- TOOLA/C manifold gauge setSearch: AC manifold gauge set
- TOOLUV leak detection kitSearch: AC UV leak detection kit
- PARTCabin filterSearch: Land Rover Freelander 1998 cabin filter
Links open Amazon search results in a new tab. As an Amazon Associate I earn from qualifying purchases.