
Rear bumper valance
- Make
- MG
- Model
- TF Factory Workshop Manual
- Year
- 2002–2005
- Section
- Exterior fittings › Rear bumper valance
BodyRear bumper valance · page 1 of 2
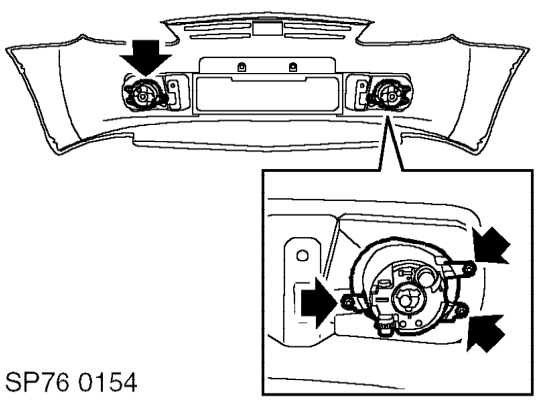
- Remove 3 screws securing each fog lamp and remove fog lamps.
- Remove front number plate.
Refit
- Clean number plate and mating face.
- Fit number plate.
- Clean bumper badge and mating face, fit badge.
- Position bumper grille, fit and tighten screws.
- Position fog/driving lamps, fit and tighten screws.
- Fit front bumper valance and connect fog/driving lamp multiplugs.
- Fit Torx bolts securing bumper valance to bumper armature and tighten to 25 Nm.
- Fit and tighten screws securing bumper valance to bonnet locking panel.
- Fit and tighten screws securing bumper valance to front wings.
- Fit and tighten screws securing front bumper to both wheel arch liners.
- Remove stands and lower vehicle.
REAR BUMPER VALANCE
Service repair no - 76.22.74
Remove
- Raise rear of vehicle.
WARNING: Do not work on or under a vehicle supported only by a jack. Always support the vehicle on safety stands.
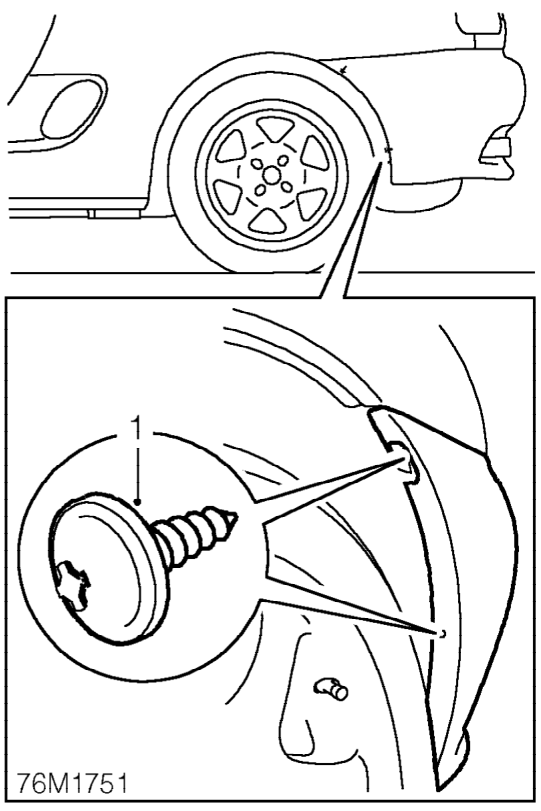
- Remove 2 screws securing bumper valance to rear of both wheel arches.
Parts & tools for this job For 2002 MG TF
- TOOLTrim removal tool kitSearch: trim removal tool kit
- PARTTouch-up paintSearch: MG touch up paint
- PARTPanel clip assortmentSearch: MG panel clips assortment
Links open Amazon search results in a new tab. As an Amazon Associate I earn from qualifying purchases.