
Dismantling and Assembling the Chain Tensioner
- Make
- Peugeot
- Model
- J5 Pocket Mechanic, 1.8 and 2.0 petrol
- Year
- 1987–1994
- Section
- Engine assembly › Dismantling and Assembling the Chain Tensioner
sprockets are opposite each other. Compare the alignment with Fig. 1.35.
- Place the timing chain over the crankshaft timing sprocket and insert the sprocket on the other side into the timing chain. Check that the timing marks are aligned as shown in Fig. 1.36 and bolt the camshaft sprocket to the camshaft. Timing chains without marks must be fitted in accordance with the marks made during dismantling.
- Place a new lockplate over the camshaft sprocket and fit the three bolts. Tighten the bolts to 2.3 kgm (17 ft.lb.).
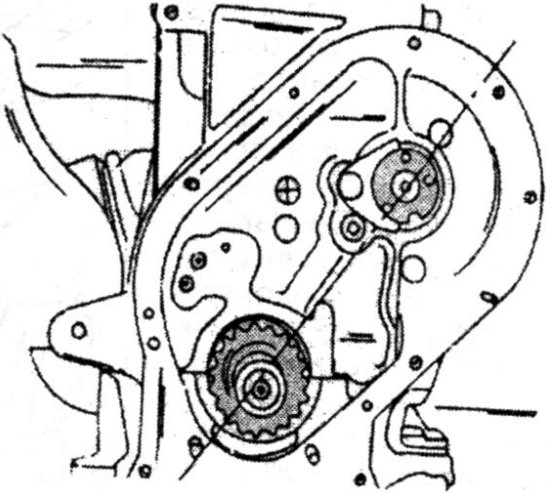
Fig. 1.35. — Rotate the crankshaft and the camshaft until the two timing marks are aligned as shown.
The lock plate tabs must be bent over the sides of the three bolts.
Dismantling and Assembling the Chain Tensioner
As already mentioned, one of two chain tensioner types can be fitted. The following description assumes that the chain tensioner has been dismantled. If the overhaul of the engine is extensive, it is always necessary to dismantle the tensioner, as this will make sure that the glide shoe can move easily and that the oil bores are free of obstructions. After dismantling, the tensioner must be assembled and pre-tensioned to ensure its correct operation after installation. The work required is described separately for the two chain tensioner types.
Sedis Chain Tensioner
This is the chain tensioner shown in Fig. 1.37. Dismantle this type of tensioner as follows:
- Place the ratchet into the position shown in box (1) and withdraw the glide shoe and the spring as an assembly. Lock the tensioner by turning the ratchet into the position shown in box (2).
- After cleaning the tensioner parts, assembly in reverse order, finally locking the tensioner in accordance with box (2). A screwdriver is inserted into the hole shown by the arrow to turn the ratchet inside the tensioner body.
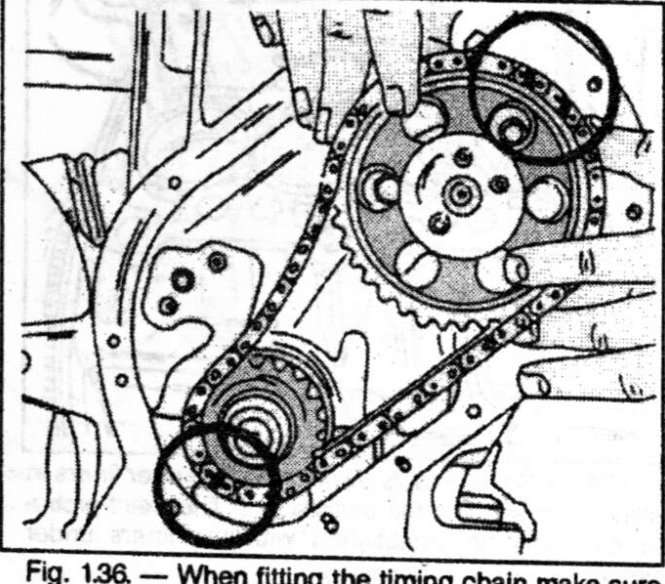
Fig. 1.36 — When fitting the timing chain make sure that the timing chain marks and the timing sprocket marks are aligned as shown.
Parts & tools for this job For 1987 Peugeot J5
- PARTEngine gasket setSearch: Peugeot J5 1987 engine gasket set
- TOOLTorque wrenchSearch: 3/8 inch torque wrench
- TOOLFeeler gauge setSearch: feeler gauge set
Links open Amazon search results in a new tab. As an Amazon Associate I earn from qualifying purchases.