
47M0055 (page 8 of 8)
- Make
- Rover
- Model
- 600 Rover 600 Repair Manual - Volumes 1 and 2 - 2nd Edition
- Section
- Repairs
Drive shafts47M0055 · page 8 of 8
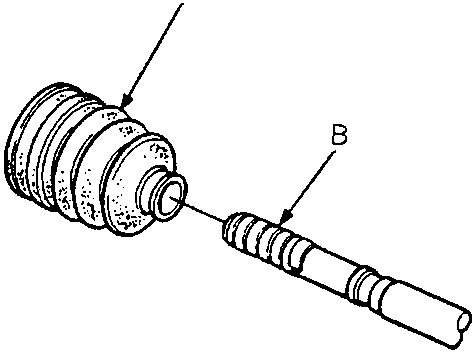
47M0069
- A Outboard Boot
- B Vinyl Tape
- Wrap the splines with vinyl tape to prevent damage to the outboard boot.
- Install the outboard boot, then remove the vinyl tape.
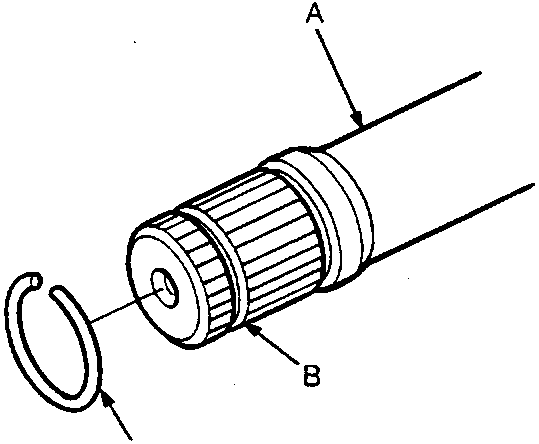
47M0070
- A Driveshaft
- B Groove
- C Stopper Ring
- Install the stopper ring into the driveshaft groove.
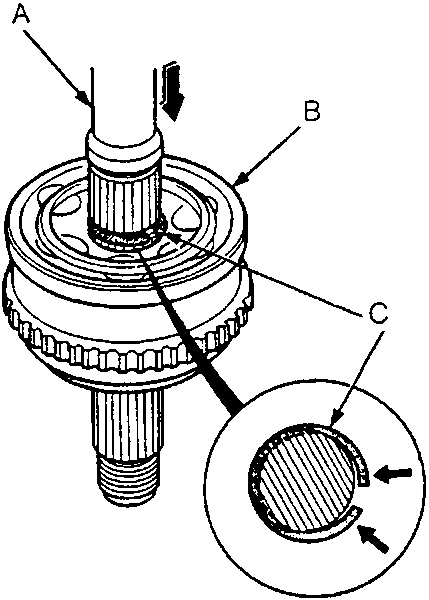
47M0071
- A Driveshaft
- B Outboard Joint
- C Stopper Ring
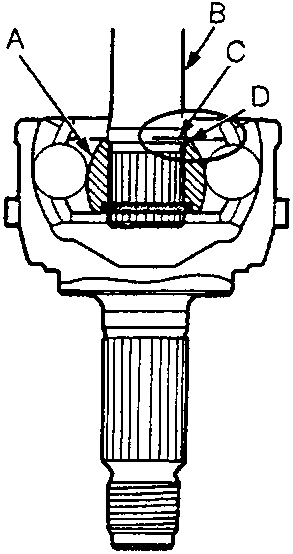
47M0072
- A Outboard Joint Inner Race
- B Driveshaft
- C Paint Mark
- D Inner Race End
- Insert the driveshaft in the outboard joint until the stopper ring is close on the joint.
- Push the stopper ring into the groove and insert the driveshaft until the paint mark of
Parts & tools for this job For Rover 600
- PARTWheel bearingSearch: Rover 600 wheel bearing
- TOOLBearing puller kitSearch: wheel bearing puller kit
- PARTCV boot kitSearch: Rover 600 cv boot kit
Links open Amazon search results in a new tab. As an Amazon Associate I earn from qualifying purchases.