
Refit
- Make
- Rover
- Model
- Coupé, Cabriolet & Tourer 200/400 Coupé, Cabriolet & Tourer Workshop Manual
- Section
- Repairs › Refit
- Measure clutch disc thickness, renew plate if less than service limit.
A.P. only Plate thickness – new clutch plate = 8.00 – 8.40 mm.
A.P. only Plate thickness – service limit = 6.30 – 6.70 mm.
Note: This check must NOT be used on Valeo clutch plates.
- Measure rivet depth, renew plate if less than service limit.
Valeo Rivet depth – New clutch plate = 0.9 mm min.
Valeo Rivet depth – Service limit = 0.1 – 0.2 mm.
A.P. Rivet depth – New clutch plate = 1.3 mm min.
A.P. Rivet depth – Service limit = 0.2 mm.
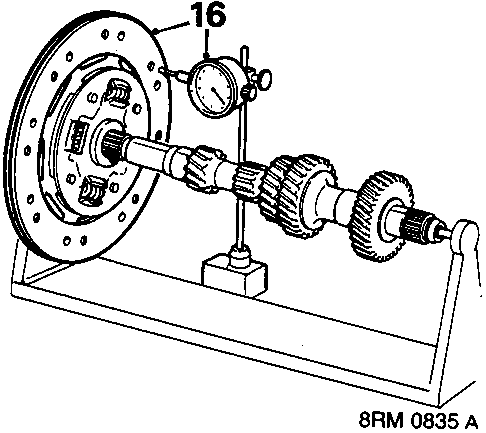
- Measure clutch plate run – out using a dial gauge and a gearbox mainshaft, renew plate if outside service limit.
Valeo Run out – New clutch plate = 0.8 mm max.
Valeo Run out – Service limit = 1.0 mm.
A.P. Run out – New clutch plate = 1.0 mm max.
A.P. Run out – Service limit = 1.3 mm.
- Check pressure plate for signs of wear or damage. Check for signs of overheating on drive straps(deep yellow to blue colour) renew pressure plate if necessary.
Note: Renew a pressure plate which has been accidentally dropped.
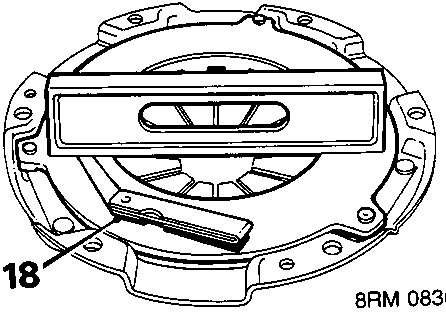
- Using a straight edge and feeler gauge check the surface of the pressure plate for flatness at 4 separate points, renew if warping exceeds service limit.
Valeo Pressure plate warping – service limit = 0.20 mm max.
A.P. Pressure plate warping – service limit = 0.08 mm max.
Refit
- Clean pressure plate and flywheel, dowels and dowel holes.
- Inspect flywheel for signs of scoring or other damage. Renew if worn or damaged.
- Smear clutch plate splines with molybdenum disulphide grease.
- Position clutch plate to flywheel with 'FLYWHEEL SIDE' marking towards flywheel.
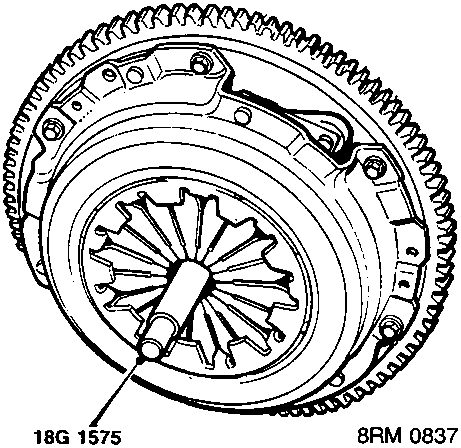
- Fit pressure plate to flywheel and fit alignment tool 18G 1575.
- Fit pressure plate bolts finger tight.
- Working in a diagonal sequence, progressively tighten pressure plate bolts to 18 Nm.
- Remove alignment tool 18G 1575.
- Remove locking tool 18G 1571.
- Clean release fork and sleeve. Smear release fork shaft and bore of release bearing with molybdenum disulphide grease.
- Position release fork and shaft assembly in bell housing and fit both bushes ensuring
Parts & tools for this job For Rover Coupé, Cabriolet & Tourer
- PARTClutch kitSearch: Rover Coupé, Cabriolet & Tourer clutch kit
- TOOLClutch alignment toolSearch: clutch alignment tool
- FLUIDGear oilSearch: Rover Coupé, Cabriolet & Tourer manual gearbox oil
Links open Amazon search results in a new tab. As an Amazon Associate I earn from qualifying purchases.