
Refitting pistons and connecting rods
- Make
- Alfa Romeo
- Model
- 145/146 Engines, 146 Bodywork and Engine Overhaul Manual
- Year
- 1994–2001
- Section
- Overhauling › Refitting pistons and connecting rods
Engine overhaul: 1.9 TD (AR67501)Refitting pistons and connecting rods
Refitting pistons and connecting rods
- Turn the crankshaft until the connecting rod pins of the 1st and 4th cylinder reach the position corresponding to the B.D.C.
- Assemble the pistons - connecting rods in the sequence illustrated below.
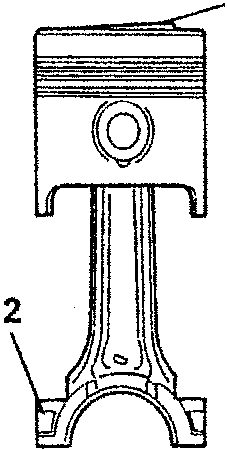
- Protrusion on piston crown
- Number of cylinder to which connecting rod belongs
- House the corresponding half bearings on the connecting rod big ends.
Carefully clean the outer surfaces of the half bearings and their seats.
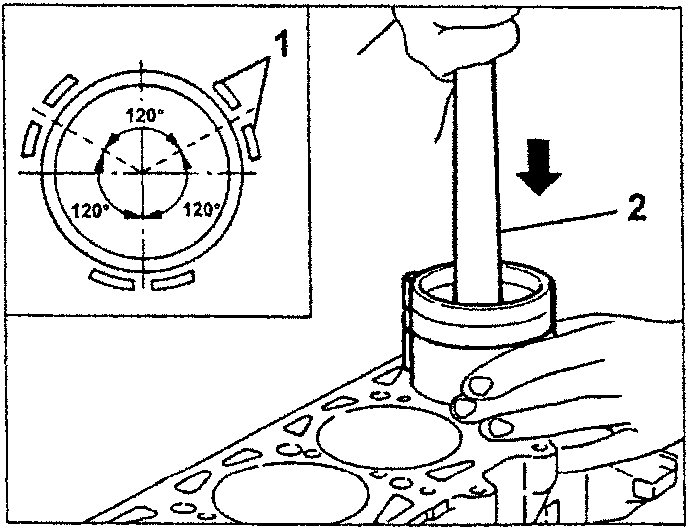
- Place the rings in the pistons with the notches offset by 120°.
- Using a suitable tool, insert the pistons and connecting rods in the 1st and 4th cylinder.
Assemble the connecting rod-piston sets directing the number of the cylinder stamped on the connecting rod small end towards the intake - exhaust side.
- Turn the crankcase 180°.
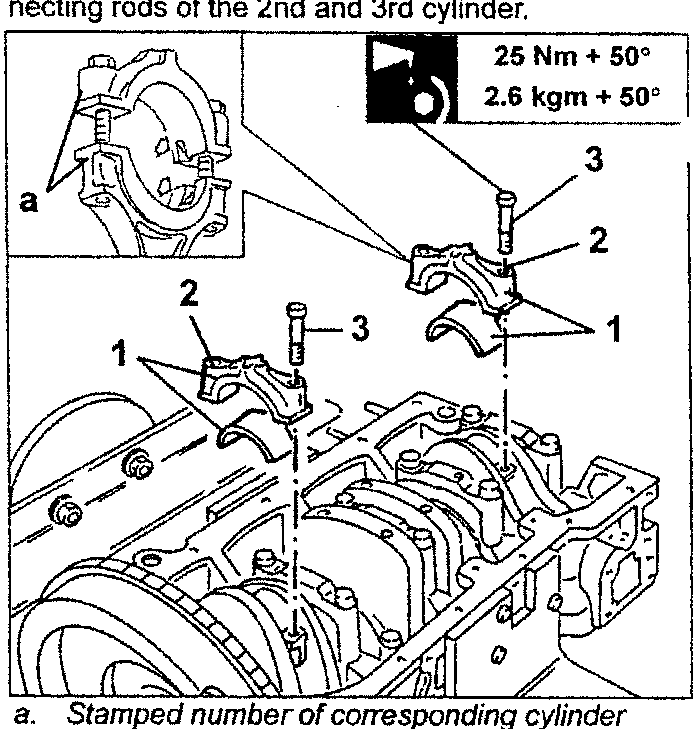
- House the corresponding half bearings on the connecting rod caps.
- Assemble the connecting rod caps of the first and fourth cylinder with the safety notch on the same side as the one on the connecting rod.
On the side, the connecting rod caps have the number of the cylinder to which to which they belong; during reassembly this number should be on the same side as the one stamped on the connecting rod big end.
- Tighten the connecting rod cap fastening screws to the specified torque in oil.
- In the same way reassemble the pistons and connecting rods of the 2nd and 3rd cylinder.
25 Nm + 50°
2.6 kgm + 50°
Cylinder head refitting
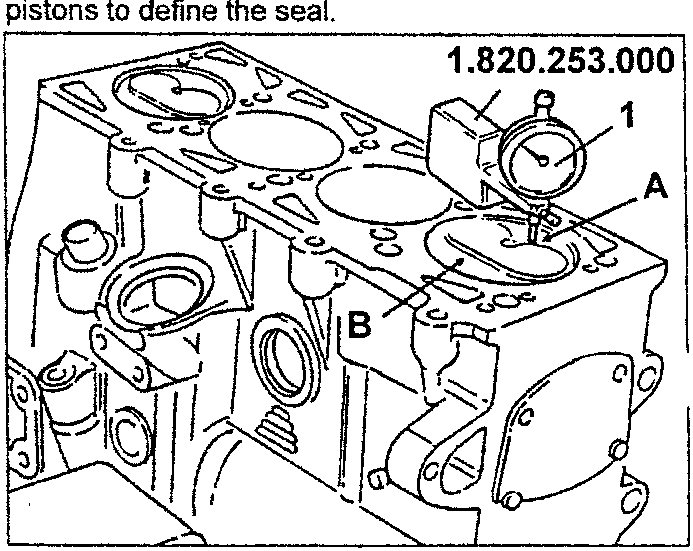
- Using tool no. 1.820.253.000 fitted with dial gauge, find for each cylinder in points A and B the protrusion/recess of the piston; calculate the average of the values and consider the highest average among the pistons to define the seal.
Parts & tools for this job For 1994 Alfa Romeo 145/146
- PARTEngine gasket setSearch: Alfa Romeo 145/146 1994 engine gasket set
- TOOLTorque wrenchSearch: 3/8 inch torque wrench
- TOOLFeeler gauge setSearch: feeler gauge set
Links open Amazon search results in a new tab. As an Amazon Associate I earn from qualifying purchases.