
Crankshaft axial play
- Make
- Alfa Romeo
- Model
- 145/146 Engines, 146 Bodywork and Engine Overhaul Manual
- Year
- 1994–2001
- Section
- Overhauling › Crankshaft axial play
Engine overhaul: 2.0 V6 Turbo (AR16202)Crankshaft axial play
Crankshaft axial play
- Check whether crankshaft axial play falls within prescribed values by means of a centesimal gauge applied with its magnetic base.
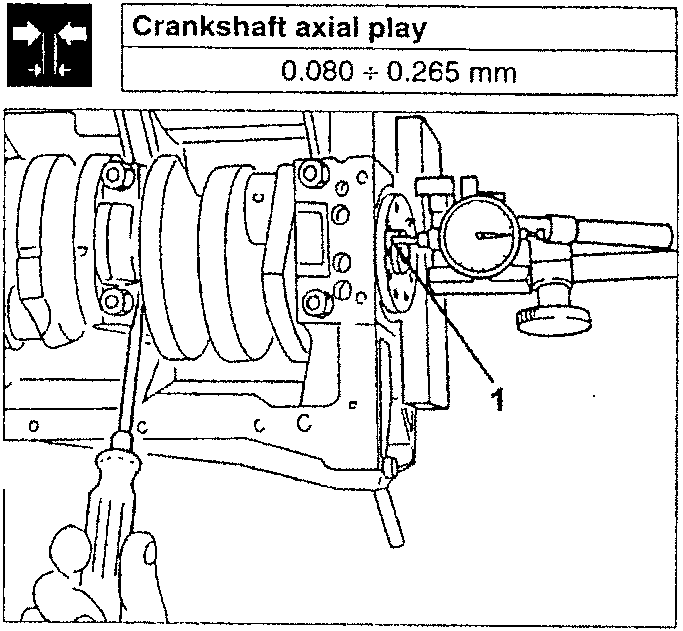
Crankshaft axial play
0.080 ÷ 0.265 mm
Cylinder liner, piston and connecting rod refitting
- Clean the cylinder liners carefully, fit the seals and insert in the crankcase. Make sure they reach the end of the stroke.
- Lock the cylinder liners in the crankcase with the liner retainer tools no. 1.820.279.000 and fasten the respective nuts at the prescribed torque.
- Fit tool no. 1.825.003.000 (C.6.0148) and the reset centesimal gauge on the crankcase. Position one side and then the other so that the feeler is in contact with the cylinder liner edges. Check the rejection falls within the prescribed values.
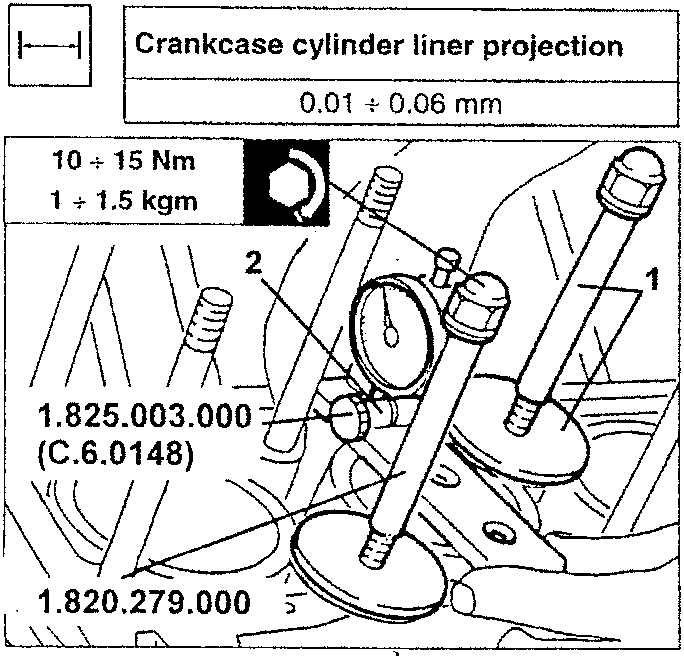
10 ÷ 15 Nm
1 ÷ 1.5 kgm
Crankcase cylinder liner projection
0.01 ÷ 0.06 mm
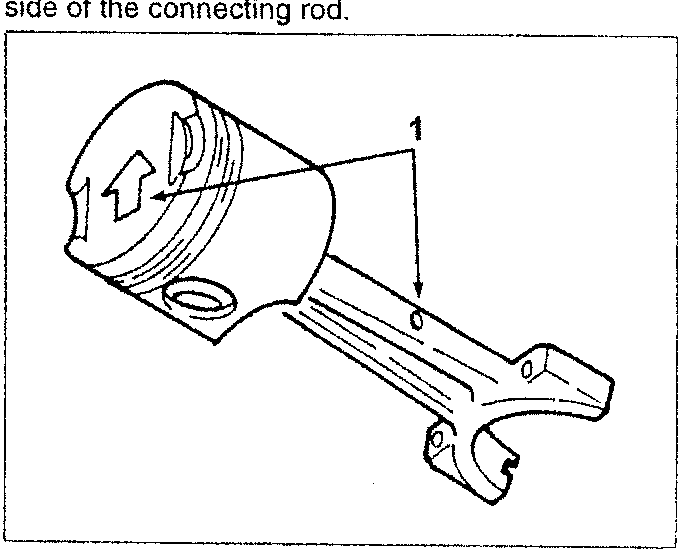
- Couple the pistons and their respective connecting rods. Make sure the arrow printed on the top of the piston is facing the direction shown in the figure with respect to the lubrication hole on the side of the connecting rod.
- Fit the gas rings and the oil scraper on the piston with a suitable tool.
NOTE: After refitting, address the gas ring cuts so that they do not coincide with the journal axis and at 120° one from the other.
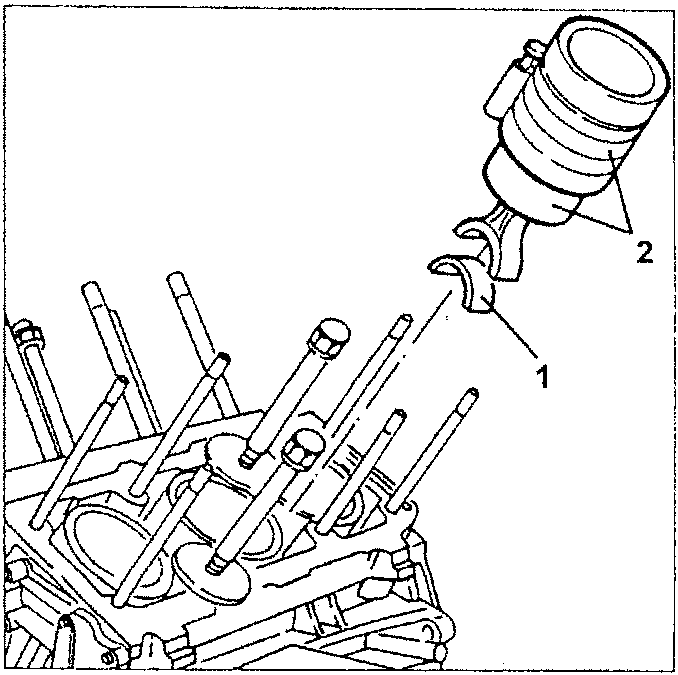
- Fit the respective half-bearings on the connecting rod big end.
- Insert the connecting rod-piston assembly in the bank cylinder liner with a suitable tool.
NOTE: Fit the connecting rod-piston assembly so that the arrow printed on the top of piston is facing the front side of the motor and that the lubrication hole is facing towards the right-hand side of the crankcase.
Parts & tools for this job For 1994 Alfa Romeo 145/146
- PARTEngine gasket setSearch: Alfa Romeo 145/146 1994 engine gasket set
- TOOLTorque wrenchSearch: 3/8 inch torque wrench
- TOOLFeeler gauge setSearch: feeler gauge set
Links open Amazon search results in a new tab. As an Amazon Associate I earn from qualifying purchases.