
Bearing Caps
- Make
- Aston Martin
- Model
- DB9 Factory Workshop Manual
- Year
- Issue 2, 2005
- Section
- Engine Structure › Bearing Caps
03 EngineBearing Caps
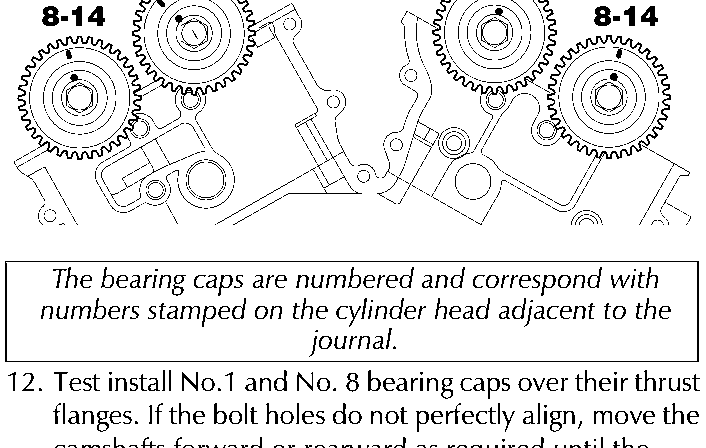
- Place the camshafts in position, with the timing marks in the positions shown.
The positions shown allow the camshafts to lay at their lowest in the journals.
- Work on one cylinder head at a time.
- Install all camshaft bearing caps, except the two thrust camshaft bearing caps (No.1 and No. 8 cap) at the front of each camshaft. Loosely secure each cam cap.
Bearing Caps
The bearing caps are numbered and correspond with numbers stamped on the cylinder head adjacent to the journal.
- Test install No.1 and No. 8 bearing caps over their thrust flanges. If the bolt holes do not perfectly align, move the camshafts forward or rearward as required until the bearing caps locate correctly. Loosely secure the bearing caps.
- Torque down the camshafts.
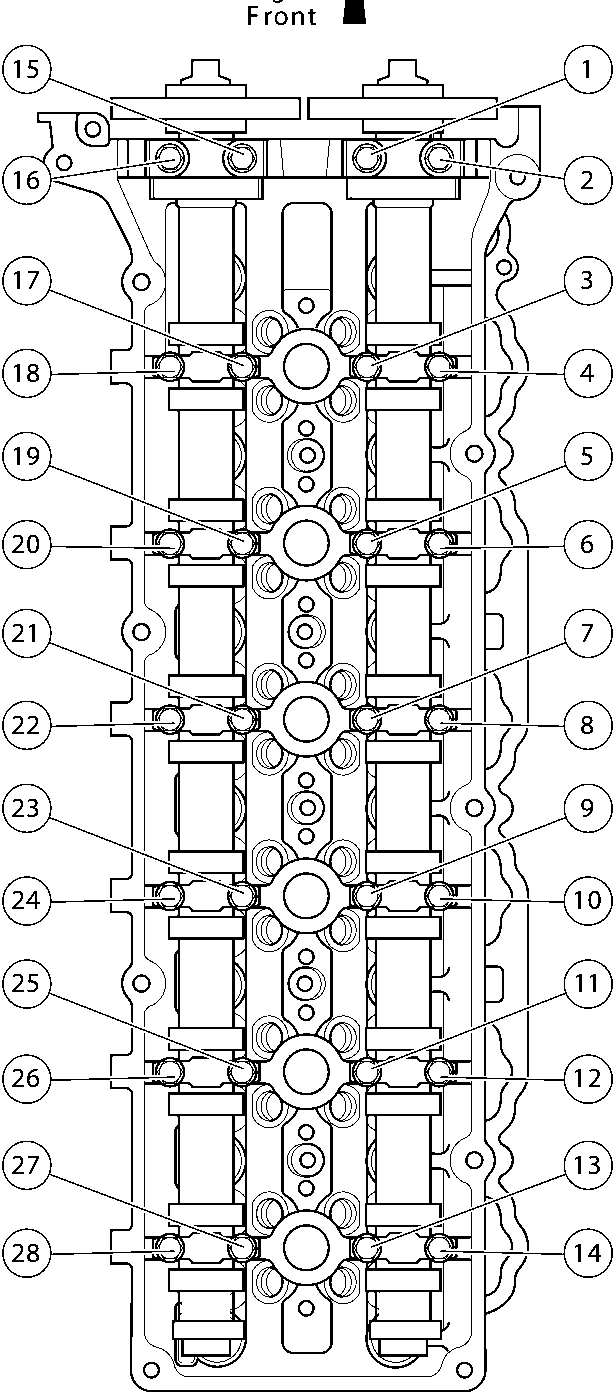
13.1 Progressively ‘nip’ down all bolts in the sequence shown. Ensure the camshaft bearing caps pull down evenly into contact with the cylinder head.
13.2 In the sequence shown, torque the camshaft bearing caps to 8-12 Nm.
- Repeat from step 10. for the second cylinder head.
- Install the timing chains. Perform the camshaft timing procedure
- (Refer to ‘Valve Train (03.09)’, page 3-10-1).
- Install the timing cover (Refer to ‘Timing Cover’, page 3-11-3).
Parts & tools for this job For 2005 Aston Martin DB9
- PARTEngine gasket setSearch: Aston Martin DB9 2005 engine gasket set
- TOOLTorque wrenchSearch: 3/8 inch torque wrench
- TOOLFeeler gauge setSearch: feeler gauge set
Links open Amazon search results in a new tab. As an Amazon Associate I earn from qualifying purchases.