
Manual Transmission: Specifications (page 2 of 4)
- Make
- Aston Martin
- Model
- V8 Vantage Factory Workshop Manual
- Year
- 2005–2010
- Section
- Manual Transmission
07 TransmissionSpecifications · page 2 of 4
- Remove the four bolts that attach the cross-brace to the rear subframe.
- Remove the cross brace.
- Remove the four bolts that attach the exhaust centre pipe to the rear silencer.
- Loosen the two clamps that attach the exhaust centre pipe to the catalytic converters.
- Move the clamps along the exhaust pipes.
- Remove the four bolts that attach the exhaust centre pipe to the exhaust front mount.
- Remove the exhaust centre pipe.
- Remove the exhaust front mount.
- Remove the four bolts that attach the floor heat shield to the body.
- Remove the floor heatshield.
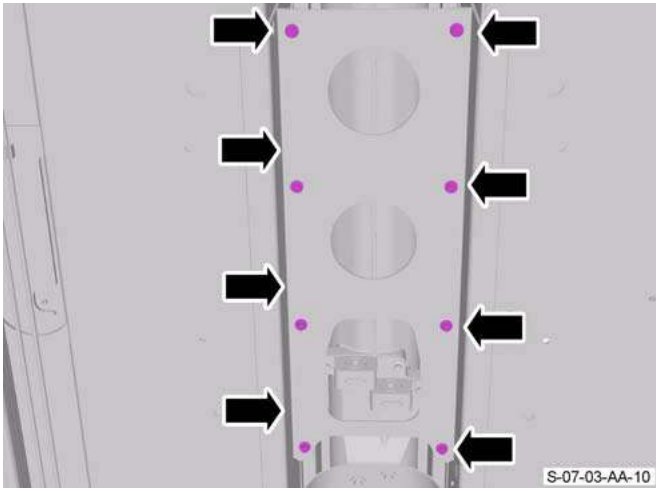
- Remove the eight screws that attach the tunnel reinforcement plate to the body.
- Remove the tunnel reinforcement plate.
- Remove the nut that attaches the ground cable to the body.
- Move the ground cable away.
- Put marks on the driveshaft to transaxle flanges to help align during installation.
- Remove and discard the six bolts that attach the right side driveshaft to the transaxle. Collect and keep the bolt plates.
- Remove and discard the six bolts that attach the left side driveshaft to the transaxle. Collect and keep the bolt plates.
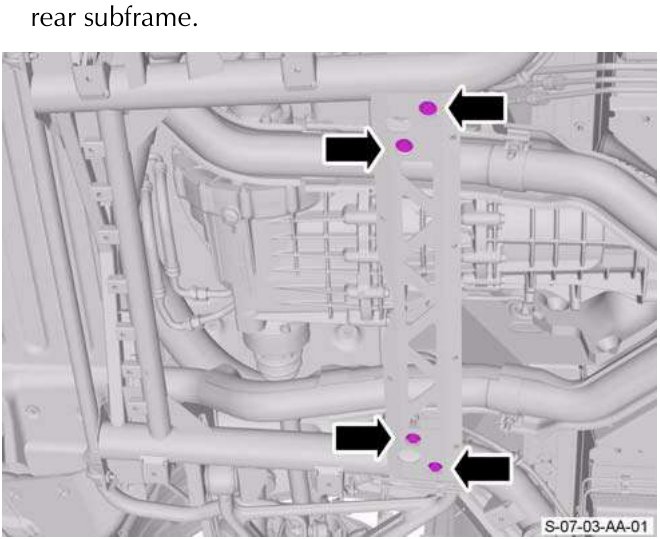
GET THE AID OF ONE MORE PERSON WHEN YOU REMOVE THE EXHAUST CENTRE PIPE. THE CENTRE EXHAUST PIPE IS HEAVY
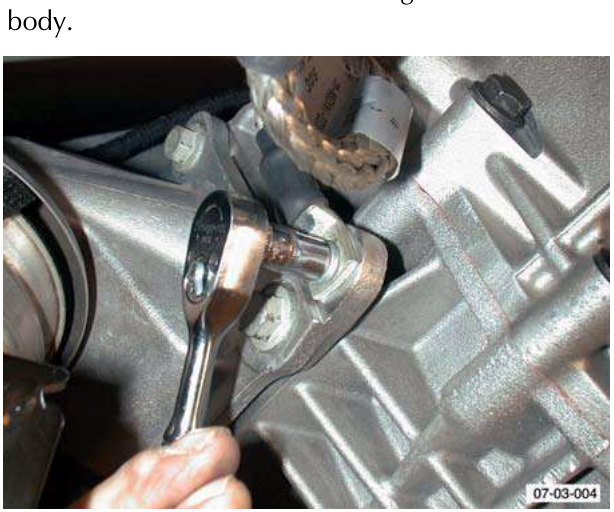
If necessary, turn the driveshaft to get access to the six bolts.
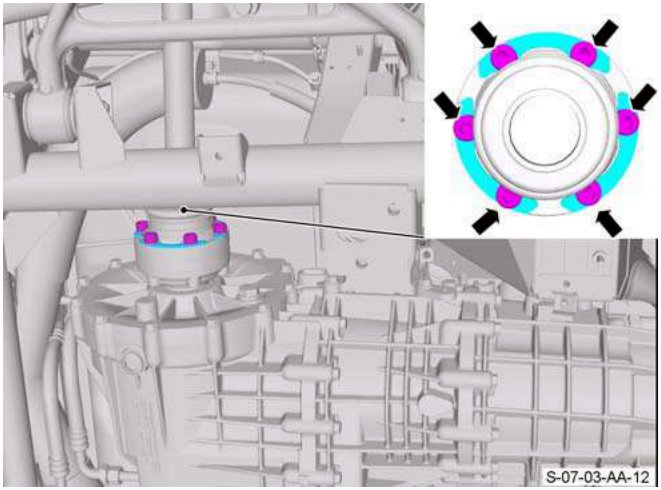
If necessary, turn the driveshaft to get access to the six bolts.
Parts & tools for this job For 2005 Aston Martin V8 Vantage
- PARTClutch kitSearch: Aston Martin V8 Vantage 2005 clutch kit
- TOOLClutch alignment toolSearch: clutch alignment tool
- FLUIDGear oilSearch: Aston Martin V8 Vantage manual gearbox oil
Links open Amazon search results in a new tab. As an Amazon Associate I earn from qualifying purchases.