
Introduction
- Make
- Fiat
- Model
- Seicento Factory Service Manual
- Year
- 1998–2010
- Section
- Introduction › Introduction
INTRODUCTION
SHORT CIRCUIT CHECK with ohmmeter
First of all disconnect the power from the component being tested. Prepare the ohmmeter and set it to read "0 Ohm" with the two tips touching. Remove the fuse (which should have triggered)of the circuit involved and disconnect the load .
Connect one tip to the fuse terminal nearest to the load and the other to earth(for example to the battery earth).
If the ohmmeter indicates a resistance of "0 Ohm" or a very low value, part of the circuit will be short circuited to earth(wire uncovered, worn, crimped, etc..). If instead the resistance read is very high (according to the full scale value), i.e. infinite, in that section the circuit is undamaged; the part involved can be easily localized by moving the wiring to find in which positions the resistance value has not a high cos².
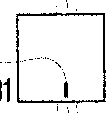
| Ref. | Description |
|---|---|
| 1 | Disconnected power supply |
| 2 | Short circuit |
| 3 | Disconnected load |
Voltmeter measurement is more accurate, and is therefore to be preferred where there is a choice.
CURRENT MEASUREMENT
To measure current absorption use an ammeter clamp, proceeding as follows:
- insert the conductor to be measured in the clamp, connected to the voltmeter (mV);
- make sure that the current flow(from positive to earth) is the same as indicated on the clamp;
- read a value in mV that coincides with the current value in A.
Parts & tools for this job For 1998 Fiat Seicento
- TOOLDigital multimeterSearch: automotive digital multimeter
- PARTAssorted fuse kitSearch: car fuse assortment kit
- TOOLWire crimper and connector kitSearch: wire crimper connector kit
Links open Amazon search results in a new tab. As an Amazon Associate I earn from qualifying purchases.