
Radius arm
- Make
- Land Rover
- Model
- Defender 90 Workshop Manual (NAS)
- Section
- Repair › Radius arm
Front suspensionRadius arm
RADIUS ARM
Service repair no - 60.10.16
Remove
- Raise front of vehicle.
WARNING: Support on safety stands.
- Remove road wheel(s).
- Raise front of vehicle and support axle.
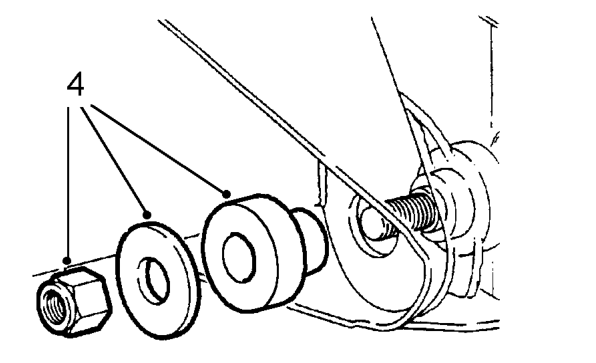
- Lower front of radius arm to clear axle and
Do not carry out further dismantling if component
- Remove nut securing radius arm to chassis side
is removed for access only.
member and collect washer and rubber bush.
- Press out bushes from radius arm.
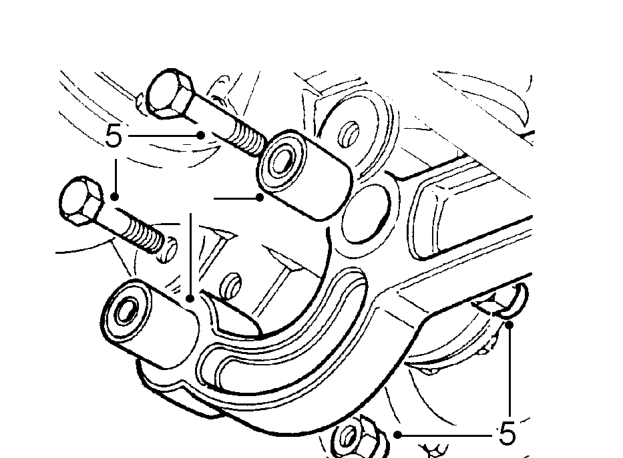
- Press in replacement bushes.
Refit
- Position radius arm to vehicle.
- Loosely fit bolts securing radius arm to axle.
- Connect track rod to swivel hub.
- Fit and tighten castellated nut securing track rod
- Fit new split [cotter] pin to castellated nut.
- Tighten nuts securing radius arm to axle to
- Remove 2 bolts securing radius arm to axle and 19. Fit rubber bush and washer to radius arm. collect nuts. 20. Fit and tighten nut securing radius arm to
- Remove jack from under axle.
- Fit road wheel.
- Remove stand(s) and lower vehicle.
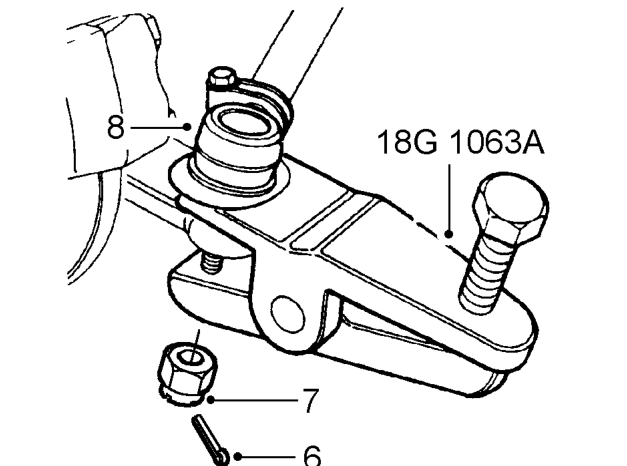
- Remove split [cotter] pin from castellated nut securing track rod to swivel hub.
- Remove castellated nut securing track rod to swivel hub.
- Using special tool LRT-57-018release track rod from swivel hub.
- Move track rod aside.
remove from vehicle.
- CAUTION: Ensure pressure is exerted on
- outer edge of bushes, and not rubber
- inner.
to swivel hub to 40 Nm, 30 lbf ft.
197 Nm, 145 lbf ft.
chassis member to 175 Nm, 130 lbf ft.
Parts & tools for this job For Land Rover Defender
- TOOLCoil spring compressorSearch: coil spring compressor
- TOOLBall joint separatorSearch: ball joint separator
- PARTFront shock absorbersSearch: Land Rover Defender front shock absorbers
Links open Amazon search results in a new tab. As an Amazon Associate I earn from qualifying purchases.