
Cooler - engine oil (page 2 of 2)
- Make
- Land Rover
- Model
- Discovery II
- Section
- REPAIRS
ENGINE - V8
12-2-40 REPAIRS
6. Remove 2 bolts securing radiator LH and RH
upper mounting brackets to body panel and
remove brackets.
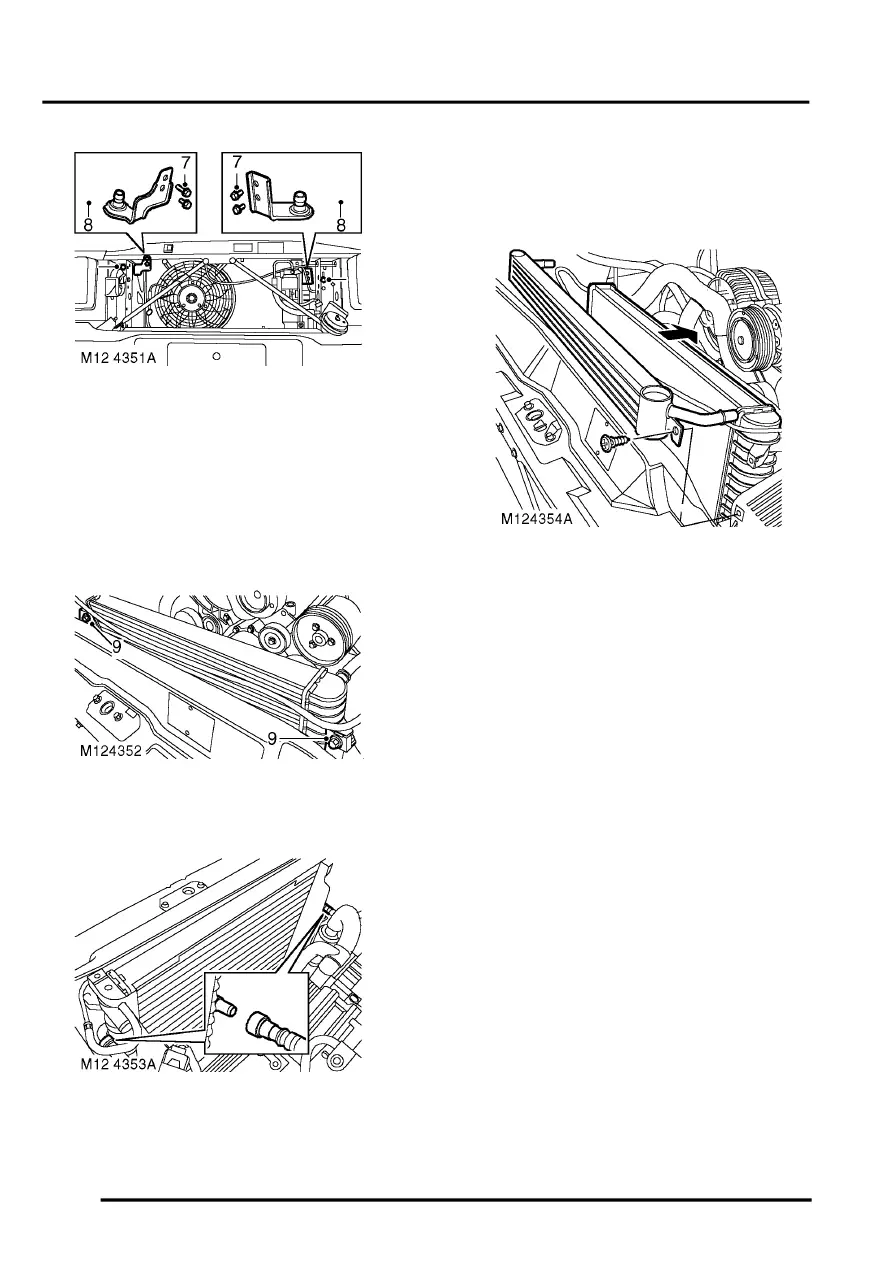
7. Remove 4 screws securing air conditioning
condenser LH and RH upper mounting
brackets to condenser.
8. Remove condenser upper mounting brackets
with rubber mounts from radiator extension
brackets.
9. Remove 2 bolts securing LH and RH extension
brackets to radiator and remove brackets.
10. Position absorbent cloth under each oil cooler
hose connection to collect oil spillage.
11. Push against coupling release rings and
disconnect both hoses from oil cooler.
CAUTION: Always fit plugs to open
connections to prevent contamination.
12. Remove screw securing oil cooler to radiator.
13. Release cooler from its location on radiator.
14. Release radiator lower mountings from
location in chassis and carefully move radiator
towards engine sufficiently only to release
engine oil cooler from radiator.
15. Remove engine oil cooler.
Refit
1. Fit engine oil cooler to radiator, engage in
location and secure with screw.
2. Fit radiator to location in chassis.
3. Ensure connections are clean, then secure
hoses to oil cooler.
4. Fit extension brackets to radiator and secure
with bolts.
5. Fit brackets with rubber mounts to extension
brackets and secure to air conditioning
condenser with screws.
6. Fit radiator upper mounting brackets and
secure to body with bolts.
7. Fit LH horn and secure with nut.
8. Fit LH and RH air deflectors to front panel and
secure with scrivets.
9. Fit front grille.
10. Fit cooling fan cowl and secure with fixings.
11. Fit battery cover and secure with fixings.
12. Top up engine oil.
Parts & tools for this job For Land Rover Discovery
- PARTEngine gasket setSearch: Land Rover Discovery engine gasket set
- TOOLTorque wrenchSearch: 3/8 inch torque wrench
- TOOLFeeler gauge setSearch: feeler gauge set
Links open Amazon search results in a new tab. As an Amazon Associate I earn from qualifying purchases.