
Clutch assembly and release bearing - ’l’ series
- Make
- Land Rover
- Model
- Freelander Workshop Manual
- Year
- 1998–2000
- Section
- Repairs › Clutch assembly and release bearing - ’l’ series
ClutchClutch assembly and release bearing - ’l’ series · page 1 of 3
- Fit pressure plate bolts finger tight.
- Working in diagonal sequence, progressively tighten pressure plate bolts to 25 Nm.
NOTE: During the above procedure, ensure diaphragm fingers do not crimp service tool. When a slight drag is felt between fingers and tool, remove tool.
- Fit gearbox. See MANUAL GEARBOX, Repairs.
CLUTCH ASSEMBLY AND RELEASE BEARING - ’L’ SERIES
Service repair no - 33.10.01
Remove
- Remove gearbox assembly. See MANUAL GEARBOX - ’PG1’, Repairs.
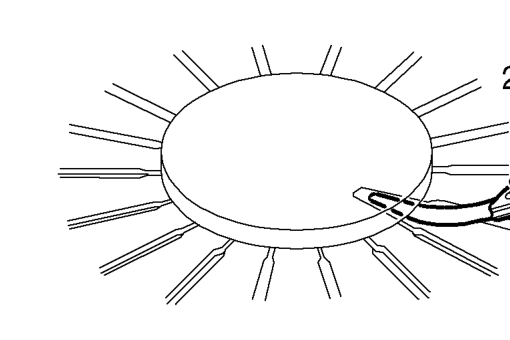
- Place a circular piece of flat plate across diaphragm fingers and insert feeler gauges between plate and fingers.
Diaphragm finger clearance limit = 1.0 mm
- Measure diaphragm finger height above bolted surface of pressure plate.
Diaphragm finger height: new clutch plate = 29.1 - 32.0 mm service limit = 36.5 mm
Renew pressure plate if clearances are outside service limit.
- Using a socket and extension bar on crankshaft pulley bolt, rotate crankshaft until locking pin LRT-12-058 can be inserted through hole in gearbox mounting plate and into hole in flywheel.
Parts & tools for this job For 1998 Land Rover Freelander
- PARTClutch kitSearch: Land Rover Freelander 1998 clutch kit
- TOOLClutch alignment toolSearch: clutch alignment tool
- FLUIDGear oilSearch: Land Rover Freelander manual gearbox oil
Links open Amazon search results in a new tab. As an Amazon Associate I earn from qualifying purchases.