
Clutch assembly and release bearing - ’l’ series (page 3 of 3)
- Make
- Land Rover
- Model
- Freelander Workshop Manual
- Year
- 1998–2000
- Section
- Repairs
ClutchClutch assembly and release bearing - ’l’ series · page 3 of 3
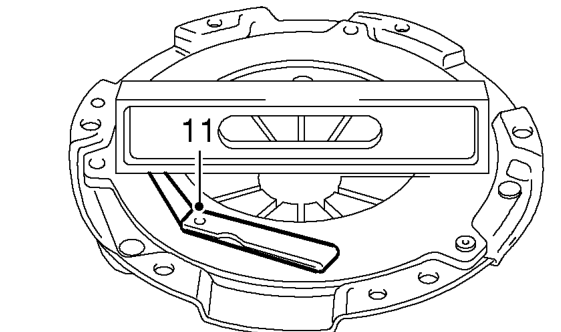
- Using a straight edge and feeler gauges check the surface of the pressure plate for flatness at 4 separate points. Renew pressure plate if warping exceeds service limit.
Pressure plate warping: service limit = 0.18 mm maximum
Refit
- Clean pressure plate and flywheel, dowels and dowel holes.
- Inspect flywheel for signs of scoring or other damage. Renew if worn or damaged.
- Smear clutch drive plate splines with Molybdenum disulphide grease.
- Position drive plate to flywheel with ’FLYWHEEL SIDE’ marking towards flywheel.
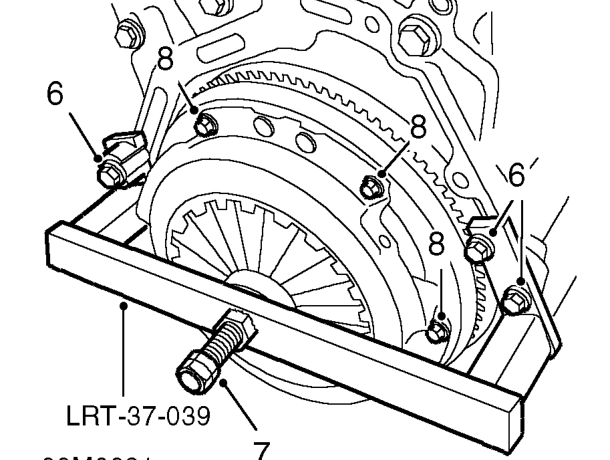
- Fit pressure plate to flywheel and fit but do not tighten bolts.
- Fit alignment tool LRT-37-039 to clutch and secure to engine adaptor plate with 3 bolts.
- Tighten centre screw on alignment tool until clutch is fully depressed.
- Working in a diagonal sequence, progressively tighten clutch pressure plate bolts to 26 Nm.
- Remove bolts and tool LRT-37-039.
- Remove locking pin LRT-12-058.
- Clean clutch release fork and release bearing guide sleeve.
- Smear release fork shaft and release bearing guide with Molybdenum disulphide grease.
- Operate release lever to ensure that release bearing is correctly located on release fork and slides smoothly on guide sleeve.
- Fit gearbox assembly. See MANUAL GEARBOX - ’PG1’, Repairs.
Parts & tools for this job For 1998 Land Rover Freelander
- PARTClutch kitSearch: Land Rover Freelander 1998 clutch kit
- TOOLClutch alignment toolSearch: clutch alignment tool
- FLUIDGear oilSearch: Land Rover Freelander manual gearbox oil
Links open Amazon search results in a new tab. As an Amazon Associate I earn from qualifying purchases.